
Forums > Sailing > > General
Rigger lake macquarie.

NSW, 187 posts
NSW, 1530 posts
Phillips Sails do rigging as well as sails. Very easy to deal with. www.phillipssails.com.au/rigging.php

NSW, 1220 posts

NSW, 671 posts
What are you trying to do with the mast? If you are moderately handy you may be able to do all the work yourself. Personally I don't like to call Patrick down to the boat because it costs a heap of money. I go up my own rig, measure the stays, rig a tight halyard, drop one of each (apart from a forestay) and take them to him and Bob (who Patrick worked for) would swage them up. Cost about half price that way. A seized sheave will be a bit of a bugger to remove but a hammer, kerosene, oil and a drift should do it. As well as saving money, I think it is safer to know as much about your boat as possible and how it is put together. If you are going to drop the mast I would recommend you go over the whole thing, and not just the masthead sheave. Run new wiring if needed, install a better LED nav/anchor light, check the VHF coax and aerial, spreader bases, and all tangs. Masts are nice jobs because they don't take too much time. I haven't dropped mine for about 19 years. Even though all is pretty good, it would be nice to pull it out and have a really nice look over the whole thing. I would like a new tang for a slutter attachment too.
Select to expand quote Kankama said.. What are you trying to do with the mast? If you are moderately handy you may be able to do all the work yourself. Personally I don't like to call Patrick down to the boat because it costs a heap of money. I go up my own rig, measure the stays, rig a tight halyard, drop one of each (apart from a forestay) and take them to him and Bob (who Patrick worked for) would swage them up. Cost about half price that way. A seized sheave will be a bit of a bugger to remove but a hammer, kerosene, oil and a drift should do it. As well as saving money, I think it is safer to know as much about your boat as possible and how it is put together. If you are going to drop the mast I would recommend you go over the whole thing, and not just the masthead sheave. Run new wiring if needed, install a better LED nav/anchor light, check the VHF coax and aerial, spreader bases, and all tangs. Masts are nice jobs because they don't take too much time. I haven't dropped mine for about 19 years. Even though all is pretty good, it would be nice to pull it out and have a really nice look over the whole thing. I would like a new tang for a slutter attachment too. Thanks Kankama, I have been up the mast a couple of times now to try and figure out what the issue is but haven't had much luck. I am using the opportunity to replace all the lights (and associated wiring) along with installing a masthead VHF antenna and replacing the Windex (found the old one on the deck one day). So the opportunity will not be wasted. I gave up on waiting for Patrick calling me back and found an alternative. Hopefully all will be happening in about 3 weeks.
PacificStar

NSW, 53 posts
"rigger lake macquarie" started by mattm14, send message.
Copyright © 1997-2024 Seabreeze.com.au - All Rights Reserved.
Newcastle Yacht Rigging and Sails
Contact and address.
| Address: | Newcastle Yacht Rigging and Sails, Marina, 1, Nanda St, Marmong Point NSW 2284, Australia |
|---|---|
| Postal code: | 2284 |
| Phone: | 0410 043 056 |
| Website: |
Opening Hours:
| Monday: | 8:00 AM – 4:00 PM |
|---|---|
| Tuesday: | 8:00 AM – 4:00 PM |
| Wednesday: | 8:00 AM – 4:00 PM |
| Thursday: | 8:00 AM – 4:00 PM |
| Friday: | 8:00 AM – 4:00 PM |
| Saturday: | Closed |
| Sunday: | Closed |
Location & routing
There are no reviews yet! You can review this Business and help others by leaving a comment. If you want to share your thoughts about Newcastle Yacht Rigging and Sails, use the form below and your opinion, advice or comment will appear in this space.
Photos of Newcastle Yacht Rigging and Sails

Newcastle Yacht Rigging and Sails On the Web
Newcastle yacht rigging and sails - sailmaker & yacht rigger based at ....
Get Quote Call 0410 043 056 Get directions WhatsApp 0410 043 056 Message 0410 043 056 Contact Us Find Table Make Appointment Place Order View Menu. Updates. Posted on May 9, 2020. ... Newcastle Yacht Rigging and Sails . Marina, 1. Nanda Street. Marmong Point NSW 2284. Australia. Business Hours. Mon: 8:00 AM - 4:00 PM: Tue: 8:00 AM - 4:00 PM ...
Newcastle Yacht Rigging and Sails - Newcastle Yacht Rigging and Sails ...
Newcastle Yacht Rigging and Sails is located in City of Lake Macquarie of New South Wales state. On the street of Nanda Street To communicate or ask something with the place, the Phone number is 0410 043 056 .
Boat and Marine services Survey Slipping Repairs Insurance Finance ...
Newcastle Yacht Rigging and Sails 477 Lake Road Argenton, NSW 2284 Mobile: 0410 043 056 Web: newcastleyachtriggingandsails.com. MOORINGS. A mooring refers to any permanent structure to which a vessel may be secured. Examples include quays, wharfs, jetties, piers, anchor buoys, and mooring buoys. A ship is secured to a mooring to forestall free ...
Most Recent
- Sage Pilates Brunswick West [Gym]
- Tile Power Gregory Hills [Home goods store]
- My Goodness - Melbourne [Food]
- LouvreElite [General contractor]
- Esteem Constructions - Sydney's Home Renovation [Home goods store]
- Wahroonga Family Dental Centre [Dentist]
- My Goodness - Southbank [Restaurant]
- Southern Smiles - Dentist Miranda [Dentist]
- EBS Entrance Solutions [Subpremise]
- Covesmore Solutions Upholstery [Furniture store]
Today most viewed
- Dog Trap Creek Memorial
- Clinipath Pathology
- AIA: Melbourne Secondary Campus
- Rubyvet Surgery
- Nome Services
- Heath Spokes Engineering
- SSAA Warwick
- Nelson Bay Tyres
- Edanbrook Consultancy Services
- Esteem Constructions - Sydney's Home Renovation
Home page . + Add listing . About . Privacy Policy . Terms of Service . Contact Us .
© 2024 Australia247.info All Rights reserved.
- Boat Rigging: Setting Sail for Success
In the world of sailing, boat rigging plays a crucial role in ensuring the safety, efficiency, and performance of your vessel. From standing rigging to sail rigging types, it's essential to understand the intricacies of rigging a yacht to embark on smooth sailing adventures. In this comprehensive guide, we'll dive into the nuances of boat rigging, helping you navigate the open waters with confidence.
Boat Rigging Basics
Before we delve into the details, let's start with the fundamentals of boat rigging. Understanding the key components and their functions is essential for any sailor, whether you're a novice or a seasoned pro.
Standing Rigging
Standing rigging refers to the fixed support structure of a boat's mast, including wires, cables, and rods. It plays a critical role in maintaining the mast's vertical position and overall stability.
Sail Rigging Types
Sail rigging is not a one-size-fits-all concept, but rather a diverse world with various types and configurations to suit different sailing needs. Understanding these rigging types is essential for any sailor looking to optimize their boat's performance and safety.
Ship Riggings
Ship riggings have played a pivotal role in shaping the history of seafaring and maritime exploration. These complex systems of ropes, wires, and sails have been integral to the functionality and success of various vessels throughout the ages.Explore the significance of ship riggings, their evolution, and their influence on modern-day boat rigging.
Read more useful sailing tips:
Materials matter.
The choice of materials for your boat rigging is a decision that can't be taken lightly. Two popular options, Dyneema and Kevlar, offer distinct advantages.
Dyneema Rigging
Dyneema rigging represents a breakthrough in the world of sailboat rigging. This cutting-edge material, known for its remarkable strength and low stretch properties, has revolutionized the way sailors experience the open water. Often referred to as the ultimate innovation in the world of sailing, Dyneema rigging offers a myriad of advantages:
- Exceptional Strength: Dyneema rigging boasts remarkable strength-to-weight ratio, making it incredibly robust and reliable even in demanding conditions.
- Low Stretch: Dyneema has minimal stretch, which translates to improved sail control and responsiveness, ensuring better performance.
- Lightweight: It's significantly lighter than traditional rigging materials like steel, reducing the overall weight of your vessel and enhancing speed and maneuverability.
- Low Maintenance: Dyneema rigging requires minimal maintenance, offering sailors peace of mind and more time on the water.
- Resistance to Corrosion: Unlike metal rigging, Dyneema is not susceptible to corrosion, ensuring a longer lifespan and durability.
- UV Resistance: Dyneema is highly resistant to UV rays, making it ideal for prolonged exposure to sunlight.
- Easy Handling: Its flexibility and ease of handling simplify rigging installation and adjustments.
- Enhanced Safety: Dyneema's strength and reliability contribute to safer sailing experiences, reducing the risk of rigging failure.
- Versatility: It's suitable for a wide range of applications, from standing rigging to halyards, making it a versatile choice for sailors.
- Eco-Friendly: Dyneema is an environmentally friendly option as it doesn't release harmful substances into the water, contributing to a cleaner marine ecosystem.
Dyneema vs. Kevlar
Weigh the pros and cons of Dyneema and Kevlar to determine which suits your sailing needs best:
Dyneema Rigging:
- Exceptional Strength: Dyneema boasts impressive strength, making it highly reliable for rigging purposes.
- Low Stretch: It has minimal stretch, enhancing sail control and overall performance.
- Lightweight: Dyneema is significantly lighter than traditional materials, reducing the vessel's weight.
- Low Maintenance: Requires minimal upkeep, saving time and effort.
- Corrosion Resistance: Dyneema is not susceptible to corrosion, ensuring durability.
- UV Resistance: It's highly resistant to UV rays, making it suitable for extended exposure to sunlight.
- Safety: Dyneema's strength and reliability contribute to safer sailing experiences.
- Versatility: Suitable for various rigging applications, from standing rigging to halyards.
- Cost: Dyneema can be more expensive than some traditional materials, initially.
- Abrasion Resistance: It may be less resistant to abrasion compared to Kevlar.
Kevlar Rigging:
- Excellent Abrasion Resistance: Kevlar is highly resistant to wear and tear, ensuring longevity.
- High Tensile Strength: It offers impressive tensile strength, making it suitable for demanding applications.
- Stiffness: Kevlar is stiffer than Dyneema, which can be advantageous for some rigging configurations.
- Heavy: Kevlar is heavier than Dyneema, potentially impacting vessel performance.
- Low UV Resistance: It is less resistant to UV radiation, which can affect its durability over time.
- Higher Stretch: Kevlar tends to stretch more than Dyneema, which can impact sail control.
- Prone to Corrosion: Unlike Dyneema, Kevlar can be susceptible to corrosion.
- Cost: It can be expensive, and the initial investment may be higher than other materials.
Choosing between Dyneema and Kevlar depends on your specific sailing needs and priorities. Dyneema is favored for its strength, low stretch, and light weight, while Kevlar excels in abrasion resistance and tensile strength. Consider these factors when making your rigging material selection.
Stainless Steel Yacht Rigging
When it comes to yacht rigging, durability is paramount, and stainless steel rigging wires stand out as a top choice. Their robust nature, coupled with an unmistakable touch of elegance, makes them an ideal option for discerning sailors. Stainless steel yacht rigging is highly resistant to corrosion, even in the harsh marine environment. This resistance not only ensures a longer lifespan but also reduces maintenance efforts, allowing you to spend more time on the water. Additionally, the sleek appearance of stainless steel adds a touch of sophistication to your vessel. Whether you're cruising the open seas or participating in regattas, stainless steel yacht rigging combines style and substance to offer a premium sailing experience.
Spectra Standing Rigging
Spectra standing rigging is a game-changer for sailors seeking top-tier performance and durability. This advanced material, known for its incredible strength and low stretch properties, has revolutionized the way we approach standing rigging. Spectra rigging offers advantages that are hard to beat – it enhances the stability and safety of your vessel while providing exceptional responsiveness. The minimal stretch ensures precise sail control, making it the go-to choice for those who demand the utmost from their rigging. If you're looking to take your sailing experience to the next level, Spectra standing rigging is a choice that can't be ignored.
Read our top notch articles on topics such as sailing, sailing tips and destinations in our Magazine.
Rigging a Yacht: A Step-By-Step Guide
Now that you've grasped the basics and material options, let's dive into the practical aspect of rigging a yacht. Follow these steps to ensure a smooth and safe sailing experience.
Planning and Preparation
Rigging a yacht is a meticulous process that requires careful planning and thorough preparation. Before embarking on your sailing adventure, it's crucial to ensure that every aspect of your yacht's rigging is in top-notch condition. The advantages of this step-by-step guide are manifold. It guarantees the safety of both the vessel and its passengers, reduces the risk of mid-sail complications, and ultimately enhances your overall sailing experience. By meticulously inspecting your rigging and addressing any issues during the planning and preparation phase, you can set sail with confidence, knowing that your yacht is ready to navigate the open waters seamlessly.
Inspecting Your Rigging
Rigging a yacht is a meticulous process that demands careful attention to detail. One crucial aspect is inspecting your rigging. This step ensures the safety and efficiency of your sailing adventure. Regular inspections , even before you set sail, can identify potential issues and help prevent mishaps on the water . Inspecting your rigging is not only a safety measure but also a way to guarantee that your yacht performs at its best, allowing you to enjoy smooth and stress-free sailing experiences.
Rigging Replacement
When it comes to maintaining your yacht's rigging, the necessity of rigging replacement cannot be overstated. Whether due to wear and tear or a desire to upgrade to modern materials, knowing when and how to replace your rigging is crucial.
Specialized Rigs for Small Sailboats
For small sailboat enthusiasts , specialized rigs can enhance your sailing experience. Explore the options available for these nimble vessels.
Ship Rigging Terms
Sailboat rigging comes with its unique terminology. Get acquainted with the essential terms:
- Mast: The vertical spar or structure that supports sails and rigging.
- Boom: A horizontal spar that extends from the mast to support the bottom of a sail.
- Shroud: Rigging wires that support the mast from the sides.
- Stay: Rigging wires that support the mast from the front or back.
- Halyard: Lines used to raise and lower sails.
- Sheet: Lines used to control the angle of the sails with respect to the wind.
- Jib: A triangular foresail set in front of the mast.
- Tack: The lower forward corner of a sail.
- Clew: The lower after corner of a sail.
- Topping Lift: A line that supports the boom when the sail is not in use.
Understanding these ship rigging terms is essential for efficient and safe sailing, allowing you to communicate effectively with your crew and navigate the open waters with confidence.
Sailboat Stays and Shrouds
Sailboat rigging comprises various components, and among the most critical are sailboat stays and shrouds. Stays are the fixed support cables or wires that keep the mast upright, while shrouds add lateral support, preventing the mast from swaying. These components work together to maintain the mast's stability and ensure safe and efficient sailing. The proper tension and alignment of stays and shrouds are crucial for the overall performance and safety of a sailboat. Regular inspections and maintenance of these rigging elements are essential to prevent wear and tear, making sure they remain reliable on your sailing adventures. Understanding the role of sailboat stays and shrouds is fundamental for any sailor, whether you're navigating coastal waters or crossing the open sea.
In conclusion, boat rigging is a multifaceted subject that greatly influences your sailing experience. Understanding the fundamentals, material choices, and the process of rigging a yacht is essential for a successful voyage.
So what are you waiting for? Take a look at our range of charter boats and head to some of our favourite sailing destinations .

East Coast Marine & Sail
Situated right in the heart of Newcastle & Lake Macquarie's lively yachting scene, East Coast Marine & Sail is the place to head for all your trimming and sailmaking needs.
As the sole agent for North Sails in Newcastle, you are assured of the same expert knowledge and advice characteristic of the North Sails brand the world over. Sailmaking is not the only reason to visit East Coast Marine & Sail, our quality covers, clears and marine trimming services are second to none.
So if you're in need of sails, fittings or covers, we invite you to come in and check out the range at the most comprehensive sailing shop in town, East Coast Marine & Sail.
Our Services

As a sailor, you are bound to appreciate the value of a good sailmaker and there are none better on the planet than North Sails.
Being the North Sails agent in Newcastle brings with it all the experience and after sales service you've come to expect of North Sails.
East Coast Marine & Sail offers top-notch marine trimming services that cater to all your boat's needs.
From repairing damaged upholstery to creating custom covers and clears, our team of professionals has the skills and expertise to ensure that boat looks and performs its best.
Our team of experts is dedicated to providing you with top-notch rigging solutions that will ensure your vessel is always in top condition. From inspections and repairs to complete rigging installations, we've got you covered. Trust to keep your yacht or skiff sailing smoothly and safely. Contact us today to learn more about our services!

32A Cherry Road,
Eleebana, NSW, 2282
(02) 49611663
Thanks for submitting!
The global authority in superyachting
- NEWSLETTERS
- Yachts Home
- The Superyacht Directory
- Yacht Reports
- Brokerage News
- The largest yachts in the world
- The Register
- Yacht Advice
- Yacht Design
- 12m to 24m yachts
- Monaco Yacht Show
- Builder Directory
- Designer Directory
- Interior Design Directory
- Naval Architect Directory
- Yachts for sale home
- Motor yachts
- Sailing yachts
- Explorer yachts
- Classic yachts
- Sale Broker Directory
- Charter Home
- Yachts for Charter
- Charter Destinations
- Charter Broker Directory
- Destinations Home
- Mediterranean
- South Pacific
- Rest of the World
- Boat Life Home
- Owners' Experiences
- Conservation and Philanthropy
- Interiors Suppliers
- Owners' Club
- Captains' Club
- BOAT Showcase
- Boat Presents
- Events Home
- World Superyacht Awards
- Superyacht Design Festival
- Design and Innovation Awards
- Young Designer of the Year Award
- Artistry and Craft Awards
- Explorer Yachts Summit
- Ocean Talks
- The Ocean Awards
- BOAT Connect
- Between the bays
- Golf Invitational
- BOATPro Home
- Superyacht Insight
- Global Order Book
- Premium Content
- Product Features
- Testimonials
- Pricing Plan
- Tenders & Equipment
.jpg/r%5Bwidth%5D=320/c01b08f0-3198-11ec-b3da-5dc06521023f-Black%20Pearl%20-%20Tom%20Van%20Oossanen%20(3).webp "newcastle yacht rigging and sails")
The definitive guide to sailing yacht rigging
Related articles, superyacht directory.
Do you know your Bermudan rig from your DynaRig or wingsails? And which is best? BOAT explains it all...
Take a look at a modern racing yacht from above, beating to windward and heeled to the breeze, and you can see at a glance why Bermudan rigs have stood the test of time. With its fore and aft sails bladed into efficient aerodynamic shapes, a modern yacht can slice close to the wind and be driven hard. Such a sight would have been outlandish a century ago. Then, a typical trading barquentine could set 18 sails to catch light airs, but it needed a large crew to battle with canvas far out on the yards. In a modern miracle as incredible in its way as flight, today’s racing yachts can sail faster than the speed of the wind – in some cases several times faster.
A mainsail set on a single spar is an age-old concept but only in the 19th century was it adapted as the Bermudan or Marconi rig. A one-piece mainsail set on a mast without a gaff, hoisted with one halyard and controlled by one sheet, was simpler and more efficient. This revolution became the power train of pleasure yachting and racing.
But perhaps the time is coming for a re-evaluation of simpler rigs requiring fewer crew – alternatives with lower loads operated by automated systems. In an era of reduced carbon consumption, could more radical sailplans even herald a revival in sail power?
The evergreen Bermudan rig
The Bermudan rig is the all-rounder, able to perform well at all angles of sail. It is efficient upwind, while downwind the sail area can be significantly boosted with a big gennaker or spinnaker. For good reasons, it is the first choice for nearly every modern sailing yacht up to around 60 to 65 metres for cruising and regatta racing alike. At larger sizes, however, things start to become trickier, and the trade-offs get interesting.
Over the last decade, sail handling technology has steadily advanced to allow sloop rigs to grow larger and larger. “But with that comes a highly loaded rig, many tonnes of compression from tension in the rigging, and you have to build structure in the boat to accept that,” explains Paul MacDonald, founder and superyacht sales manager of Southern Spars.
“You have to have a lot of deck gear and captive winches below decks and the machinery for that. But over the years, boom furling systems and MPS [Multi Purpose Sails for downwind angles] stored on a drum, for example, have made sail handling safer.
Bill Tripp is the designer behind the 86-metre Aquijo , which broke new ground in 2015 as the world’s largest Bermudan ketch. Tripp prefers to call the rig a "sketch", a portmanteau word for a rig that is neither a sloop nor a ketch “because the main and mizzen are identical”. Even though the sailplan is divided over two masts, each spar is still a towering 90 metres above the water. Aquijo perfectly illustrates the issues involved with a Bermudan rig when scaled up.
“The sloop is great but I prefer the ‘sketch’ for sailing around the world under full control due to the desirability of a two-masted rig for reaching ability, which dominates passages, and the safety of controllable loads when sailing in all kinds of conditions miles from nowhere,” he says.
Upwind, Aquijo sets a jib, staysail, mainsail and mizzen, all in North Sails 3Di, totalling 3,821 square metres. A furling Code sail for reaching and downwind angles increases that to a vast 5,051 square metres.
While Aquijo has a crew retinue of 17, it can be controlled under sail by six or seven people. With custom winches to handle halyards and sheets, the sails can be hoisted astonishingly quickly for such a large rig. “It takes five minutes to put the main up, on average, and the main and mizzen can go up at the same time,” Tripp says. Aquijo has now sailed 100,000 nautical miles around the world and the owner is planning another circumnavigation through the Northwest Passage.
Tripp is not convinced of the wisdom of a much larger single-masted sloop rig. “If you are day sailing in the Med, a sloop would be awesome, but I am not sure if you had fewer sails you would be able to [reduce canvas] well enough. Also the mast is a windage problem when the keel is up and you are beam-to. If you are on anchor, that’s no problem but you’d have to be able to cope with being on the docks in 70 knots. The windage at 120 metres is not only more but the centre of effort is so much higher, and so the heeling loads all go up.”
However, British designer Malcolm McKeon , the name behind the high-performance, sloop-rigged carbon composite superyachts Missy and Ribelle , is pushing the sloop rig to new heights. His 85-metre design concept Apex, developed with Royal Huisman , would be the largest sloop-rigged yacht in the world. “The loads are enormous,” he admits, “but it is all scalable.”
“The big disadvantage is sail handling. The downwind sails are pretty complicated once you start hoisting and retrieving, even with drum and reel systems. It is not straightforward.” But, he adds, “I think we know the advantages of a sloop: if you want all-round performance you can’t beat it, even at the top end.”
Advantages of a clipper rig
The DynaRig has been around as a concept since the 1960s when German engineer Wilhelm Prölss devised these free-standing, rotating rigs as a fuel-saving solution for large commercial vessels. The idea was ahead of its time, so much so that its first realisation came nearly 40 years later when American owner Tom Perkins bought the residual technology and commissioned Dykstra Naval Architects to create a three-masted DynaRig for Maltese Falcon , his 88-metre Perini Navi.
The DynaRig is not as efficient upwind as the Bermudan rig, and is probably not the best solution for a yacht smaller than around 65 metres, suggests Jeroen de Vos of Dykstra. “We wouldn’t advise putting a DynaRig on a small yacht because there are other ways to manage sail handling. But on a larger yacht the DynaRig becomes an alternative because there is no rigging, no highly loaded sheets, low-tech [small] sails and no big winches.”
The beauty of the DynaRig is that its automatic systems can be handled by one or two people and, notes de Vos, “you don’t have to get out of your chair to go sailing. Maltese Falcon can sail on and off the anchor and can set 2,400 square metres of sail in six minutes. On other boats it takes six minutes to get the sail cover off.”
Damon Roberts of Magma Structures, which built the rigs for Maltese Falcon and the only other DynaRig yacht to date, the 106-metre Black Pearl , says: “You can do any manoeuvre easily; it’s like sailing a dinghy. There are no highly loaded sheets or ropes or flogging lines. You can luff up, bear away, tack and gybe at any time and really enjoy sailing the boat without any apparent fuss.”
So with all these advantages, why has the DynaRig been chosen for only two sailing superyachts? For some designers, such as Malcolm McKeon, it is partly to do with compromises imposed by the large mast tubes and bearing diameters on the internal structure and layout, “particularly in the cockpit area,” he says. He also points out that the clipper ship look is not to every owner’s taste. “Sloops are more conventional looking,” he says.
Damon Roberts says there is still development work to be done. He has teamed up with Southern Spars and, with their additional resources, expects evolution with several new projects. “These include two at the moment that are twin-masted DynaRigs,” he says. “We did quite a lot of wind tunnel work early on as we felt that was really the sweet spot for it, and people will be stunned at how efficient these are.”
The future of the wingsail
Wingsails have been around for decades too, but with their adoption by the last two America’s Cups and the confluence with foiling technology, they have undergone rapid and revolutionary development.
To date, there is no proven solution for reefing a wing that would be suitable for offshore cruising or ocean passages. As the pronounced aerodynamic “nose” at the leading edge of a wing can develop force in strong winds, they could potentially make a large yacht uncontrollable in port as well.
“How do you get rid of sail and how does [a boat] handle when caught out in heavy wind conditions – which you will be? How do you keep the angle of attack all the way up the rig and how do you handle squalls?” Roberts asks. “A mechanism to reduce sail might be easy to sketch out but it is difficult to engineer.”
Jeroen de Vos says: “The wingsails are more developed towards performance and I wouldn’t say that they are as practical as soft sails or would ever make handling easier. But if somebody wants that, why not? Reefable soft sails, wings that are inflated, hoisted panels, possibly these are applicable. The development of this area is happening very rapidly.”
Paul MacDonald of Southern Spars agrees that the time is not here yet but thinks it will come. “In reality we are in the early days of wings. For the America’s Cup, they are the most efficient way of sailing by a long shot, but with them comes handling issues, which the industry hasn’t resolved yet. But I am sure they will be in 10 years’ time. Designers such as VPLP are starting to [work on concepts] and we are going to see something that is usable and efficient and suitable for ocean work eventually,” he says. “And whatever the solution is, you imagine that it will scale.”
Looking to the future
A drive for greener superyachts could present an opportunity for sail, but perhaps it needs to be less daunting.
“There is this intimidation of sheets and backstays, and sailing is a language you don’t learn in a year,” Tripp says. “But we have a project we are doing now with a yard with some new rig technology and some soft wings that we think is going to be viable.
“We can uncomplicate sailing more. If we can win people over from motorboats it will help, but we are only winning these battles one or two at a time. We need [more] projects like Sailing Yacht A , which are something really different, and do more things better with less energy. We as architects need to elicit change.”
McKeon also sees change coming. “People are more and more concerned about keeping their image green and sails are the way to do that,” he says. “Simpler sailing systems are needed. The current generation is used to Bermudan sloops. In years to come, the traditionalists will all be gone, and maybe new people will be more accepting of [different ideas]. I think in the future we will certainly have wings.”
Sign up to BOAT Briefing email
Latest news, brokerage headlines and yacht exclusives, every weekday
By signing up for BOAT newsletters, you agree to our Terms of Use and our Privacy Policy .
More about this yacht
Yachts for sale, similar yachts for sale, yachts for charter, more stories, most popular, from our partners, sponsored listings.

- AMERICA'S CUP
- CLASSIFIEDS
- NEWSLETTERS
- SUBMIT NEWS

New Kid On The Block

Related Articles

Get free quotes
Let us do the work. Compare multiple quotes from Boat & Yacht Equipment in your local area, so you get the right fit, the first time.
Free Quotes
Get free quotes from professionals near you.
Local Marine Sail Makers in Newcastle NSW
5 results for marine sail makers near you, lake mac marine.
Marine Sail Makers, Belmont, NSW 2280
Endeavour Marine
Boat & Yacht Builders & Repairers, Marmong Point, NSW 2284
Open until 4:30pm
From Sailboats & Yachts Through To Ski Boats, Cruisers & Fishing Boats
1 Nanda St, Marmong Point, NSW, 2284
Legal ID: Dedicated Staff Members
Boat & Yacht Equipment, Warners Bay, NSW 2282
Open by appt
Unit 2 192 Macquarie Rd, Warners Bay, NSW, 2282
East Coast Marine & Sail
Boat & Yacht Equipment, Eleebana, NSW 2282
Open until 5:00pm
32A Cherry Rd, Eleebana, NSW, 2282
Terrace Boating & Leisure Centre Pty Ltd
Boat & Yacht Sales, Heatherbrae, NSW 2324
2382 Pacific Hwy, Heatherbrae, NSW, 2324
Legal ID: Family owned and operated
Nearby Locations
Popular categories, related categories, our directory., our advertising., connect with us..
Bay Sailing Centre
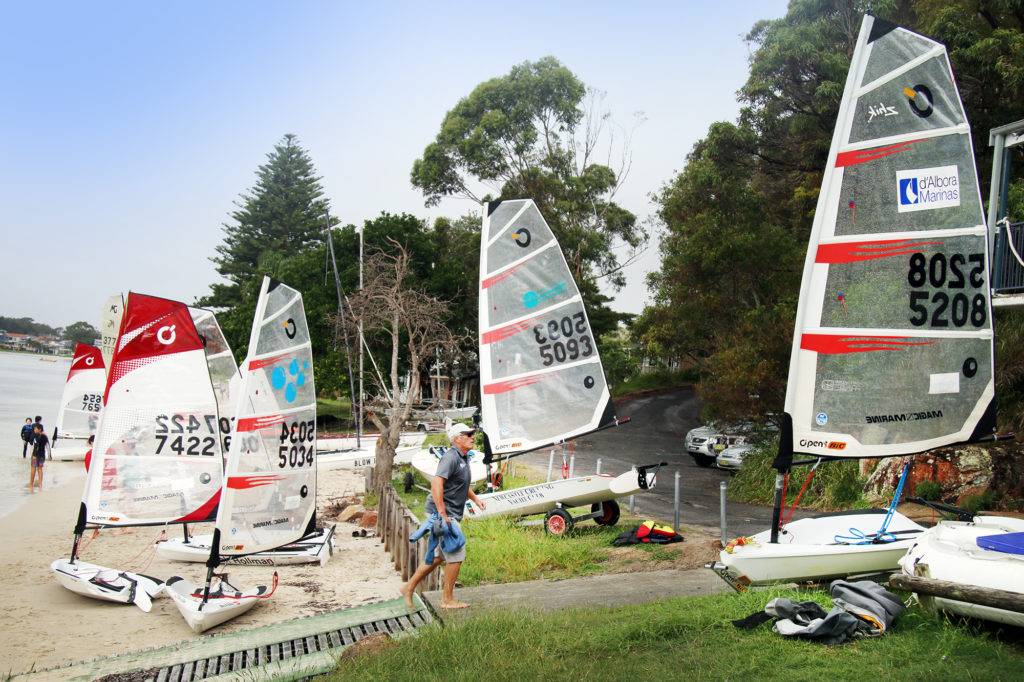
The Bay Sailing Centre venue has a 40-year history of hosting local dinghy sailing as well as delivering major world, national and state championships.
Situated on the shores of Salamander Bay, it faces east towards the majestic Port Stephens headlands and a body of water that is widely regarded as offering one of the best sailboat racing tracks in Australia.
Fluctuating tidal conditions provide a degree of challenge, yet race officers have myriad opportunities to set fair courses for all wind directions and distances – include passage races.
A long stretch of white sandy beach and two grassy reserves either side of the clubhouse provide ample rigging and launching opportunities for dinghies, skiffs, catamarans and sailboards alike. In addition, there is a public wharf and concrete boat ramp 100 metres to the north of the site.
Trailer sailers and sports boats can also launch at nearby Soldiers Point boat ramp and overnight at the adjoining Soldiers Point Marina, gaining shelter from the prevailing summer nor’easters.
As part of a new chapter, Newcastle Cruising Yacht Club (NCYC) has attained the licence to run the community club, renaming it the Bay Sailing Centre to signify the change. It is bringing a higher degree of professional staffing and resourcing to the sailing and sail training operations, while enhancing community access.
The ultimate vision is to create a facility that showcases and enhances the sport’s presence, with anticipated flow-on benefits for local and regional recognition, participation and visitation.
The Bay Sailing Centre conducts point-score racing throughout the summer season and also offers a raft of sail training opportunities for junior sailors keen to try the sport.
Our renowned Sailing Academy and on-water race management team has expanded to this Centre, bringing O’Pen Skiffs and Tacker dinghies.
The upper floor of the facility is the perfect place to watch the sailing activities or enjoy a post-race get-together, either inside or on the veranda. It has a café serving barista-made coffee and snacks, while also being available for catered functions.
Please don’t hesitate to contact us for more information via the following –
| Newcastle Cruising Yacht Club | Membership Enquiry | (02) 4940 8188 |
| Bay Sailing Centre | Cafe Enquiry | (02) 4919 1015 |
| Functions Enquiry | Kaylee Menzies (02) 4919 1015 |
The Ultimate Guide to Sail Types and Rigs (with Pictures)
What's that sail for? Generally, I don't know. So I've come up with a system. I'll explain you everything there is to know about sails and rigs in this article.
What are the different types of sails? Most sailboats have one mainsail and one headsail. Typically, the mainsail is a fore-and-aft bermuda rig (triangular shaped). A jib or genoa is used for the headsail. Most sailors use additional sails for different conditions: the spinnaker (a common downwind sail), gennaker, code zero (for upwind use), and stormsail.
Each sail has its own use. Want to go downwind fast? Use a spinnaker. But you can't just raise any sail and go for it. It's important to understand when (and how) to use each sail. Your rigging also impacts what sails you can use.

On this page:
Different sail types, the sail plan of a bermuda sloop, mainsail designs, headsail options, specialty sails, complete overview of sail uses, mast configurations and rig types.
This article is part 1 of my series on sails and rig types. Part 2 is all about the different types of rigging. If you want to learn to identify every boat you see quickly, make sure to read it. It really explains the different sail plans and types of rigging clearly.

Guide to Understanding Sail Rig Types (with Pictures)
First I'll give you a quick and dirty overview of sails in this list below. Then, I'll walk you through the details of each sail type, and the sail plan, which is the godfather of sail type selection so to speak.
Click here if you just want to scroll through a bunch of pictures .
Here's a list of different models of sails: (Don't worry if you don't yet understand some of the words, I'll explain all of them in a bit)
- Jib - triangular staysail
- Genoa - large jib that overlaps the mainsail
- Spinnaker - large balloon-shaped downwind sail for light airs
- Gennaker - crossover between a Genoa and Spinnaker
- Code Zero or Screecher - upwind spinnaker
- Drifter or reacher - a large, powerful, hanked on genoa, but made from lightweight fabric
- Windseeker - tall, narrow, high-clewed, and lightweight jib
- Trysail - smaller front-and-aft mainsail for heavy weather
- Storm jib - small jib for heavy weather
I have a big table below that explains the sail types and uses in detail .
I know, I know ... this list is kind of messy, so to understand each sail, let's place them in a system.
The first important distinction between sail types is the placement . The mainsail is placed aft of the mast, which simply means behind. The headsail is in front of the mast.
Generally, we have three sorts of sails on our boat:
- Mainsail: The large sail behind the mast which is attached to the mast and boom
- Headsail: The small sail in front of the mast, attached to the mast and forestay (ie. jib or genoa)
- Specialty sails: Any special utility sails, like spinnakers - large, balloon-shaped sails for downwind use
The second important distinction we need to make is the functionality . Specialty sails (just a name I came up with) each have different functionalities and are used for very specific conditions. So they're not always up, but most sailors carry one or more of these sails.
They are mostly attached in front of the headsail, or used as a headsail replacement.
The specialty sails can be divided into three different categories:
- downwind sails - like a spinnaker
- light air or reacher sails - like a code zero
- storm sails

The parts of any sail
Whether large or small, each sail consists roughly of the same elements. For clarity's sake I've took an image of a sail from the world wide webs and added the different part names to it:

- Head: Top of the sail
- Tack: Lower front corner of the sail
- Foot: Bottom of the sail
- Luff: Forward edge of the sail
- Leech: Back edge of the sail
- Clew: Bottom back corner of the sail
So now we speak the same language, let's dive into the real nitty gritty.
Basic sail shapes
Roughly speaking, there are actually just two sail shapes, so that's easy enough. You get to choose from:
- square rigged sails
- fore-and-aft rigged sails
I would definitely recommend fore-and-aft rigged sails. Square shaped sails are pretty outdated. The fore-and-aft rig offers unbeatable maneuverability, so that's what most sailing yachts use nowadays.

Square sails were used on Viking longships and are good at sailing downwind. They run from side to side. However, they're pretty useless upwind.
A fore-and-aft sail runs from the front of the mast to the stern. Fore-and-aft literally means 'in front and behind'. Boats with fore-and-aft rigged sails are better at sailing upwind and maneuvering in general. This type of sail was first used on Arabic boats.
As a beginner sailor I confuse the type of sail with rigging all the time. But I should cut myself some slack, because the rigging and sails on a boat are very closely related. They are all part of the sail plan .
A sail plan is made up of:
- Mast configuration - refers to the number of masts and where they are placed
- Sail type - refers to the sail shape and functionality
- Rig type - refers to the way these sails are set up on your boat
There are dozens of sails and hundreds of possible configurations (or sail plans).
For example, depending on your mast configuration, you can have extra headsails (which then are called staysails).
The shape of the sails depends on the rigging, so they overlap a bit. To keep it simple I'll first go over the different sail types based on the most common rig. I'll go over the other rig types later in the article.
Bermuda Sloop: the most common rig
Most modern small and mid-sized sailboats have a Bermuda sloop configuration . The sloop is one-masted and has two sails, which are front-and-aft rigged. This type of rig is also called a Marconi Rig. The Bermuda rig uses a triangular sail, with just one side of the sail attached to the mast.
The mainsail is in use most of the time. It can be reefed down, making it smaller depending on the wind conditions. It can be reefed down completely, which is more common in heavy weather. (If you didn't know already: reefing is skipper terms for rolling or folding down a sail.)
In very strong winds (above 30 knots), most sailors only use the headsail or switch to a trysail.
The headsail powers your bow, the mainsail powers your stern (rear). By having two sails, you can steer by using only your sails (in theory - it requires experience). In any case, two sails gives you better handling than one, but is still easy to operate.
Let's get to the actual sails. The mainsail is attached behind the mast and to the boom, running to the stern. There are multiple designs, but they actually don't differ that much. So the following list is a bit boring. Feel free to skip it or quickly glance over it.
- Square Top racing mainsail - has a high performance profile thanks to the square top, optional reef points
- Racing mainsail - made for speed, optional reef points
- Cruising mainsail - low-maintenance, easy to use, made to last. Generally have one or multiple reef points.
- Full-Batten Cruising mainsail - cruising mainsail with better shape control. Eliminates flogging. Full-length battens means the sail is reinforced over the entire length. Generally have one or multiple reef points.
- High Roach mainsail - crossover between square top racing and cruising mainsail, used mostly on cats and multihulls. Generally have one or multiple reef points.
- Mast Furling mainsail - sails specially made to roll up inside the mast - very convenient but less control; of sail shape. Have no reef points
- Boom Furling mainsail - sails specially made to roll up inside the boom. Have no reef points.
The headsail is the front sail in a front-and-aft rig. The sail is fixed on a stay (rope, wire or rod) which runs forward to the deck or bowsprit. It's almost always triangular (Dutch fishermen are known to use rectangular headsail). A triangular headsail is also called a jib .
Headsails can be attached in two ways:
- using roller furlings - the sail rolls around the headstay
- hank on - fixed attachment
Types of jibs:
Typically a sloop carries a regular jib as its headsail. It can also use a genoa.
- A jib is a triangular staysail set in front of the mast. It's the same size as the fore-triangle.
- A genoa is a large jib that overlaps the mainsail.
What's the purpose of a jib sail? A jib is used to improve handling and to increase sail area on a sailboat. This helps to increase speed. The jib gives control over the bow (front) of the ship, making it easier to maneuver the ship. The mainsail gives control over the stern of the ship. The jib is the headsail (frontsail) on a front-and-aft rig.
The size of the jib is generally indicated by a number - J1, 2, 3, and so on. The number tells us the attachment point. The order of attachment points may differ per sailmaker, so sometimes J1 is the largest jib (on the longest stay) and sometimes it's the smallest (on the shortest stay). Typically the J1 jib is the largest - and the J3 jib the smallest.
Most jibs are roller furling jibs: this means they are attached to a stay and can be reefed down single-handedly. If you have a roller furling you can reef down the jib to all three positions and don't need to carry different sizes.

Originally called the 'overlapping jib', the leech of the genoa extends aft of the mast. This increases speed in light and moderate winds. A genoa is larger than the total size of the fore-triangle. How large exactly is indicated by a percentage.
- A number 1 genoa is typically 155% (it used to be 180%)
- A number 2 genoa is typically 125-140%
Genoas are typically made from 1.5US/oz polyester spinnaker cloth, or very light laminate.

This is where it gets pretty interesting. You can use all kinds of sails to increase speed, handling, and performance for different weather conditions.
Some rules of thumb:
- Large sails are typically good for downwind use, small sails are good for upwind use.
- Large sails are good for weak winds (light air), small sails are good for strong winds (storms).
Downwind sails
Thanks to the front-and-aft rig sailboats are easier to maneuver, but they catch less wind as well. Downwind sails are used to offset this by using a large sail surface, pulling a sailboat downwind. They can be hanked on when needed and are typically balloon shaped.
Here are the most common downwind sails:
- Big gennaker
- Small gennaker
A free-flying sail that fills up with air, giving it a balloon shape. Spinnakers are generally colorful, which is why they look like kites. This downwind sail has the largest sail area, and it's capable of moving a boat with very light wind. They are amazing to use on trade wind routes, where they can help you make quick progress.
Spinnakers require special rigging. You need a special pole and track on your mast. You attach the sail at three points: in the mast head using a halyard, on a pole, and on a sheet.
The spinnaker is symmetrical, meaning the luff is as long as its leech. It's designed for broad reaching.

Gennaker or cruising spinnaker
The Gennaker is a cross between the genoa and the spinnaker. It has less downwind performance than the spinnaker. It is a bit smaller, making it slower, but also easier to handle - while it remains very capable. The cruising spinnaker is designed for broad reaching.
The gennaker is a smaller, asymmetric spinnaker that's doesn't require a pole or track on the mast. Like the spinnaker, and unlike the genoa, the gennaker is set flying. Asymmetric means its luff is longer than its leech.
You can get big and small gennakers (roughly 75% and 50% the size of a true spinnaker).
Also called ...
- the cruising spinnaker
- cruising chute
- pole-less spinnaker
- SpinDrifter
... it's all the same sail.

Light air sails
There's a bit of overlap between the downwind sails and light air sails. Downwind sails can be used as light air sails, but not all light air sails can be used downwind.
Here are the most common light air sails:
- Spinnaker and gennaker
Drifter reacher
Code zero reacher.
A drifter (also called a reacher) is a lightweight, larger genoa for use in light winds. It's roughly 150-170% the size of a genoa. It's made from very lightweight laminated spinnaker fabric (1.5US/oz).
Thanks to the extra sail area the sail offers better downwind performance than a genoa. It's generally made from lightweight nylon. Thanks to it's genoa characteristics the sail is easier to use than a cruising spinnaker.
The code zero reacher is officially a type of spinnaker, but it looks a lot like a large genoa. And that's exactly what it is: a hybrid cross between the genoa and the asymmetrical spinnaker (gennaker). The code zero however is designed for close reaching, making it much flatter than the spinnaker. It's about twice the size of a non-overlapping jib.

A windseeker is a small, free-flying staysail for super light air. It's tall and thin. It's freestanding, so it's not attached to the headstay. The tack attaches to a deck pad-eye. Use your spinnakers' halyard to raise it and tension the luff.
It's made from nylon or polyester spinnaker cloth (0.75 to 1.5US/oz).
It's designed to guide light air onto the lee side of the main sail, ensuring a more even, smooth flow of air.
Stormsails are stronger than regular sails, and are designed to handle winds of over 45 knots. You carry them to spare the mainsail. Sails
A storm jib is a small triangular staysail for use in heavy weather. If you participate in offshore racing you need a mandatory orange storm jib. It's part of ISAF's requirements.
A trysail is a storm replacement for the mainsail. It's small, triangular, and it uses a permanently attached pennant. This allows it to be set above the gooseneck. It's recommended to have a separate track on your mast for it - you don't want to fiddle around when you actually really need it to be raised ... now.

| Sail | Type | Shape | Wind speed | Size | Wind angle |
|---|---|---|---|---|---|
| Bermuda | mainsail | triangular, high sail | < 30 kts | ||
| Jib | headsail | small triangular foresail | < 45 kts | 100% of foretriangle | |
| Genoa | headsail | jib that overlaps mainsail | < 30 kts | 125-155% of foretriangle | |
| Spinnaker | downwind | free-flying, balloon shape | 1-15 kts | 200% or more of mainsail | 90°–180° |
| Gennaker | downwind | free-flying, balloon shape | 1-20 kts | 85% of spinnaker | 75°-165° |
| Code Zero or screecher | light air & upwind | tight luffed, upwind spinnaker | 1-16 kts | 70-75% of spinnaker | |
| Storm Trysail | mainsail | small triangular mainsail replacement | > 45 kts | 17.5% of mainsail | |
| Drifter reacher | light air | large, light-weight genoa | 1-15 kts | 150-170% of genoa | 30°-90° |
| Windseeker | light air | free-flying staysail | 0-6 kts | 85-100% of foretriangle | |
| Storm jib | strong wind headsail | low triangular staysail | > 45 kts | < 65% height foretriangle |
Why Use Different Sails At All?
You could just get the largest furling genoa and use it on all positions. So why would you actually use different types of sails?
The main answer to that is efficiency . Some situations require other characteristics.
Having a deeply reefed genoa isn't as efficient as having a small J3. The reef creates too much draft in the sail, which increases heeling. A reefed down mainsail in strong winds also increases heeling. So having dedicated (storm) sails is probably a good thing, especially if you're planning more demanding passages or crossings.
But it's not just strong winds, but also light winds that can cause problems. Heavy sails will just flap around like laundry in very light air. So you need more lightweight fabrics to get you moving.
What Are Sails Made Of?
The most used materials for sails nowadays are:
- Dacron - woven polyester
- woven nylon
- laminated fabrics - increasingly popular
Sails used to be made of linen. As you can imagine, this is terrible material on open seas. Sails were rotting due to UV and saltwater. In the 19th century linen was replaced by cotton.
It was only in the 20th century that sails were made from synthetic fibers, which were much stronger and durable. Up until the 1980s most sails were made from Dacron. Nowadays, laminates using yellow aramids, Black Technora, carbon fiber and Spectra yarns are more and more used.
Laminates are as strong as Dacron, but a lot lighter - which matters with sails weighing up to 100 kg (220 pounds).
By the way: we think that Viking sails were made from wool and leather, which is quite impressive if you ask me.
In this section of the article I give you a quick and dirty summary of different sail plans or rig types which will help you to identify boats quickly. But if you want to really understand it clearly, I really recommend you read part 2 of this series, which is all about different rig types.
You can't simply count the number of masts to identify rig type But you can identify any rig type if you know what to look for. We've created an entire system for recognizing rig types. Let us walk you through it. Read all about sail rig types
As I've said earlier, there are two major rig types: square rigged and fore-and-aft. We can divide the fore-and-aft rigs into three groups:
- Bermuda rig (we have talked about this one the whole time) - has a three-sided mainsail
- Gaff rig - has a four-sided mainsail, the head of the mainsail is guided by a gaff
- Lateen rig - has a three-sided mainsail on a long yard

There are roughly four types of boats:
- one masted boats - sloop, cutter
- two masted boats - ketch, schooner, brig
- three masted - barque
- fully rigged or ship rigged - tall ship
Everything with four masts is called a (tall) ship. I think it's outside the scope of this article, but I have written a comprehensive guide to rigging. I'll leave the three and four-masted rigs for now. If you want to know more, I encourage you to read part 2 of this series.
One-masted rigs
Boats with one mast can have either one sail, two sails, or three or more sails.
The 3 most common one-masted rigs are:
- Cat - one mast, one sail
- Sloop - one mast, two sails
- Cutter - one mast, three or more sails
1. Gaff Cat

2. Gaff Sloop
Two-masted rigs
Two-masted boats can have an extra mast in front or behind the main mast. Behind (aft of) the main mast is called a mizzen mast . In front of the main mast is called a foremast .
The 5 most common two-masted rigs are:
- Lugger - two masts (mizzen), with lugsail (cross between gaff rig and lateen rig) on both masts
- Yawl - two masts (mizzen), fore-and-aft rigged on both masts. Main mast much taller than mizzen. Mizzen without mainsail.
- Ketch - two masts (mizzen), fore-and-aft rigged on both masts. Main mast with only slightly smaller mizzen. Mizzen has mainsail.
- Schooner - two masts (foremast), generally gaff rig on both masts. Main mast with only slightly smaller foremast. Sometimes build with three masts, up to seven in the age of sail.
- Brig - two masts (foremast), partially square-rigged. Main mast carries small lateen rigged sail.

4. Schooner

5. Brigantine

This article is part 1 of a series about sails and rig types If you want to read on and learn to identify any sail plans and rig type, we've found a series of questions that will help you do that quickly. Read all about recognizing rig types
Related Questions
What is the difference between a gennaker & spinnaker? Typically, a gennaker is smaller than a spinnaker. Unlike a spinnaker, a gennaker isn't symmetric. It's asymmetric like a genoa. It is however rigged like a spinnaker; it's not attached to the forestay (like a jib or a genoa). It's a downwind sail, and a cross between the genoa and the spinnaker (hence the name).
What is a Yankee sail? A Yankee sail is a jib with a high-cut clew of about 3' above the boom. A higher-clewed jib is good for reaching and is better in high waves, preventing the waves crash into the jibs foot. Yankee jibs are mostly used on traditional sailboats.
How much does a sail weigh? Sails weigh anywhere between 4.5-155 lbs (2-70 kg). The reason is that weight goes up exponentially with size. Small boats carry smaller sails (100 sq. ft.) made from thinner cloth (3.5 oz). Large racing yachts can carry sails of up to 400 sq. ft., made from heavy fabric (14 oz), totaling at 155 lbs (70 kg).
What's the difference between a headsail and a staysail? The headsail is the most forward of the staysails. A boat can only have one headsail, but it can have multiple staysails. Every staysail is attached to a forward running stay. However, not every staysail is located at the bow. A stay can run from the mizzen mast to the main mast as well.
What is a mizzenmast? A mizzenmast is the mast aft of the main mast (behind; at the stern) in a two or three-masted sailing rig. The mizzenmast is shorter than the main mast. It may carry a mainsail, for example with a ketch or lugger. It sometimes doesn't carry a mainsail, for example with a yawl, allowing it to be much shorter.
Special thanks to the following people for letting me use their quality photos: Bill Abbott - True Spinnaker with pole - CC BY-SA 2.0 lotsemann - Volvo Ocean Race Alvimedica and the Code Zero versus SCA and the J1 - CC BY-SA 2.0 Lisa Bat - US Naval Academy Trysail and Storm Jib dry fit - CC BY-SA 2.0 Mike Powell - White gaff cat - CC BY-SA 2.0 Anne Burgess - Lugger The Reaper at Scottish Traditional Boat Festival
Hi, I stumbled upon your page and couldn’t help but notice some mistakes in your description of spinnakers and gennakers. First of all, in the main photo on top of this page the small yacht is sailing a spinnaker, not a gennaker. If you look closely you can see the spinnaker pole standing on the mast, visible between the main and headsail. Further down, the discription of the picture with the two German dinghies is incorrect. They are sailing spinnakers, on a spinnaker pole. In the farthest boat, you can see a small piece of the pole. If needed I can give you the details on the difference between gennakers and spinnakers correctly?
Hi Shawn, I am living in Utrecht I have an old gulf 32 and I am sailing in merkmeer I find your articles very helpful Thanks
Thank you for helping me under stand all the sails there names and what there functions were and how to use them. I am planning to build a trimaran 30’ what would be the best sails to have I plan to be coastal sailing with it. Thank you
Hey Comrade!
Well done with your master piece blogging. Just a small feedback. “The jib gives control over the bow of the ship, making it easier to maneuver the ship. The mainsail gives control over the stern of the ship.” Can you please first tell the different part of a sail boat earlier and then talk about bow and stern later in the paragraph. A reader has no clue on the newly introduced terms. It helps to keep laser focused and not forget main concepts.
Shawn, I am currently reading How to sail around the World” by Hal Roth. Yes, I want to sail around the world. His book is truly grounded in real world experience but like a lot of very knowledgable people discussing their area of expertise, Hal uses a lot of terms that I probably should have known but didn’t, until now. I am now off to read your second article. Thank You for this very enlightening article on Sail types and their uses.
Shawn Buckles
HI CVB, that’s a cool plan. Thanks, I really love to hear that. I’m happy that it was helpful to you and I hope you are of to a great start for your new adventure!
Hi GOWTHAM, thanks for the tip, I sometimes forget I haven’t specified the new term. I’ve added it to the article.
Nice article and video; however, you’re mixing up the spinnaker and the gennaker.
A started out with a question. What distinguishes a brig from a schooner? Which in turn led to follow-up questions: I know there are Bermuda rigs and Latin rig, are there more? Which in turn led to further questions, and further, and further… This site answers them all. Wonderful work. Thank you.
Great post and video! One thing was I was surprised how little you mentioned the Ketch here and not at all in the video or chart, and your sample image is a large ship with many sails. Some may think Ketch’s are uncommon, old fashioned or only for large boats. Actually Ketch’s are quite common for cruisers and live-aboards, especially since they often result in a center cockpit layout which makes for a very nice aft stateroom inside. These are almost exclusively the boats we are looking at, so I was surprised you glossed over them.
Love the article and am finding it quite informative.
While I know it may seem obvious to 99% of your readers, I wish you had defined the terms “upwind” and “downwind.” I’m in the 1% that isn’t sure which one means “with the wind” (or in the direction the wind is blowing) and which one means “against the wind” (or opposite to the way the wind is blowing.)
paul adriaan kleimeer
like in all fields of syntax and terminology the terms are colouual meaning local and then spead as the technology spread so an history lesson gives a floral bouque its colour and in the case of notical terms span culture and history adds an detail that bring reverence to the study simply more memorable.
Hi, I have a small yacht sail which was left in my lock-up over 30 years ago I basically know nothing about sails and wondered if you could spread any light as to the make and use of said sail. Someone said it was probably originally from a Wayfayer wooden yacht but wasn’t sure. Any info would be must appreciated and indeed if would be of any use to your followers? I can provide pics but don’t see how to include them at present
kind regards
Leave a comment
You may also like, 17 sailboat types explained: how to recognize them.
Ever wondered what type of sailboat you're looking at? Identifying sailboats isn't hard, you just have to know what to look for. In this article, I'll help you.

How Much Sailboats Cost On Average (380+ Prices Compared)
Yachting Monthly
- Digital edition

Expert advice: sails and rigging
- Katy Stickland
- December 22, 2021
Keeping sails and rigging in tip-top shape are of key importance to sailors. Read our tips and tricks from experts to improve their longevity

Sails and rigging are the engine room of any sailing boat from small dinghies up to giant superyachts. No matter how big or how new your boat, the sails and rigging need to be checked regularly and will need intermittent updating.
Updating of rigging on a yacht in particular will often be a requirement for insurance purposes so any owner will want to be mindful of that and make sure they upgrade often enough for those purposes – usually 10-15 years, but check your policy.
But you don’t need to focus on buying new to make improvements to your boat. Sure brand new sails will give you a performance boost, but there is plenty to be done with your old sails and rigging to improve performance and their longevity.
Tidy up your rigging – Dr Nick Bamford

Keeping lines shorter will help keep a clear cockpit. Credit: Dr Nick Bamford
When changing your standing rigging, look at your running rigging too.
The hi-tech, non-stretch polyester with which we just replaced our old wire and rope halyards has massively reduced the friction and now makes hoisting the mainsail a joy.
And this prompted another review. The advantages of all halyards and reefing lines led back to the cockpit, in terms of ease of operation as well as safety, are well known.
But the price you pay is that mountain of spaghetti cluttering up the cockpit!
I realised that a lot of mine was simply not needed. The lines were the length they were because they always had been! It was time for a rethink.
I treated myself to a £20 butane rope knife and set to work, and the result is a joyfully tidy cockpit.
I do have one other rigging tip, which I discovered when I lost a reefing line in the boom.
While specialist mousing devices are not cheap, curtain wire is! And it works a treat
Carabiner at your boom – Harry Dekkers

Carabiners will make it easier to reef. Credit: Harry Dekkers
How often did you try to hook the reefing eye of the mainsail at the forward end of the boom only to find that it has fallen out before you are able to hoist the halyard?
I have overcome this issue by welding carabiners on the existing ramshorn hooks on both sides of the gooseneck.
Secure every inch of your sails – Jonty Pearce

Sails and rigging advice: Ensure genoas are well secured on their roller reefing forestay before leaving the boat. Credit: Theo Stocker
When wandering around marinas, moorings, and boatyards, I am always dismayed by the number of yachts left with a triangle of genoa unfurled on their roller reefing forestay.
Not only does this engender potential weakness as a result of exposure to damaging solar ultraviolet, but that small handkerchief of unrolled sail can be worried by strong winds until it risks a catastrophic unfurling with consequential ripping and destruction of the flogging material.
It seems that every winter I spot a tattered rag of an unfurled sail that could have been properly protected by secure tight rolling.
My habit is to roll my genoa away with at least two turns of overlying sheet to trap the sail; the sheets are then tightened and securely tailed on the winches. This protects against unwanted unfurling and also provides an extra handhold.
When leaving the boat for any time, those more obsessional than I might back the sheets up with a safety lashing around the sail/sheet combination, as well as tying a preventer onto the roller reefing drum so that any damage to its furling line does not result in the sail unwrapping.
Homemade mast steps – Tony Curphey
Tony’s homemade mast steps are still going strong after two circumnavigations of the world. Credit: Tony Curphey
Mast steps are invaluable when you are cruising. They don’t have to be expensive. Mine cost me about £100, which was the price of a flat aluminium bar and Monel pop rivets. It’s necessary to have a good large pop riveter like the trellis one I have.
I used my small, onboard vice to bend them into shape. Make sure each step is wide enough for your foot with hard shoes on.
Start from the deck and put as few on as possible, spacing them apart as far as you can step up. You can use your bosun’s chair to drill and rivet, using 4x 6.4mm rivets per step.
Finish off with two together at the top so that you can stand on them and work at the very top of the mast.
I finished mine off with gold spray paint to match Nicola Deux ’s 1970s mast.
The mast steps have been there for five years and two circumnavigations, and are as firm and strong as when first fitted.
The mast has 14 steps, but I have long legs.
DIY quick-release soft shackles – Duncan Wells
Soft shackles are just the business these days; easy on the hands, no chafe to worry about and no pin to drop in the drink.
Soft shackles made from Dyneema are lighter and stronger than stainless steel, they are also kinder to your boat and your hands.
But a soft shackle, such as the one above does still present and issue in that getting them undone does require you to pull the inner core to open the loop end and allow the diamond knot through. This is why a quick-release system is a good idea.

Tie off the ends once you have passed your quick release lanyard through the shackle. Credit: Duncan Wells
Pull the inner core of the shackle out so it makes a loop sufficient to get the diamond knot through comfortably.
Then make your hole. Use a fid (a pen or screwdriver will do) to separate the 12-strand rope, pass the lanyard through and tie in a knot. Now set the shackle and smooth the outer core from the diamond knot end to the loop end and nip it up tight.
To release, pull on the lanyard.
Preventing chafe on sails and rigging – Julian and Patricia Morgan

Sewing on anti-chafe covers to lines ahead of a passage. Credit: Patricia and Julian Morgan
Chafe and rubbing damage is an ongoing enemy and it is surprising how quickly small rubs can lead to considerable damage to sheets, sails, halyards, lines and equipment.
On long-distance passages we do a detailed boat inspection, using a checklist, at least twice a day, including looking for signs of chafe.
We have installed tough anti-chafe covers on halyards and reefing lines where damage is likely, for example where ropes pass around sheaves or blocks.
We carry a bag full of short lengths of plastic pipe, which we use to pass over mooring and other lines when wear is likely to be an issue.
We also have plenty of readymade Dyneema soft shackles and loops, and have replaced many of our shackles with Dyneema equivalents, again reducing wear and damage.
Sails are very susceptible to chafe on long passages.
We have to be careful that our mainsail does not rub on our spreaders and shrouds when sailing downwind and have had covers sewn over our batten pockets where chafe has arisen.
We put one reef in the main when running to stop the sail touching the upper intermediate shrouds.
The ideal Genoa sheet attachment – Vyv Cox

Sails and rigging advice: A soft shackle makes an ideal genoa sheet attachment. Credit: Vyv Cox
There are many different ways in which genoa sheets may be attached to the sail, ranging from the simple but inelegant cow hitch, via bowlines or other knots, to some quite sophisticated methods.
In most cases they may be much of a muchness but there is one particular case that complicates the issue, and this is the presence of a baby-stay.
On our boat the combination of a large overlapping genoa and baby-stay has probably led to more sailing foul-ups than anything else on the boat.
Over the years we have tried most common methods of attachment but in every one there is a good chance that the knot or join will catch when tacking.
The only answer, short of going forward to unhitch it is to let the boat’s bow fall away until the sail blows free, not conducive to efficient tacking and doubling the effort of sheeting the sail home on the new tack.
We have tried most types of bearing on the stay itself, large and small diameter plastic tubes in various order, but none was truly satisfactory.
Then, soft shackles came onto the market. This seemed like the perfect solution to the problem, and so it proved.
I spliced loops into the end of each sheet, not quite as easily as it might have been as I was using a welding rod as a fid, and working with rope that was several years old.
Nonetheless, after an afternoon’s work we had a new system to try and the transformation was remarkable.
I cannot claim that the sail never hangs up on tacking but the occasions are pretty rare.
We have now used this same original shackle for 10 years and it continues to give excellent service.
Permanent boom preventer – Helen Melton

A permanent preventer attachment makes sailing easier. Credit: Helen Melton
Our Westerly Ocean 43 has a large, fully battened mainsail.
In light winds, or in anything less than flat seas, we have found it is essential to pin the main into place to curb any unnecessary flogging and hence prevent an accidental crash gybe.
Having a dedicated preventer line and pulley blocks in the cockpit locker ready for such conditions was helpful, but attaching it to the end of the boom in a centre cockpit boat whilst at sea felt like a needlessly hazardous manoeuvre that I wasn’t comfortable with.
We solved the problem by rigging a permanent line along the underside of the boom, one end with a hard eye splice and the other with a snap shackle.
From the relative safety of the mast foot, the preventer can now be secured and winched into place.
Wash your turning blocks with warm water – Graham Walker

Sails and rigging advice: Salt crystals and other debris can prevent turning blocks and clutches from running smoothly. Credit: Graham Walker
Before we set off on our Atlantic passage from Las Palmas, we had an expert rigger do full rig inspection for us.
At the same time he gave us a lot of valuable advice about maintenance.
One thing he recommended was to wash all of our turning blocks and clutches with warm, fresh water to remove all the salt crystals and other debris ingrained in the blocks and their bearings.
We took his advice and used a lot of warm water to wash everything down thoroughly.
It was eye-opening to see how much friction we were able to remove from the system by getting everything really clean.
That then translated directly into less effort on sail handling and sail changes.
Think like a climber – Helen Melton

Using an ascender and climbing hardness has made it easier for the crew of SeaEye to climb the mast. Credit: Helen Melton
After a few years of taxing work winching a crew member, sat in a bosun’s chair, up the mast we rethought how to lighten the load, (literally) and bought ourselves two ascenders and a climbing harness.
Also known as jumars, they clip and lock to a rope – we use the spinnaker halyard on our boat – sliding freely in one direction but clamping firmly when pulled in the opposite direction.
By using them in pairs, one with a foot loop affixed, the climber can alternate taking weight through their harness whilst easily manoeuvring the other upwards, then stepping up on the foot loop.
In an emergency, the mast can be ascended alone without support whilst if crew are available, a second halyard can be used as a safety line.
This brings about an added advantage when descending in that they can be lowered away efficiently on the winch.
A rigger, who has recently worked on our boat, works alone and always uses this technique, mousing his own halyard to be 100% certain of the condition of the line bearing his weight.
It is recommended that you wear a helmet when climbing the mast.
Check furling line fairleads – Harry Dekkers

A worn furling line fairlead can make hauling lines heavy work. Credit: Harry Dekkers
Do you sometimes wonder why your headsail furling line is not running freely? Is it the wind, the furling system itself or is it a problem with the furling line fairlead?
I found out that mine was 50 pert cent worn out, as you can see in the picture.
No wonder it took me a lot of effort.
It is also worth remembering that when unfurling your headsail, always control the furling line because if a strong wind makes the headsail run out too fast, the furling line will be tangled in the furling drum and you will only notice it once you need to furl the sail again
Practice working aloft – Graham Walker

Sails and rigging advice: Make sure every crew member has experience going aloft. Credit: Kate Walker
Who normally goes aloft when the need arises?
Depending on the task and the situation it may not always be appropriate for this to be the most experienced person (possibly the skipper) or the lightest member of the crew.
On a long passage it makes good sense for all members of the crew to have experience going aloft and putting other crew members aloft.
Before our transatlantic we made sure that everyone on board had the opportunity to go aloft and experience working on the mast.
Cost-effective mainsheet horse – Tony Curphey

Tony’s mainsheet horse has stood up well to a circumnavigation of the world. Credit: Tony Curphey
Most of the changes I make to my Nicholson 32 are for economic and simplistic reasons.
When I built the new large stern locker to reduce the volume of my cockpit, I had to move the mainsheet horse.
The new mainsheet horse was very simple and cost only the price of four new long 12mm stainless steel ringbolts.
It is also better than the old one because it’s higher so doesn’t chafe on the top guardrail when sailing off the wind.
I used the original four bolt holes for the new long ringbolts but raised them with hardwood by 5 inches.
A single length of 3-strand pre-stretched 10mm polyester rope (the boltrope from an old sail) was passed through all four ringbolt eyes and the ends tied together.
The sliding part of the horse is a 12mm stainless steel bow shackle, over all four parts of the rope. All ringbolts have equal strain.
The rope horse did a complete circumnavigation via the Southern Ocean with very little sign of wear.
Put chafe guard on your genoa sheet – Graham Walker

Chafe guard will make your sheets last longer. Credit: Graham Walker
When we started sailing longer passages we read about the problem of chafe, particularly on genoa sheets when poled out downwind.
The junction between the jaw on the pole and the section of sheet just behind the bowline seemed to be a particular area of wear.
\We learnt that rigging the pole so as to minimise movement between the jaw and the sheet makes a massive difference.
To try to eliminate any possible chafe we put Dyneema chafe guard on the first 2m of the genoa sheets, covering the area that would be in contact with the pole jaw.
After 12 years we’ve replaced a few metres of chafe guard, but we still have our original genoa sheets.
Enjoyed reading Expert advice: sails and rigging?
A subscription to Yachting Monthly magazine costs around 40% less than the cover price .
Print and digital editions are available through Magazines Direct – where you can also find the latest deals .
YM is packed with information to help you get the most from your time on the water.
- Take your seamanship to the next level with tips, advice and skills from our experts
- Impartial in-depth reviews of the latest yachts and equipment
- Cruising guides to help you reach those dream destinations
Follow us on Facebook , Twitter and Instagram.
Sail Rigs And Types - The Only Guide You Need

A well-designed sailboat is a thing of pure beauty. Whether you're a proud owner of one, a guest on one, or a shore-side admirer, you'll fall in love with the gliding sails, the excitement of a race, and the eco-friendly nature of these sophisticated yet magnificent vessels. With good sails, great design, and regular maintenance, sails and rigs are an important part of a sailboat.
If you’re thinking about going sailing, one of the first things you have to understand is the variety of modern sail plans. Unlike old sailboats, modern sailboats don't need huge, overlapping headsails and multiple masts just to get moving. In the past, when sailboats were heavy, keels were long, the only way to get the boat moving was with a massive relative sail area. You needed as much square footage as you could just to get your sailboat moving. But with the invention of fiberglass hulls, aluminum or composite masts, high-tensile but low diameter lines and stats, and more efficient sails, sailboats no longer need to plan for such large sail plans.. Still, there are various rig styles, from the common sloop, to the comfortable cat-rig, to the dual masted ketch and schooner, there are various sail types and rigs to choose from. The most important thing is to know the different types of sails and rigs and how they can make your sailing even more enjoyable.
There are different types of sails and rigs. Most sailboats have one mainsail and one headsail. The mainsail is generally fore-and-aft rigged and is triangular shaped. Various conditions and courses require adjustments to the sails on the boats, and, other than the mainsail, most boats can switch out their secondary sail depending on various conditions.. Do you want to sail upwind or go downwind? You cannot hoist just any sail and use it. It's, therefore, of great importance to understand how and when to use each sail type.
In this in-depth article, we'll look at various sail types and rigs, and how to use them to make your sailing more enjoyable.
Table of contents
Different Sail Types
It is perhaps worth noting that a sailboat is only as good as its sails. The very heart of sailing comes in capturing the wind using artfully trimmed sails and turning that into motion. . Ask any good sailor and he'll tell you that knowing how and when to trim the sails efficiently will not only improve the overall performance of your boat but will elevate your sailing experience. In short, sails are the driving force of sailboats.
As such, it's only natural that you should know the different types of sails and how they work. Let's first highlight different sail types before going into the details.
- Jib - triangular staysail
- Spinnaker - huge balloon-shaped downwind sail for light airs
- Genoa - huge jib that overlaps the mainsail
- Gennaker - a combination of a spinnaker and genoa
- Code zero - reaching genoa for light air
- Windseeker - tall, narrow, high-clewed, and lightweight jib
- Drifter - versatile light air genoa made from particularly lightweight cloth
- Storm jib - a smaller jib meant for stormy conditions
- Trysail - This is a smaller front-and-aft sail for heavy weather
The mainsail is the principal sail on a boat. It's generally set aft of the mainmast. Working together with the jib, the mainsail is designed to create the lift that drives the sailboat windward. That being said, the mainsail is a very powerful component that must always be kept under control.
As the largest sail, and the geometric center of effort on the boat, the mainsail is tasked with capturing the bulk of the wind that's required to propel the sailboat. The foot, the term for the bottom of any sail, secures to the boom, which allows you to trim the sail to your heading. The luff, the leading edge of the sail, is attached to the mast. An idealized mainsail would be able to swing through trim range of 180°, the full semi-circle aft of the mast, though in reality, most larger boats don’t support this full range of motion, as a fully eased sail can occasionally be unstable in heavy breeze.
. As fully controlling the shape of the mainsail is crucial to sailing performance, there are many different basic mainsail configurations. For instance, you can get a full-batten mainsail, a regular mainsail with short battens, or a two-plus-two mainsail with two full-length battens. Hyper-high performance boats have even begun experimenting with winged sails which are essentially trimmable airplane wings! Moreover, there are numerous sail controls that change the shape by pulling at different points on the sail, boom, or mast. Reefing, for instance, allows you to shorten the sail vertically, reducing the amount of sail area when the boat is overpowered.
Features of a Mainsail
Several features will affect how a particular sail works and performs. Some features will, of course, affect the cost of the sail while others may affect its longevity. All in all, it's essential to decide the type of mainsail that's right for you and your sailing application.
Sail Battens, the Roach, and the Leech
The most difficult part of the sail to control, but also the most important, are the areas we refer to as the leech and the roach. The roach is the part of the sail that extends backwards past the shortest line between the clew, at the end of the boom, and the top of the mast. It makes up roughly the back third of the sail. The leech is the trailing edge of the sail, the backmost curve of the roach. Together, these two components control the flow of the air off the back of the sail, which greatly affects the overall sail performance. If the air stalls off the backside of the sail, you will find a great loss in performance. Many sail controls, including the boom vang, backstay, main halyard, and even the cunningham, to name a few, focus on keeping this curve perfect.
As for parts of the sail itself, battens control the overall horizontal shape of the sail. Battens are typically made from fiberglass or wood and are built into batten pockets. They're meant to offer support and tension to maintain the sail shape Depending on the sail technology you want to use, you may find that full battens, which extend from luff to leech, or short battens, just on the trailing edge, are the way to go. Fully battened sails tend to be more expensive, but also higher performance.
Fully Battened Mainsails
They're generally popular on racing multihulls as they give you a nice solid sail shape which is crucial at high speeds. In cruising sailboats , fully battened mainsails have a few benefits such as:
- They prevent the mainsail from ragging. This extends the life of the sail, and makes maneuvers and trimming easier for the crew.
- It provides shape and lift in light-air conditions where short-battened mainsails would collapse.
On the other hand, fully-battened mainsails are often heavier, made out of thicker material, and can chafe against the standing rigging with more force when sailing off the wind.
Short Battens
On the other hand, you can choose a mainsail design that relies mostly on short battens, towards the leech of the sail. This tends to work for lighter cloth sails, as the breeze, the headsail, and the rigging help to shape the sail simply by the tension of the rig and the flow of the wind. The battens on the leech help to preserve the shape of the sail in the crucial area where the air is flowing off the back of the sail, keeping you from stalling out the entire rig.
The only potential downside is that these short battens deal with a little bit of chafe and tension in their pockets, and the sail cloth around these areas ought to be reinforced. If your sails do not have sufficient reinforcement here, or you run into any issues related to batten chafe, a good sail maker should be able to help you extend the life of your sails for much less than the price of a new set.
How to Hoist the Mainsail
Here's how to hoist the mainsail, assuming that it relies on a slab reefing system and lazy jacks and doesn't have an in-mast or in-boom furling system.
- Maintain enough speed for steeragewhile heading up into the wind
- Slacken the mainsheet, boom vang, and cunningham
- Make sure that the lazy jacks do not catch the ends on the battens by pulling the lazy jacks forward.
- Ensure that the reefing runs are free to run and the proper reefs are set if necessary.
- Raise the halyard as far as you can depending on pre-set reefs.
- Tension the halyard to a point where a crease begins to form along the front edge
- Re-set the lazy jacks
- Trim the mainsail properly while heading off to your desired course
So what's Right for You?
Your mainsail will depend on how you like sailing your boat and what you expect in terms of convenience and performance. That being said, first consult the options that the boatbuilder or sailmakers suggest for your rig. When choosing among the various options, consider what you want from the sail, how you like to sail, and how much you're willing to spend on the mainsail.
The headsail is principally the front sail in a fore-and-aft rig. They're commonly triangular and are attached to or serve as the boat’s forestay. They include a jib and a genoa.
A jib is a triangular sail that is set ahead of the foremost sail. For large boats, the roto-furling jib has become a common and convenient way to rig and store the jib. Often working in shifts with spinnakers, jibs are the main type of headsails on modern sailboats. Jibs take advantage of Bournoulli’s Principle to break the incoming breeze for the mainsail, greatly increasing the speed and point of any boat. By breaking the incoming wind and channeling it through what we call the ‘slot,’ the horizontal gap between the leech of the jib and the luff of the mainsail, the jib drastically increases the efficiency of your mainsail. It additionally balances the helm on your rudder by pulling the bow down, as the mainsail tends to pull the stern down. .
The main aim of the jib is to increase the sail area for a given mast size. It improves the aerodynamics of the mainsails so that your sailboat can catch more wind and thereby sail faster, especially in light air
Using Jibs on Modern Sailboats
In the modern contexts, jib’s mainly serve increase the performance and overall stability of the mainsail. The jib can also reduce the turbulence of the mainsail on the leeward side.
On Traditional Vessels
Traditional vessels such as schooners have about three jibs. The topmast carried a jib topsail, the main foresail is called the jib, while the innermost jib is known as the staysail. The first two were employed almost exclusively by clipper ships.
How to Rig the Jibs
There are three basic ways to rig the jib.
Track Sheets - A relatively modern approach to the self-tacking jib, this entails placing all the trimming hardware on a sliding track forward of the mast. This means that on each tack, the hardware slides from one side of the boat to the other. This alleviates the need to switch sheets and preserves the trim angle on both sides, though it can be finnicky and introduce friction.
Sheet up the Mast - This is a very popular approach and for a good reason. Hoist the jib sheet up the mast high enough to ensure that there's the right tension through the tack. Whether internally or externally, the sheet returnsto the deck and then back to the cockpit just like the rest of the mast baselines. The fact the hardware doesn't move through the tacks is essential in reducing friction.
Sheet Forward - This method revolves around ensuring that the jib sheet stays under constant pressure so that it does not move through the blocks in the tacks. This is possible if the through-deck block is extremely close to the jib tack. Your only challenge will only be to return the sheet to the cockpit. This is, however, quite challenging and can cause significant friction.
Dual Sheeting - The traditional method, especially on smaller dinghies, though it is not self-tacking. This requires a two ended or two separate sheet system, where one sheet runs to a block on starboard, and the other to port. Whenever you tack or gybe, this means you have to switch which sheet is active and which is slack, which is ok for well crewed boats, but a potential issue on under-crewed boats.
Another important headsail, a genoa is essentially a large jib that usually overlaps the mainsail or extends past the mast, especially when viewed from the other side. In the past, a genoa was known as the overlapping jib and is technically used on twin-mast boats and single-mast sloops such as ketches and yawls. A genoa has a large surface area, which is integral in increasing the speed of the vessel both in moderate and light winds.
Genoas are generally characterized by the percentage they cover. In most cases, sail racing classes stipulate the limit of a genoa size. In other words, genoas are usually classified by coverage.
Top-quality genoa trim is of great importance, especially if the wind is forward of the beam. This is because the wind will first pass over the genoa before the mainsail. As such, a wrongly sheeted genoa can erroneously direct the wind over the mainsail,spelling doom to your sailing escapades. While you can perfectly adjust the shape of a genoa using the mast rake, halyard tension, sheet tension, genoa car positioning, and backstay tension, furling and unfurling a genoa can be very challenging, especially in higher winds.
That being said, here are the crucial steps to always keep in mind.
- Unload and ease the loaded genoa sheet by going to a broad reach
- Do not use the winch; just pull on the furling line
- Keep a very small amount of pressure or tension on the loaded genoa sheet
- Secure the furling line and tighten the genoa sheets
- Get on the proper point of sail
- Have the crew help you and release the lazy genoa sheets
- Maintain a small tension while easing out the furling line
- Pull-on a loaded genoa sheet
- Close or cleat off the rope clutch when the genoa is unfurled
- Trim the genoa
To this end, it's important to note that genoas are popular in some racing classes. This is because they only categorize genoas based on the fore-triangle area covered, which essentially allows a genoa to significantly increase the actual sail area. On the contrary, keep in mind that tacking a genoa is quite a bit harder than a jib, as the overlapping area can get tangled with the mast and shrouds. It's, therefore, important to make sure that the genoa is carefully tended, particularly when tacking.
Downwind Sails
Modern sailboats are a lot easier to maneuver thanks to the fore-and-aft rig. Unfortunately, when sailing downwind they catch less wind, and downwind sails are a great way of reducing this problem. They include the spinnaker and the gennaker.
A spinnaker will, without a doubt, increase your sailing enjoyment. But why are they often buried in the cabin of cruising boats? Well, the first few attempts to rig and set a spinnaker can be difficult without enough help and guidance. Provided a solid background, however, spinnakers are quite straightforward and easy to use and handle with teamwork and enough practice. More importantly, spinnakers can bring a light wind passage to life and can save your engine.
Spinnakers are purposely designed for sailing off the wind; they fill with wind and balloon out in front of your sailboat. Structured with a lightweight fabric such as nylon, the spinnaker is also known as a kite or chute, as they look like parachutes both in structure and appearance.
A perfectly designed spinnaker should have taut leading edges when filled. This mitigates the risk of lifting and collapsing. A spinnaker should have a smooth curve when filled and devoid of depressions and bubbles that might be caused by the inconsistent stretching of the fabric. The idea here is that anything other than a smooth curve may reduce the lift and thereby reduce performance.
Types of Spinnakers
There are two main types of spinnakers: symmetric spinnakers and asymmetric spinnakers.
Asymmetric Spinnakers
Flown from a spinnaker pole or bowsprit fitted to the bow of the boat, asymmetric spinnakers resemble large jibs and have been around since the 19th century. The concept of asymmetric spinnaker revolves around attaching the tack of the spinnaker at the bow and pulling it around during a gybe.
Asymmetric spinnakers have two sheets just like a jib., These sheets are attached at the clew and never interact directly with the spinnaker pole. This is because the other corner of the spinnaker is fixed to the bowsprit. The asymmetric spinnaker works when you pull in one sheet while releasing the other. This makes it a lot easier to gybe but is less suited to sailing directly downwind. There is the loophole of having the asymmetric spinnaker gybed to the side opposite of the boom, so that the boat is sailing ‘wing-on-wing,’ though this is a more advanced maneuver, generally reserved for certain conditions and tactical racing situations.
On the contrary, the asymmetric spinnaker is perfect for fast planing dinghies. This is because such vessels have speeds that generate apparent wind forward. Because asymmetrics, by nature, prefer to sail shallower downwind angles, this apparent wind at high speeds makes the boat think that it is sailing higher than it really is, allowing you to drive a little lower off the breeze than normal. . In essence, the asymmetric spinnaker is vital if you're looking for easy handling.
Symmetric Spinnakers
Symmetric spinnakers are a classic sail type that has been used for centuries for controlling boats by lines known as a guy and a sheet. The guy, which is a windward line, is attached to the tack of the sail and stabilized by a spinnaker pole. The sheet, which is the leeward line, is attached to the clew of the spinnaker and is essential in controlling the shape of the spinnaker sail.
When set correctly, the leading edges of the symmetric spinnaker should be almost parallel to the wind. This is to ensure that the airflow over the leading edge remains attached. Generally, the spinnaker pole should be at the right angles to the apparent wind and requires a lot of care when packing.
The main disadvantage of this rig is the need to gybe the spinnaker pole whenever you gybe the boat. This is a complicated maneuver, and is one of the most common places for spinnakers to rip or get twisted. If, however, you can master this maneuver, you can sail at almost any angle downwind!
How to Use Spinnaker Effectively
If you decide to include the spinnakers to your sailboat, the sailmaker will want to know the type of boat you have, what kind of sailing you do, and where you sail. As such, the spinnaker that you end up with should be an excellent and all-round sail and should perform effectively off the breeze
The type of boat and where you'll be sailing will hugely influence the weight of your spinnaker cloth. In most cases, cruising spinnakers should be very light, so if you've decided to buy a spinnaker, make sure that it's designed per the type of your sailboat and where you will be sailing. Again, you can choose to go for something lighter and easier to set if you'll be sailing alone or with kids who are too young to help.
Setting up Spinnakers
One of the main reasons why sailors distrust spinnakers is because they don't know how to set them up. That being said, a perfectly working spinnaker starts with how you set it up and this revolves around how you carefully pack it and properly hook it up. You can do this by running the luff tapes and ensuring that the sails are not twisted when packed into the bag. If you are using large spinnakers, the best thing to do is make sure that they're set in stops to prevent the spinnakers from filling up with air before you even hoist them fully.
But even with that, you cannot fully set the spinnaker while sailing upwind. Make sure to bear away and have your pole ready to go as you turn downwind. You should then bear away to a reach before hoisting. Just don't hoist the spinnakers from the bow as this can move the weight of the crew and equipment forward.
Used when sailing downwind, a gennaker is asymmetric sail somewhere between a genoa and a spinnaker. It sets itself apart because it gennaker is a free-flying asymmetric spinnaker but it is tacked to the bowsprit like the jib.
Let's put it into perspective. Even though the genoa is a great sail for racing and cruising, sailors realized that it was too small to be used in a race or for downwind sail and this is the main reason why the spinnaker was invented. While the spinnakers are large sails that can be used for downwind sail, they are quite difficult to handle especially if you're sailing shorthanded. As such, this is how a gennaker came to be: it gives you the best of both worlds.
Gennakers are stable and easy to fly and will add to your enjoyment and downwind performance.
The Shape of a Gennaker
As we've just noted, the gennaker is asymmetrical. It doesn't attach to the forestay like the genoa but has a permanent fitting from the mast to bow. It is rigged exactly like a spinnaker but its tack is fastened to the bowsprit. This is fundamentally an essential sail if you're looking for something to bridge the gap between a genoa and a spinnaker.
Setting a Gennaker
When cruising, the gennaker is set with the tack line from the bow, a halyard, and a sheet that's led to the aft quarter. Attach the tack to a furling unit and attach it to a fitting on the hull near the very front of the sailboat. You can then attach the halyard that will help in pulling it up to the top of the mast before attaching it to the clew. The halyard can then run back to the winches to make the controlling of the sail shape easier, just like when using the genoa sail.
In essence, a gennaker is a superb sail that will give you the maximum versatility of achieving the best of both a genoa and a spinnaker, especially when sailing downwind. This is particularly of great importance if you're cruising by autopilot or at night.
Light Air Sails
Even though downwind sails can be used as light air sails, not all light air sails can be used for downwind sailing. In other words, there's a level of difference between downwind sails and light air sails. Light air sails include code zero, windseeker, and drifter reacher.
A cross between an asymmetrical spinnaker and a genoa, a code zero is a highly modern sail type that's generally used when sailing close to the wind in light air. Although the initial idea of code zero was to make a larger genoa, it settled on a narrow and flat spinnaker while upholding the shape of a genoa.
Modern boats come with code zero sails that can be used as soon as the sailboat bears off close-hauled even a little bit. It has a nearly straight luff and is designed to be very flat for close reaching. This sail is designed to give your boat extra performance in light winds, especially in boats that do not have overlapping genoas. It also mitigates the problem of loss of power when you are reaching with a non-overlapping headsail. Really, it is closer to a light air jib that sacrifices a little angle for speed.
In many conditions, a code zero sail can go as high as a sailboat with just a jib. By hoisting a code zero, you'll initially have to foot off about 15 degrees to fill it and get the power that you require to heel and move the boat. The boat will not only speed up but will also allow you to put the bow up while also doing the same course as before you set the zero. In essence, code zero can be an efficient way of giving your boat about 30% more speed and this is exactly why it's a vital inventory item in racing sailboats.
When it comes to furling code zero, the best way to do it is through a top-down furling system as this will ensure that you never get a twist in the system.
Generally used when a full size and heavier sail doesn't stay stable or pressurized, a windseeker is a very light sail that's designed for drifting conditions. This is exactly why they're designed with a forgiving cloth to allow them to handle these challenging conditions.
The windseeker should be tacked at the headstay with two sheets on the clew. To help this sail fill in the doldrums, you can heel the boat to whatever the apparent leeward side is and let gravity help you maintain a good sail shape while reaching.The ideal angle of a windseeker should be about 60 degrees.
Though only used in very specific conditions, the windseeker is so good at this one job that it is worth the investment if you plan on a long cruise. Still, you can substitute most off the breeze sails for this in a pinch, with slightly less performance gain, likely with more sacrifices in angle to the breeze.
Drifter Reacher
Many cruising sailors often get intimidated by the idea of setting and trimming a drifter if it's attached to the rig at only three corners or if it's free-flying. But whether or not a drifter is appropriate for your boat will hugely depend on your boat's rig, as well as other specific details such as your crew's ability to furl and unfurl the drifter and, of course, your intended cruising grounds.
But even with that, the drifter remains a time-honored sail that's handy and very versatile. Unlike other light air sails, the drifter perfectly carries on all points of sails as it allows the boat to sail close-hauled and to tack. It is also very easy to control when it's set and struck. In simpler terms, a drifter is principally a genoa that's built of lightweight fabric such as nylon. Regardless of the material, the drifter is a superb sail if you want to sail off a lee shore without using the genoa.
Generally stronger than other regular sails, stormsails are designed to handle winds of over 45 knots and are great when sailing in stormy conditions. They include a storm jib and a trysail.
If you sail long and far enough, chances are you have or will soon be caught in stormy conditions. Under such conditions, storm jibs can be your insurance and you'll be better off if you have a storm jib that has the following features:
- Robustly constructed using heavyweight sailcloth
- Sized suitably for the boat
- Highly visible even in grey and white seas
That's not all; you should never go out there without a storm jib as this, together with the trysail, is the only sails that will be capable of weathering some of nature's most testing situations.
Storm jibs typically have high clews to give you the flexibility of sheet location. You can raise the sail with a spare halyard until its lead position is closed-hauled in the right position. In essence, storm jib is your insurance policy when out there sailing: you should always have it but always hope that you never have to use it.
Also known as a spencer, a trysail is a small, bright orange, veritably bullet-proof, and triangular sail that's designed to save the boat's mainsail from winds over 45 knots and works in the same way as a storm jib. It is designed to enable you to make progress to windward even in strong and stormy winds.
Trysails generally use the same mast track as the mainsail but you have to introduce the slides into the gate from the head of the trysail.
There are two main types of rigs: the fore-and-aft rig and the square rigg.
Fore-and-aft Rig
This is a sailing rig that chiefly has the sails set along the lines of the keel and not perpendicular to it. It can be divided into three categories: Bermuda rig, Gaff rig, and Lateen rig.
Bermuda Rig - Also known as a Marconi rig, this is the typical configuration of most modern sailboats. It has been used since the 17th century and remains one of the most efficient types of rigs. The rig revolves around setting a triangular sail aft of the mast with the head raised to the top of the mast. The luff should run down the mast and be attached to the entire length.
Gaff Rig - This is the most popular fore-and-aft rig on vessels such as the schooner and barquentine. It revolves around having the sail four-cornered and controlled at its peak. In other words, the head of the mainsail is guided by a gaff.
Lateen Rig - This is a triangular fore-and-aft rig whereby a triangular sail is configured on a long yard that's mounted at a given angle of the mast while running in a fore-and-aft direction. Lateen rig is commonly used in the Indian Ocean and the Mediterranean.
Square Rigged
This is a rig whereby the mainsails are arranged in a horizontal spar so that they're square or vertical to the mast and the keel of the boat. The square rig is highly efficient when sailing downwind and was once very popular with ocean-going sailboats.
Unquestionably, sailing is always pleasurable. Imagine turning off the engine of your boat, hoisting the sails, and filling them with air! This is, without a doubt, a priceless moment that will make your boat keel and jump forward!
But being propelled by the noiseless motion of the wind and against the mighty currents and pounding waves of the seas require that you know various sail types and how to use them not just in propelling your boat but also in ensuring that you enjoy sailing and stay safe. Sails are a gorgeous way of getting forward. They remain the main fascination of sailboats and sea cruising. If anything, sails and boats are inseparable and are your true friends when out there on the water. As such, getting to know different types of sails and how to use them properly is of great importance.
All in all, let's wish you calm seas, fine winds, and a sturdy mast!
Related Articles
Daniel Wade
I've personally had thousands of questions about sailing and sailboats over the years. As I learn and experience sailing, and the community, I share the answers that work and make sense to me, here on Life of Sailing.
by this author
Learn About Sailboats
Sailboat Parts
Most Recent

What Does "Sailing By The Lee" Mean?
October 3, 2023

The Best Sailing Schools And Programs: Reviews & Ratings
September 26, 2023
Important Legal Info
Lifeofsailing.com is a participant in the Amazon Services LLC Associates Program, an affiliate advertising program designed to provide a means for sites to earn advertising fees by advertising and linking to Amazon. This site also participates in other affiliate programs and is compensated for referring traffic and business to these companies.
Similar Posts

Affordable Sailboats You Can Build at Home
September 13, 2023

Best Small Sailboat Ornaments
September 12, 2023

Discover the Magic of Hydrofoil Sailboats
December 11, 2023
Popular Posts

Best Liveaboard Catamaran Sailboats
December 28, 2023

Can a Novice Sail Around the World?
Elizabeth O'Malley
June 15, 2022

4 Best Electric Outboard Motors

How Long Did It Take The Vikings To Sail To England?

10 Best Sailboat Brands (And Why)
December 20, 2023

7 Best Places To Liveaboard A Sailboat
Get the best sailing content.
Top Rated Posts
© 2024 Life of Sailing Email: [email protected] Address: 11816 Inwood Rd #3024 Dallas, TX 75244 Disclaimer Privacy Policy
Currency: GBP
- Worldwide Delivery
Mooring Warps and Mooring Lines
- LIROS 3 Strand Polyester Mooring Warps
- LIROS Green Wave 3 Strand Mooring Warps
- LIROS Braided Dockline Mooring Warps
- LIROS Handy Elastic Mooring Warps
- Marlow Blue Ocean Dockline
- LIROS Super Yacht Mooring Polyester Docklines
- 50 metre / 100 metre Rates - Mooring
Mooring Accessories
- Mooring Compensators
Mooring Strops and Bridles
- V shape Mooring Bridles
- Y shape Mooring Bridles
- Small Boat and RIB Mooring Strops
- Mooring Strops
- Mooring Strops with Chain Centre Section
Mooring Assistance
- Coastline Bow Thruster Accessories
- Max Power Bow Thrusters
- Bonomi Mooring Cleats
- Majoni Fenders
- Polyform Norway Fenders
- Ocean Inflatable Fenders
- Dock Fenders
- Fender Ropes and Accessories
Mooring Components
- Mooring Swivels
- Mooring Shackles
- Mooring Cleats and Fairleads
- Mooring Buoys
Mooring Information
- Mooring Warps Size Guide
- Mooring Lines - LIROS Recommended Diameters
- Mooring Rope Selection Guide
- Mooring Warp Length and Configuration Guide
- How to estimate the length of a single line Mooring Strop
- Mooring Ropes - Break Load Chart
- Mooring Compensator Advisory
- Rope Cockling Information
- Fender Size Guide
- Majoni Fender Guide
- Polyform Norway Fender Inflation Guide
- More Article and Guides >
Anchor Warps Spliced to Chain
- LIROS 3 Strand Nylon Spliced to Chain
- LIROS Anchorplait Nylon Spliced to Chain
Anchor Warps
- LIROS Anchorplait Nylon Anchor Warps
- LIROS 3 Strand Nylon Anchor Warps
- Leaded Anchor Warp
- Drogue Warps and Bridles
- 50 / 100 metre Rates - Anchoring
- Aluminium Anchors
- Galvanised Anchors
- Stainless Steel Anchors
Calibrated Anchor Chain
- Cromox G6 Stainless Steel Chain
- G4 Calibrated Stainless Steel Anchor Chain
- Lofrans Grade 40
- MF DAMS Grade 70
- MF Grade 40
- Titan Grade 43
- Lewmar Windlasses
- Lofrans Windlasses
- Maxwell Windlasses
- Quick Windlasses
- Windlass Accessories and Spares
Chain Snubbers
- Chain Hooks, Grabs and Grippers
- Chain Snubbing Bridles
- Chain Snubbing Strops
Anchoring Accessories
- Anchor Connectors
- Anchor Trip Hooks and Rings
- Anchoring Shackles
- Bow Rollers and Fittings
- Chain and Anchor Stoppers
- Chain Links and Markers
Anchoring Information
- How To Choose A Main Anchor
- Anchoring System Assessment
- Anchor Chain and Rope Size Guide
- The Jimmy Green Guide to the Best Anchor Ropes
- What Size Anchor Do I Need?
- Anchor to Chain Connection Guide
- How to Choose Your Anchor Chain
- How to Establish the Correct Anchor Chain Calibration?
- Calibrated Anchor Chain - General Information
- Calibrated Anchor Chain Quality Control
- Calibrated Chain - Break Load and Weight Guide
- Galvanising - Managing Performance and Endurance expectation
- Can Galvanised Steel be used with Stainless Steel?
- Windlass Selection Guide
- More Articles and Guides
Stainless Steel Wire Rigging and Wire Rope
- 1x19 Wire Rigging
- 50 / 100 metre Rates - Wire and Fibre
- 7x19 Flexible Wire Rigging
- Compacted Strand Wire Rigging
Dinghy Rigging
- Stainless Steel Dinghy Rigging
- Dinghy Rigging Fittings
Fibre Rigging
- LIROS D-Pro Static Rigging
- LIROS D-Pro-XTR Fibre Rigging
- DynIce Dux Fibre Rigging
- Fibre Rigging Fittings
Wire Terminals
- Cones, Formers, Wedges, Ferrules, Rigging Spares
- Hi-Mod Swageless Terminals
- Sta-Lok Swageless Terminals
- Swage Terminals
Wire Rigging Fittings
- Turnbuckle Components
Rigging Accessories
- Rigging Chafe Protection
- Headsail Reefing Furlers
- Plastimo Jib Reefing
- Selden Furlex Reefing Gear
Furling Systems
- Anti-torsion Stays
- Straight Luff Furlers
- Top Down Furlers
Guard Wires, Rails and Fittings
- Guard Rail Fittings
- Guard Rails in Fibre and Webbing
- Guard Wire Accessories
- Guard Wires
Standing Rigging Assistance
- Replacing your Furling Line
- Fibre Rigging Break Load Comparison Guide
- More Articles and Guides >
- Cruising Halyards
- Performance Halyards
- Dinghy Halyards
Rigging Shackles
- Captive and Key Pin Shackles
- hamma™ Snap Shackles
- Soft Shackles
- Standard Snap Shackles
- Wichard Snap Shackles
Classic Ropes
- Classic Control Lines
- Classic Halyards
- Classic Sheets
- Cruising Sheets
- Performance Sheets
- Dinghy Sheets
Sail Handling
- Boom Brakes and Preventers
- Lazy Jack Sail Handling
- Rodkickers, Boomstruts
- Sail Handling Accessories
50 / 100 metre Rates - Running Rigging
- 50 / 100 metres - Cruising Ropes
- 50 / 100 metres - Dinghy Ropes
- 50 / 100 metres - Performance Ropes
Control Lines
- Cruising Control Lines
- Performance Control Lines
- Dinghy Control Lines
- Continuous Control Lines
Running Rigging Accessories
- Anti-Chafe Rope Protection
- Lashing, Lacing and Lanyards
- Mast and Boom Fittings
- Rope Stowage
- Sail Ties and Sail Stowage
- Shock Cord and Fittings
- LIROS Ropes
- Marlow Ropes
Running Rigging Resources
- Running Rigging Rope Fibres and Construction Explained
- How to Select a Suitable Halyard Rope
- How to select Sheets and Guys
- Dyneema Rope - Cruising and Racing Comparison
- Dinghy Rope Selection Guide
- Rope Measurement Information
- Running Rigging - LIROS Recommended Line Diameters
- Running Rigging Break Load Comparison Chart
- Colour Coding for Running Rigging
- Selecting the right type of block, plain, roller or ball bearing
- Recycling Rope
- Running Rigging Glossary
Plain Bearing Blocks
- Barton Blocks
- Harken Element Blocks
- Low Friction Rings
- Selden Yacht Blocks
- Wichard MXEvo Blocks
- Wooden Yacht Blocks
Control Systems
- Ratchet Blocks
- Stanchion Blocks and Fairleads
- Snatch Blocks
- Genoa Car Systems
- Traveller Systems
- Block and Tackle Purchase Systems
Ball Bearing Blocks
- Harken Ball Bearing Blocks
- Selden Ball Bearing Blocks
Roller Bearing Blocks
- Harken Black Magic Blocks
- Selden Roller Bearing Blocks
Deck Fittings
- Bungs and Hatches
- Bushes and Fairleads
- Deck Eyes, Straps and Hooks
- Pad Eyes, U Bolts and Eye Bolts
- Pintles and Gudgeons
- Tiller Extensions and Joints
- Harken Winches, Handles and Accessories
- Barton Winches, Snubbers and Winchers
- Lewmar Winches, Handles and Accessories
- Winch Servicing and Accessories
Clutches and Organisers
- Barton Clutches and Organisers
- Spinlock Clutches and Organisers
- Lewmar Clutches
- Harken Ball Bearing Cam Cleats
- Barton K Cam Cleats
Deck Hardware Support
- Blocks and Pulleys Selection Guide
- Barton High Load Eyes
- Dyneema Low Friction Rings Comparison
- Seldén Block Selection Guide
- Barton Track Selection Guide
- Barton Traveller Systems Selection Guide
- Harken Winch Selection Guide
- Karver Winch Comparison Chart
- Lewmar Winch Selection Guide - PDF
- Winch Servicing Guide
Sailing Flags
- Courtesy Flags
- Red Ensigns
- Blue Ensigns
- Signal Code Flags
- Flag Staffs and Sockets
- Flag Accessories
- Flag Making and Repair
- Webbing only
- Webbing Soft Shackles
- Webbing Restraint Straps
- Webbing Sail Ties
- Sail Sewing
- PROtect Tape
Fixings and Fastenings
- Screws, Bolts, Nuts and Washers
- Monel Rivets
Hatches and Portlights
- Lewmar Hatches
- Lewmar Portlights
- Fids and Tools
- Knives and Scissors
General Chandlery
- Carabiners and Hooks
- Antifouling
Flag Articles
- Flag Size Guide
- Bending and Hoisting Methods for Sailing Flags
- Courtesy Flags Identification, Labelling and Stowage
- Courtesy Flag Map
- Flag Etiquette and Information
- Glossary of Flag Terms and Parts of a Flag
- Making and Repairing Flags
- Signal Code Message Definitions
Other Chandlery Articles
- Anchorplait Splicing Instructions
- Antifoul Coverage Information
- Hawk Wind Indicator Selection Guide
- Petersen Stainless - Upset Forging Information
- Speedy Stitcher Sewing Instructions
- Thimble Dimensions and Compatible Shackles
Jackstays and Jacklines
- Webbing Jackstays
- Stainless Steel Wire Jackstay Lifelines
- Fibre Jackstay Lifelines
- Jackstay and Lifeline Accessories
Lifejackets
- Crewsaver Lifejackets
- Seago Lifejackets
- Spinlock Lifejackets
- Children's Life Jackets
- Buoyancy Aids
Floating Rope
- LIROS Multifilament Polypropylene
- LIROS Yellow Floating Safety Rope
Guard Wires, Guardrails and Guardrail Webbing
Lifejacket accessories.
- Lifejacket Lights
- Lifejacket Rearming Kits
- Lifejacket Spray Hoods
- Safety Lines
Seago Liferafts
- Grab Bag Contents
- Grab Bags and Polybottles
- Liferaft Accessories
- Danbuoy Accessories
- Jimmy Green Danbuoys
- Jonbuoy Danbuoys
- Seago Danbuoys
Overboard Recovery
- Lifebuoy Accessories
- Purchase Systems
- Slings and Throwlines
Safety Accessories
- Fire Safety
- Sea Anchors and Drogues
Safety Resources
- Guard Wires - Inspection and Replacement Guidance
- Guard Wire Stud Terminal Dimensions
- Webbing Jackstays Guidance
- Webbing Jackstays - Custom Build Instructions
- Danbuoy Selection Guide
- Danbuoy Instructions - 3 piece Telescopic - Offshore
- Liferaft Selection Guide
- Liferaft Servicing
- Man Overboard Equipment - World Sailing Compliance
- Marine Safety Information Links
- Safety Marine Equipment List for UK Pleasure Vessels
Sailing Clothing
- Sailing Jackets
- Sailing Trousers
- Thermal Layers
Leisure Wear
- Accessories
- Rain Jackets
- Sweatshirts
Sailing Footwear
- Dinghy Boots and Shoes
- Sailing Wellies
Leisure Footwear
- Walking Shoes
Sailing Accessories
- Sailing Bags and Holdalls
- Sailing Gloves
- Sailing Kneepads
Clothing Clearance
Clothing guide.
- What to wear Sailing
- Helly Hansen Mens Jacket and Pant Size Guide
- Helly Hansen Womens Sailing Jacket and Pant Size Guide
- Lazy Jacks Mens and Womens Size Charts
- Musto Men's and Women's Size Charts
- Old Guys Rule Size Guide
- Sailing Gloves Size Guides
- Weird Fish Clothing Size Charts
The Jimmy Green Clothing Store
Lower Fore St, Beer, East Devon, EX12 3EG
- Adria Bandiere
- Anchor Marine
- Anchor Right
- August Race
- Barton Marine
- Blue Performance
- Brierley Lifting
- Brook International
- Brookes & Adams
- Captain Currey
- Chaineries Limousines
- Coastline Technology
- Colligo Marine
- Cyclops Marine
- Douglas Marine
- Ecoworks Marine
- Exposure OLAS
- Fire Safety Stick
- Fortress Marine Anchors
- Hawk Marine Products
- Helly Hansen
- International
- Jimmy Green Marine
- Maillon Rapide
- Mantus Marine
- Marling Leek
- Meridian Zero
- MF Catenificio
- Ocean Fenders
- Ocean Safety
- Old Guys Rule
- Petersen Stainless
- Polyform Norway
- PSP Marine Tape
- Sidermarine
- Stewart Manufacturing Inc
- Team McLube
- Technical Marine Supplies
- Titan Marine (CMP)
- Ultramarine
- Waterline Design
- William Hackett
Clearance LIROS Racer Dyneema £55.08
Clearance Folding Stock Anchor £123.25
Clearance Sarca Excel Anchors £294.00
Clearance LIROS Herkules £0.00
Clearance Barton Size 0 Ball Bearing Blocks - 5mm £0.00
Clearance Marlow Blue Ocean® Doublebraid £18.48
Mooring Clearance
Anchoring clearance, standing rigging clearance, running rigging clearance, deck hardware clearance, chandlery clearance, safety clearance, guide to tackling a complete re-rig.
30 Oct 2018
Replacing your Standing Rigging with Jimmy Green Marine
The task of replacing the standing rigging on a sailing yacht may seem daunting but there is a procedure to follow that can make it a relatively straight forward process for anyone who is reasonably practical.
The first decision is whether to tackle the job with the mast up or down.
If you have enough time together with the availability of a mast lift, then mast down is by far the easier option. The whole project will be much easier with the mast horizontal and chocked up on firm ground and accessible to work. You may even elect to carry out the upper mast inspection after lowering the mast to save going aloft in a bosuns chair. You will be able to purchase each wire with swaged terminals at both ends finished and ready to fit. You can order yourself online or with help from the Jimmy Green Rigging Team.

You can take confidence from the fact there is a good deal of adjustment on the rigging screws to allow for any minor errors in measurement. It’s worth noting that Team Jimmy Green set the turnbuckles at 2/3 open unless otherwise requested and undertake to produce the finished wires accurately to within plus or minus the diameter of the wire.
If the mast has to remain stepped, you need a slightly different approach, generally involving the purchase of each wire over long with the top terminal swaged. The bottom end will need to be finished in situ by cutting to the exact length and fitting a DIY swageless (mechanical) terminal. Modern Swageless terminals from Sta-Lok or Petersen are fairly simple to fit so you can be confident of success.

Rigging Checklist
- Rig Tune and Tension check on existing rigging
- Consider any design or specification alterations
- Close inspection of all components including measuring diameters
- Take photos
- Mark all tension settings (with tape above and/or below the rigging screw)
- Determine any possible improvements
- Order process for mast unstepped
- Order process for mast remaining stepped
Each step is explained more fully below:
1. Rig Tune and Tension check on existing rigging
Begin by checking that your current rigging is set up and tuned correctly. This need not be as technical as it sounds - you just need to be sure that you are copying a rig that works well. The essentials are mast rake and bend, athwartship vertical alignment and correct tensioning. You may want to elicit some professional advice but if your current set up performs satisfactorily upwind and downwind on both tacks/gybes, it may be best not to interfere with the current settings. The aim of the game is to replicate the old rig with a new one within parameters that allow for adjustment and tuning.

Look for extra unnecessary shackles or toggles which may have been added to compensate for the wire being too short and determine whether they can be omitted from the new rig.
2. Consider any design or specification alterations
The next step is to survey all aspects of the rigging including an assessment of whether the existing is the right design and specification for your anticipated purposes e.g Coastal, Offshore or Ocean Cruising, occasional or hard core racing.
3. Close inspection of all components
Carry out a thorough inspection of the rigging including all the wire, terminals and clevis pins. Establish the size of every component and make notes. A good quality pair of callipers is an invaluable investment for producing accurate results.
Once you have confirmed the wire diameter, the approximate length and identified the terminals top and bottom, it is a simple online exercise to get an accurate estimate of the replacement cost on JimmyGreen.com/standing rigging . Alternatively, Team Jimmy Green can readily produce a costing based on the same information.

4. Take photos
Take photos of everything including zoomed in detail of anything you are not sure about and any others that will serve as a reminder when fitting the new shrouds and stays.
Check for any signs of wear or structural damage and identify the probable cause. Problems can occur for many reasons e.g. misalignment leading to stress at an odd angle, fittings that allow unnecessary movement, lack of articulation due to missing toggles, undersize clevis pins or oversize clevis pin holes. Some of these may be part of the reason that you are replacing the rig so it is best to avoid repeating the issue on the new set up.

There are standard pin and hole diameters that correspond with the thread size of the studs in the turnbuckles. There is a varied choice of stud/turnbuckle sizes on each wire diameter. Components either side of the normal sizing ared enotes as Down Size and Up Size by Petersen Stainless Rigging. Threads are generally UNF or possibly the Metric equivalent. The table below sets out all the relevant sizes for standard, down size and up size components. If your rigging has special non standard characteristics, the Jimmy Green Rigging Team can source bespoke replacements or suggest suitable alternatives.
This chart is a guide only. Please check all dimensions before ordering your rigging.

5. Mark all tension settings
Make a note of all the turnbuckle settings before you disconnect any shrouds or stays by marking them with tape or taking photos. You will need to loosen all the turnbuckles to disconnect them at deck level.
Remember to return them to their noted settings before measuring. The new rigging can then be made to the required length with the optimum adjustment, normally 2/3 open.

6. Determine any possible improvements
One last check to ensure that there isn’t a change of fitting or a tweak in the set up that will make the new rig an improvement on the old one.
7. Order Process for Mast Unstepped.
Dependent on the time factor there are two main options to consider:
Determine the terminals required, measure the wires, make any adjustments and place your order either online or by emailing your requirements for Team Jimmy Green to load the order for you.
N.B. The old wires should be removed from the mast, pulled out taut with a little tension if possible to ensure that they are straight in readiness for measuring.
Measurements are from bearing edge to bearing edge of the pins or eyes.
For T terminals and studs, refer to our Standing Rigging Custom Build Instructions .
Label the individual stays. You may need them as an aide memoire when you come to fit the new standing rigging.
Check and double check your measurements and terminal fittings before ordering. Remember the old adage: “Measure twice, cut once”.
Remove the old stays, labelling them carefully as you go and noting any amendments required to length or fittings.
Coil the wires as neatly as possible.
Send them or bring them to Jimmy Green Marine for assessment and a quote.
This option puts the onus on the Jimmy Green Rigging Team to replicate your rigging accurately.
8. Order Process for mast remaining stepped
Establish the length of the existing shrouds and stays.
Order new wires with the required top terminals swaged on and the wire length appropriately over length for cutting and fitting in situ.
Order DIY swageless terminals for the bottom end.
The wire should be long enough so that it can be cut and fitted with the new swageless terminal to finish at the desired length.
N.B. Replacing the forestay will be tricky if it is fitted with a headsail furler and you may need professional help.
Standing Rigging Assistance Shop for Standing Rigging
Related products
Spinlock rig-sense tension gauge, 5mm 1x19 stainless steel wire standing rigging, sta-lok stud, petersen stainless insulators - compression and compression, 100 metre reel - 1x19 stainless steel wire, author: jimmy green, you may also like.

Carrying replacement rigging for emergency use
Keyboard_arrow_left sea anchors and yacht drogues, sheets and halyards selection guide keyboard_arrow_right.
Join us and Try Sailing!
Sailing on the inshore waters of Newcastle Harbour gives us the opportunity to sail in a protected yet challenging waterway, with fantastic views and varied conditions.
We welcome you to join us and start your sailing journey with us today . . .
'Discover Sailing' Experience
Discover sailing experience, have you always wanted to ‘try sailing’.
Join us for one of our ‘Discover Sailing Experiences’ which provides that opportunity to get out on the water and see what it’s like.
Our experienced sailing instructors will take you out on one of our small inshore keelboats to “give you a taste” of what sailing is all about. You will spend 3 hours learning basic sailing skills, terminology, and boat handling manoeuvres.
Enjoy the unique opportunity to see our city from a different perspective!
This might just whet your appetite to join us for one of our Learn to Sail courses . . .
$80 per person , conducted on weekend mornings from 9:00am to 12:00noon .
“Just what I wanted with lots of hands on experience and guidance. Should have done it years ago.”
“Learnt heaps! Our instructor was very knowledgeable and sharing.”
“Emma was really good. Her personality and relaxed way made for a really enjoyable day.”
“The instructor was excellent and the boat was ideal for learning.”
“It was a fantastic experience that everyone should do one day.”
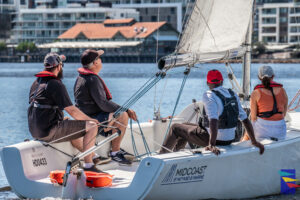
'Give it a Go' Racing
‘give it a go’ racing, join us on a wednesday evening* and sail alongside our club twilight racers.
No previous sailing experience required, you’ll have an instructor onboard to guide you!
Sailing on our ‘Force 24’ inshore keelboats which carry a crew of five.
You’ll have the chance to quickly ‘learn the ropes’, then start the race (near Queens Wharf), and head up to Nobby’s, round the marker buoy and then head back to the finish near the clubhouse – all whilst taking in the amazing view of our beautiful city from the water!
We’ll meet at the marina at 5:30pm for a briefing & boat rigging, the race start will be at 6:00pm.
Depending upon the wind, we’ll be back into the marina around 7:30pm to unrig.
We’ll head up to the clubhouse with the rest of the NCYC racing crews for the presentation, to see who takes out the ‘Boat of the Day’ prize!
Secure your place on a racing crew for only $55 per person.
Why not organise a group of four friends and sail together with our instructor to make your crew of five!
Bookings are essential – Enrolments are open until 12:00pm on the day of sailing.
*During Daylight Savings only
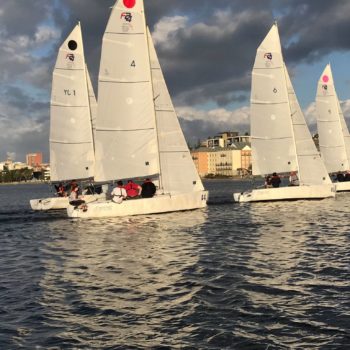
Friday Twilight Sailing
Friday twilight sailing, a great way to kick-start your weekend . . ..
Walk or light-rail it down from the office, jump on-board for a casual easy sail and see our city from a totally new angle!
5:30pm meet at the top of F-Arm of our Marina (out the front of the clubhouse).
We’ll be back ashore around 7:30pm as the sun is setting, then we’ll head up to the Clubhouse for a free drink!
We run weekly on a Friday during Daylight Savings Time (DST).
You can join us either as a regular activity or just on the ad-hoc dates that suit your lifestyle.
We cater for complete beginners through to those enjoying a regular sail. Our Force 24 inshore keelboats carry a qualified instructor and up to four participants.
Bookings are essential – Enrolments are open until 12:00pm on the day of sailing.
Just $55 per person for a Friday sail and a drink in the clubhouse afterwards . . . and maybe stay for dinner!
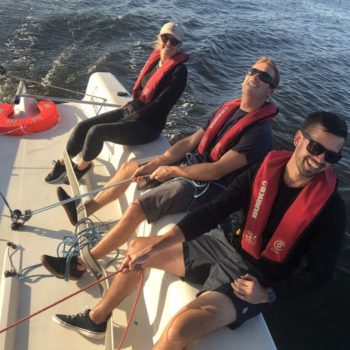
Family Sailing Adventures
Family sailing adventures, time spent with family is worth every second . . ..
Join us as a family group for a two-hour sailing experience which provides that opportunity to get out on the water and spend time together doing something fun!
Conducted on Friday afternoons during daylight savings times from 5:30pm to 7:30pm
$200 per boat , which can carry up to four family members plus our instructor (more kids? Please see our FAQs)
Suitable for children from 7 years of age onwards and at least one adult must be onboard.
We require a minimum of two participants , plus our instructor to sail the boat safely (pending weather conditions).

You’ll also receive a gift voucher to enjoy a free share bowl of chips back in the clubhouse while you share your ‘sailing stories’ . . .
So why not be intentional about planning some family time into your week.
You’ll be making great memories for you and your children and likely relieving stress in the process!
It can be a once-off session or make it a weekly habit . . .
Just wait for your kids to start asking, “can we do that again?”
What to Wear
What to wear.
All you need to wear are some comfortable, warm clothes that are suitable for outdoor activity and allow you freedom of movement, with a pair of enclosed shoes to protect your feet.
Active wear is suitable or shorts/trousers & t-shirt/polo shirt.
A wind/spray jacket is a good idea for cooler days.
Joggers/sandshoes or any non-marking rubber soled shoes that provide support would be suitable.
For sun protection we recommend a hat with a chin strap or one that is firm fitting so as not to blow off in the wind.
Don’t forget suncream!
Sunglasses should be secured with a flexible strap if possible.
We will supply you with a correctly fitting self inflating life-jacket or personal flotation device(PFD).
Your ‘sailing gear’ may get slightly wet from occasional splashes.
The Boats we Sail
Our keelboat sailing courses are conducted on the Club’s fleet of ‘Force 24s’, which are 24 feet (7.31m) long and carry an Instructor and up to four course participants.
We will sail with a headsail or jib (small sail at the front) and a mainsail (large sail on the tall mast).
All sailing boats lean to the side with the wind but these boats were specifically designed for teaching beginning sailors and are very stable. They have a large lead keel for ballast that prevents the boat from tipping over.
As a course participant you will be actively involved in sailing the boats, pulling ropes, moving around the boat and most importantly ducking under the boom to swap sides as you tack or gybe to change directions.
Your instructor will lead you through all of these sailing terms and will explain (and support you through) each of these actions.
We will be sailing inshore on the mainly flat waters of Newcastle Harbour, we do not go out onto the ocean.
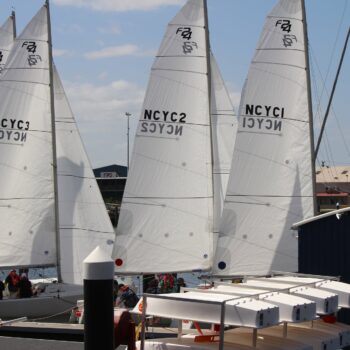
Our Instructors
Instructors.
Our wonderful team of Instructors are all skilled and experienced sailors, many of whom actively sail themselves every weekend.
All hold specific keelboat qualifications with Australian Sailing (AS) as well as additional & complimentary certifications.
- AS Keelboat Instructor certificate
- Instructor General Principles
- First Aid certificate
- Working with Children Check
- Powerboat Handling certificate and General Boat Licence
Adult Sailing Pathway
Adult sailing pathway.
NCYC has developed a comprehensive Sailing Pathway to help guide sailors of all ages and abilities in the right direction and is one of only a few clubs in Australia that deliver all Australian Sailing pathway levels, from the beginnings right through to the advanced programs.
We are continually developing opportunities to support those who have come through the Sailing Academy and wish to continue on to progress their skills and knowledge in various sailing activities.

Frequently Asked Questions
Frequently asked questions.
Details are being updated and will be posted soon!

Number 1 National Keelboat Program centre in Australia

Number 3 Discover Sailing C entre in Australia

Number 7 Tackers centre in Australia

Number 9 OutThere Sailing centre in Australia
Australian Sailing Annual Participation Report 2023
Contact Us: For more information or assistance with booking, please contact us at the Sailing Academy! (02) 4940 8188 [email protected]

NORDIC TUGS
NORTHERN MARINE
BULLFROG BOATS
MY YACHT WORTH?
- USED YACHTS
FEATURED LISTINGS
YACHTS BY BUILDER
YACHTS BY LOCATION
YACHTS BY TYPE
WHY LIST WITH US
- BUYING A TRAWLER YACHT
- TRAWLER BOAT BUYER'S GUIDE
FT LAUDERDALE
MARINA DEL REY
SAN FRANCISCO BAY
VICTORIA B.C.
- SERVICE - PNW
FLOTILLA EVENTS
SEATTLE SAILING ACADEMY
- JOIN OUR TEAM
1978 Bristol 35.5
Boat Name: "Age of Reason"
Age of Reason is a 1978 Bristol 35.5 currently available for sale in Rock Hall Maryland. This boat has a price of $32,500. Our team at Seattle Yachts is here to help you find the right boat for your needs, budget, and style. We have access to boats off the market that will never be seen online, so contact us today with your interest.
Price: $32,500

SPECIFICATIONS
| Price: | $32,500 |
| Boat Name: | Age of Reason |
| Make: | Bristol |
| Model: | 35.5 |
| Year: | 1978 |
| Condition: | Used |
| Category: | Sloop |
| Construction: | Fiberglass |
| Length: | 35 ft |
| Display Length: | 36 ft |
| Beam: | 10 ft 10 in |
| Max Draft: | 9 ft 6 in |
| Min Draft: | 3 ft 9 in |
| Fuel Capacity (Gallons): | 31 |
| Fuel Type: | Diesel |
| Fresh Water Capacity (Gallons): | 100 |
| Max Speed: | 7 kn |
| Displacement: | -- |
| Number of Engines: | 0 |
| Engine Make | -- |
| Engine Model | -- |
| Engine Power | -- |
| City: | Rock Hall |
| State: | Maryland |
| Country: | United States |
This well cared for 1978 Bristol 35.5C (Centerboard) has been a brackish water boat (Chesapeake Bay) most of its life, spending its time both cruising all over with the family and winning the Governor's Cup during her ownership under a racing enthusiast.
AGE OF REASON has had some significant upgrades that a vessel of this age would be envious of (their owners would too!). New Selden Mast and Boom in 2015, Standing rigging was replaced then too, recently the Bimini and dodger were replaced and looks fantastic, and during those hot Chesapeake summers you can stay cool in the AIR-CONDITIONED CABIN (new late last year). If cruising is what you are looking to do, you absolutely should not overlook this Bristol 35.5C. AGE OF REASON has a shallow draft with the lead swing keel up and a 9.5' draft with the centerboard down when blue water cruising. Designed by Ted Hood, the World's premier centerboard designer.
If you are looking for a solid, good looking, blue water sailboat, that won't break the bank and has all the "bling", this is it!
Electronics
- 16k btu Dometic Marine reverse cycle AC/Heat 2024
- 110-volt battery charger 2012
- 2 - 6-volt deep cycle house batteries 2021
- TackTick Wireless instruments
- Raymarine autohelm wheel drive (drive belt and clutch new 2024)
- Garmin 9” Chart plotter 2019 (with 2024 chart chip)
- Running lights converted to LED
- Handheld Horizon HX870 VHF
- ICOM IC-M40 fixed VHF with mast head antenna
Sails and Rigging
- Seldon Mast (with MDS car system), Boom, Vang, standing rigging 2015
- New mast step 2015
- 2007 Quantum Dacron Main with double jiffy reef
- 2006 Quantum 155% Kevlar Genoa
- 2007 Quantum 95% Kevlar Blade Jib w/UV protection added 2019
- 2007 .75 oz running spinnaker
- 2008 .75 oz reaching spinnaker
- 2010 Quantum 2 oz spinnaker staysail
- 6 oz Dacron storm jib
- Harken MKIV Furler 2015
- Aluminum spinnaker pole with track on mast
- 2 – Lewmar 42 Self Tailing 2 speed winches
- Wind Vane 2024
- Westerbeke 4 cylinder 25 hp (compression test 2023 with good results – pending report)
- 25-gal aluminum fuel tank 2011
- Max prop 3 blade 2007
- 1 starting battery
- Fuel pump 2023
- Throttle cable 2023
- Groco freshwater strainer 2024
- All interior lights converted to LED
- New salon foam and sunbrella cushion covers 2017
- Dining table, expandable, secures to wall for more space
- 2 settees ea. 6 ft long
- 24” Vizio smart TV
- Cabin hatch screens and sunshades
- Teak and Holly cabin sole
- Cabin curtains 2017
- King V berth with 3” mattress topper
- Regal CNG stove/oven
- 12-volt Sea Frost refrigeration
- Filtered dock water to galley sink
- Raritan manual head (fresh water fed)
- Filtered dock water run to head sink
- Sunbrella dodger, bimini, wheel cover, mainsail cover 2021
- Cockpit cushions recovered 2021
- Full winter cover (dated but serviceable)
- Companionway removable folding doors
- Removeable Teak cockpit table
- 4 – Groco thru hulls with Groco ball valves replaced 2018/2019
- Dyneema centerboard cable (including updated system) 2017
- Leather-wrapped Edson wheel 2024
The company offers the details of this vessel in good faith but cannot guarantee or warrant the accuracy of this information nor warrant the condition of the vessel. A buyer should instruct his agents, or his surveyors, to investigate such details as the buyer desires validated. This vessel is offered subject to prior sale, price change or withdrawal without notice.
Listing MLS by Yachtr.com
For more information on this yacht, please contact us..
SIMILAR BOATS

A celebration of all things sail!
Cock of the Harbour
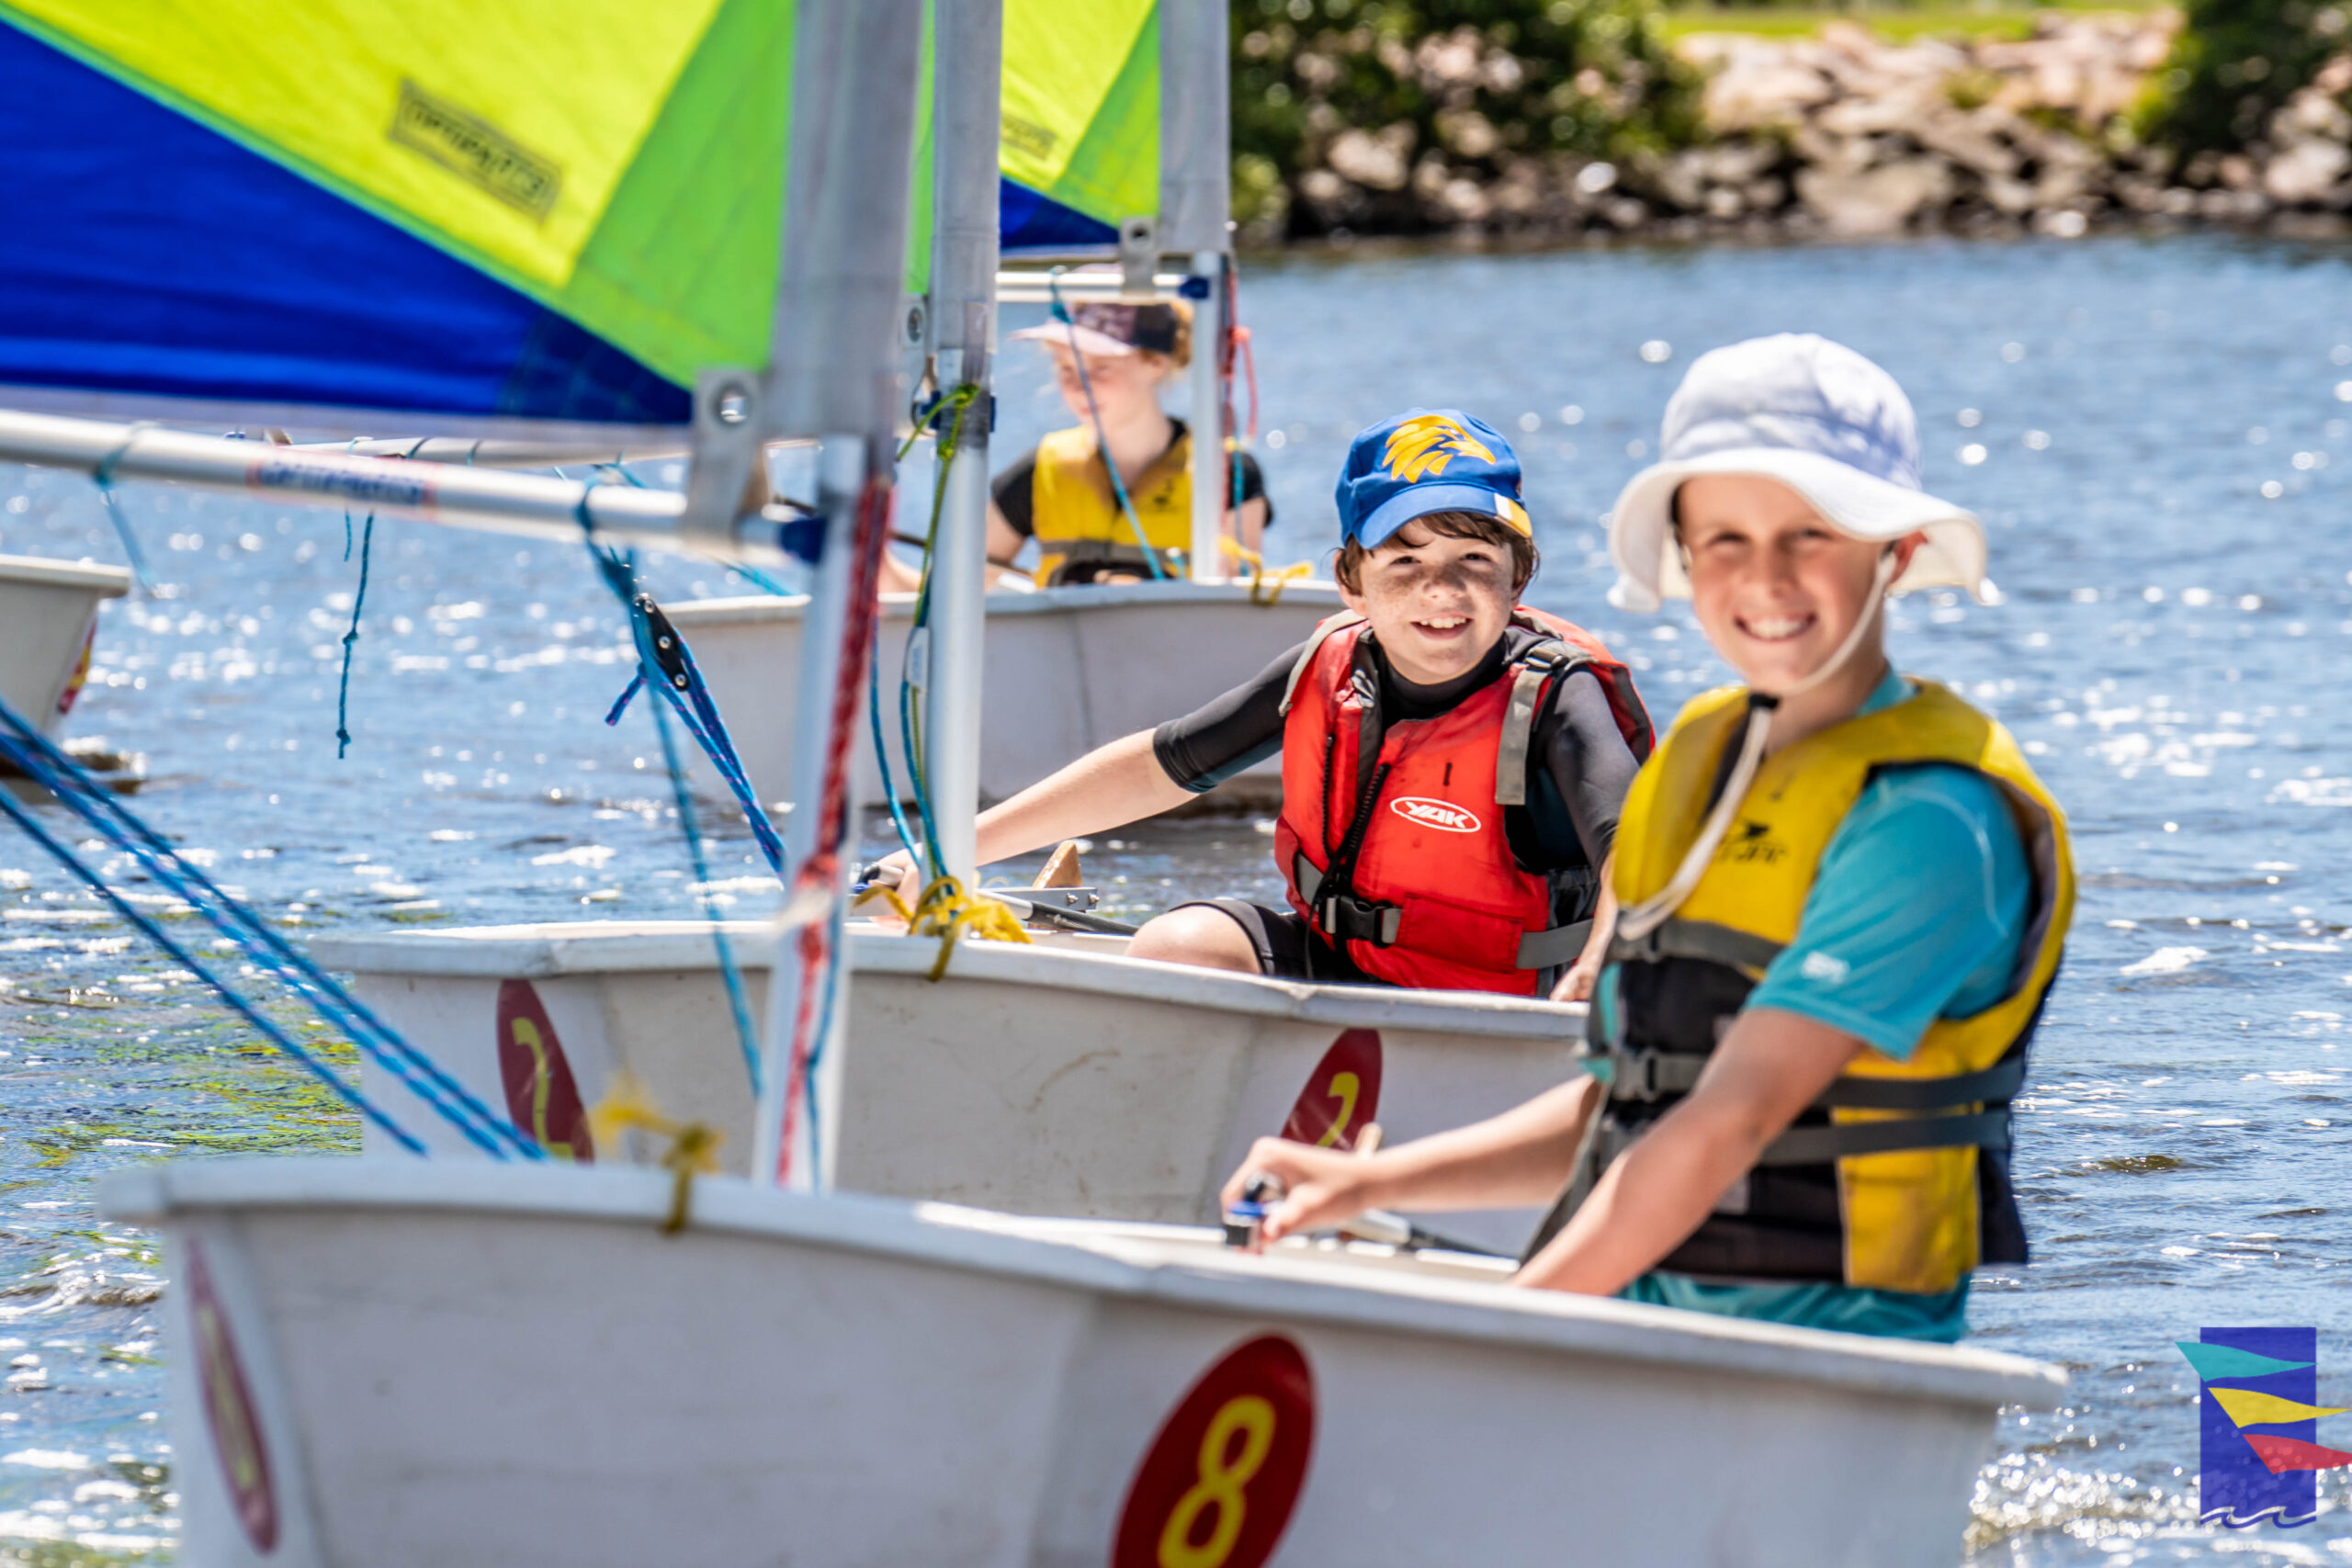
FREE Try Sailing
Newcastle Cruising Yacht Club and Port Hunter 16-Foot Skiff Sailing Club proudly present the annual SailFest Newcastle Regatta
22-24 march 2025.
In a celebration of all things sail, Newcastle Harbour and the city’s pristine coastline come alive with grand-prix TP52 yachts, offshore racers, high-speed skiffs and catamarans, Try-Sailing experiences and more. It rekindles the historic Newcastle Regatta, dating back to 1854, and evokes the maritime traditions of Australia’s oldest export port – albeit with a modern-day twist.
With thanks to our major supporters City of Newcastle and Transport for NSW.
Our Supporters
From drama to calmer in national title finale

Day 2 marked by course confusion
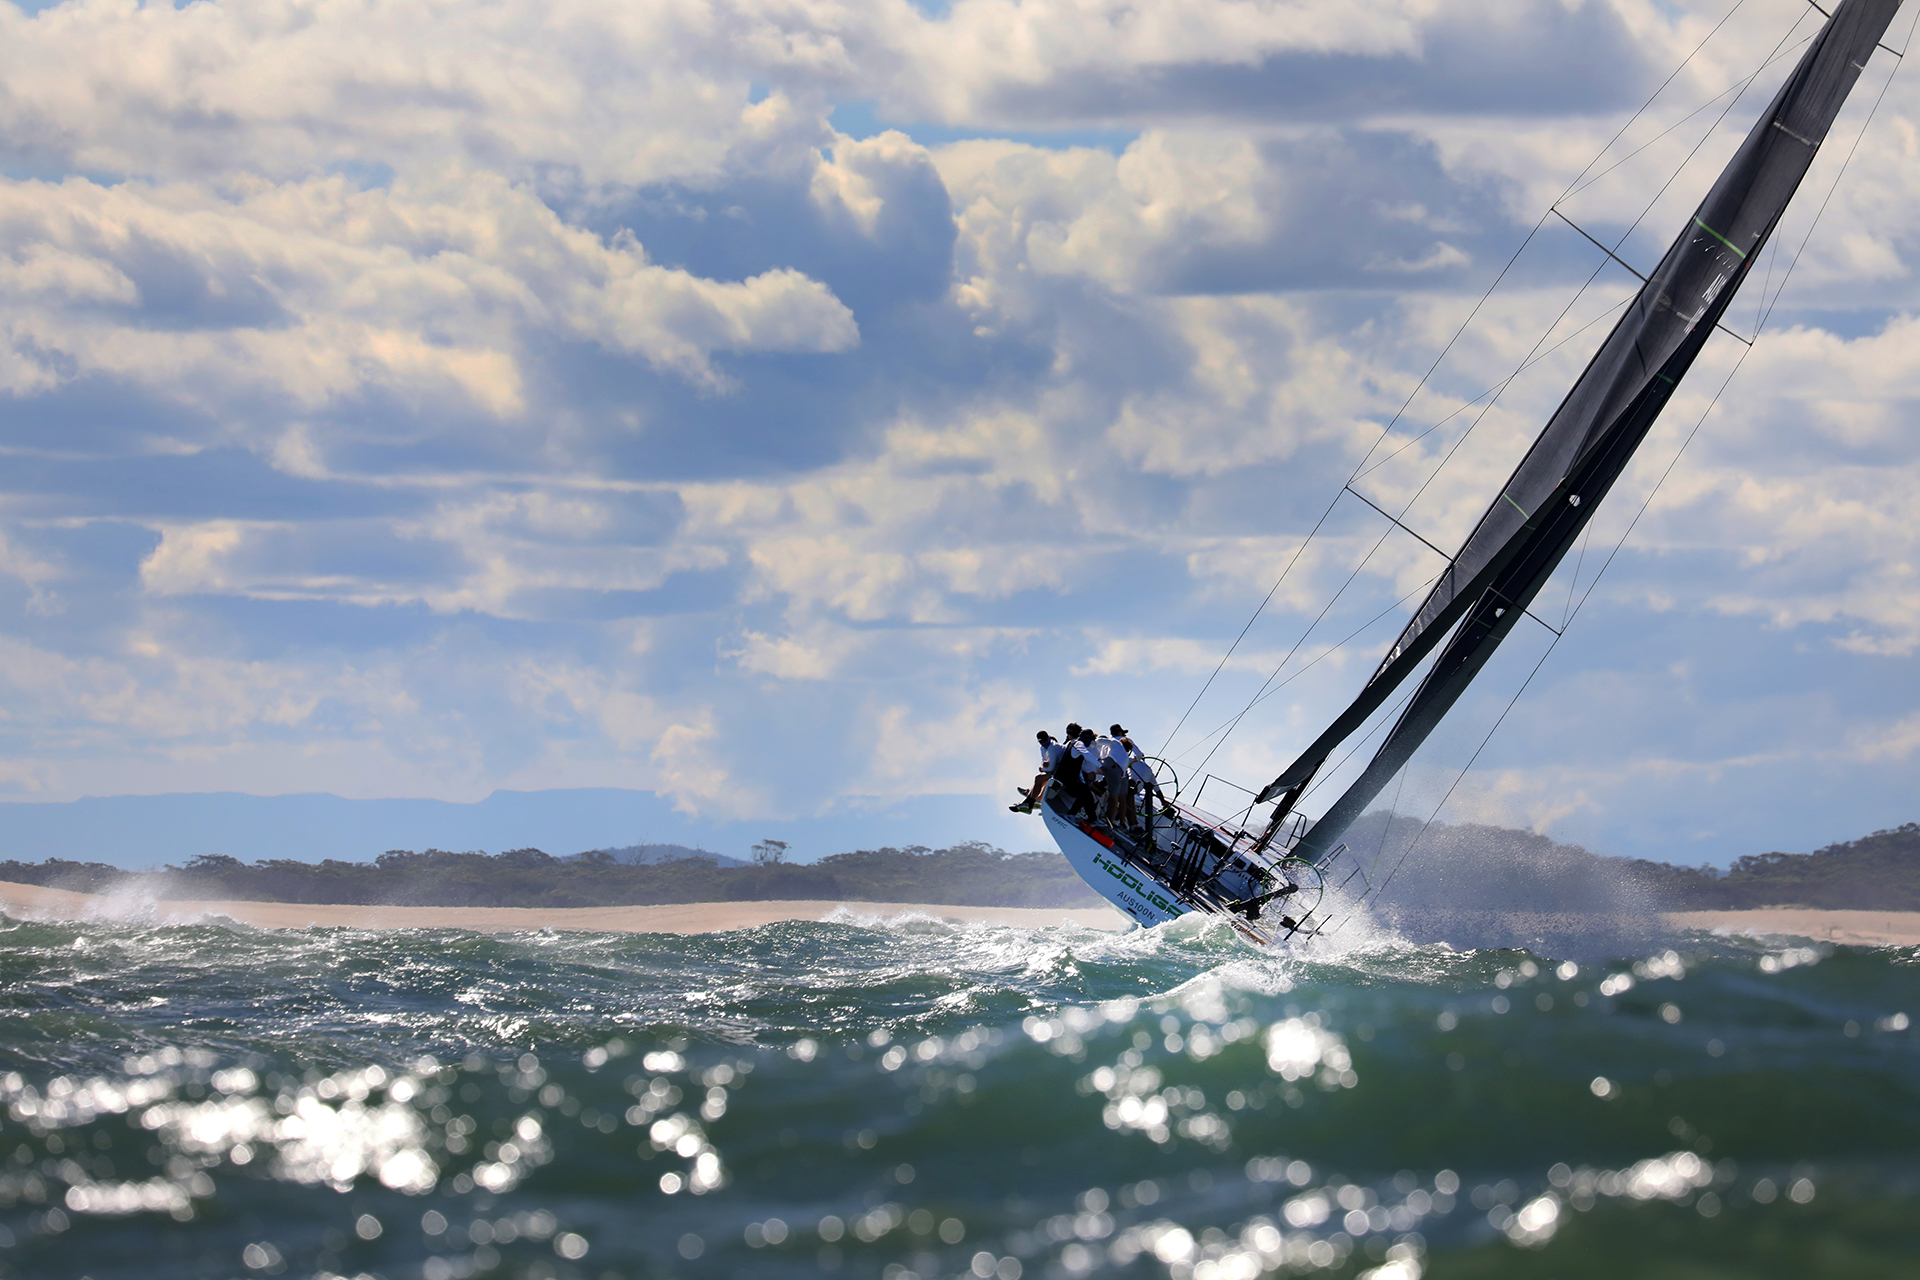
IMAGES
VIDEO
COMMENTS
Apart from servicing local rigging needs in the Lake Macquarie region, Bryan travels as far afield as Coffs Harbour and Port Macquarie on the Mid-North Coast, Nelson Bay and the wider Port Stephens locality, along with Newcastle and the Hunter Region. As any yacht owner will know, the benefits of maintaining the standing rigging should not be ...
Being the North Sails agent in Newcastle brings with it all the experience and after sales service you've come to expect of North Sails, combined with the local knowledge of your resident sailing shop. East Coast Marine & Sail knows that there's more to keeping your boat afloat than just new sails and sail repairs, that's why we offer the full ...
Anyway, I have tried Patrick from Newcastle Yacht rigging & Sails and after an initial conversation he doesn't seem to be returning my calls . Scott from East Coast Marine & Sail was wanting me to take the boat around to Marmong Point Marina but my intention / preference is to just use the mast crane available 100m from my mooring at LMYC.
Newcastle Yacht Rigging and Sails is located in City of Lake Macquarie of New South Wales state. On the street of Nanda Street To communicate or ask something with the place, the Phone number is 0410 043 056. You can get more information from their website.
Newcastle Yacht Rigging. Boats & Submarines · Australia · <25 Employees. View Company Info for Free. About. Headquarters Marmong Point Marina 1 Nanda St, Marmong Point,... Phone Number +61 410043056. Website www.newcastleyachtriggingandsails.com. Revenue <$5 Million. Industry Boats & Submarines Manufacturing .
06. 2024. In the world of sailing, boat rigging plays a crucial role in ensuring the safety, efficiency, and performance of your vessel. From standing rigging to sail rigging types, it's essential to understand the intricacies of rigging a yacht to embark on smooth sailing adventures. In this comprehensive guide, we'll dive into the nuances of ...
Situated right in the heart of Newcastle & Lake Macquarie's lively yachting scene, East Coast Marine & Sail is the place to head for all your trimming and sailmaking needs. As the sole agent for North Sails in Newcastle, you are assured of the same expert knowledge and advice characteristic of the North Sails brand the world over. Sailmaking is ...
Credit: Bill Tripp Design. The Bermudan rig is the all-rounder, able to perform well at all angles of sail. It is efficient upwind, while downwind the sail area can be significantly boosted with a big gennaker or spinnaker. For good reasons, it is the first choice for nearly every modern sailing yacht up to around 60 to 65 metres for cruising ...
Focusing on servicing boat owners from the Newcastle, Lake Macquarie, Central Coast and Port Stephens area, this service centre is set up with additional small chandlery and rigging shop, which will make it easier for boats owners to get North Sails certified service without the hassle of travelling or transporting sails to Sydney.
Compare multiple quotes from Boat & Yacht Equipment in your local area, so you get the right fit, the first time. ... Local Marine Sail Makers in Newcastle NSW. 5 Results for Marine Sail Makers Near You. Lake Mac Marine. Marine Sail Makers, Belmont, NSW 2280. Less info. Call. 0401 798 475. Less info. Endeavour Marine. Boat & Yacht Builders ...
The Bay Sailing Centre, formerly known as Port Stephens Sailing and Aquatic Club, is a sub-location of the Newcastle Cruising Yacht Club. The Bay Sailing Centre venue has a 40-year history of hosting local dinghy sailing as well as delivering major world, national and state championships. Situated on the shores of Salamander Bay, it faces east ...
In front of the main mast is called a foremast. The 5 most common two-masted rigs are: Lugger - two masts (mizzen), with lugsail (cross between gaff rig and lateen rig) on both masts. Yawl - two masts (mizzen), fore-and-aft rigged on both masts. Main mast much taller than mizzen. Mizzen without mainsail.
Sails and rigging are the engine room of any sailing boat from small dinghies up to giant superyachts. No matter how big or how new your boat, the sails and rigging need to be checked regularly and will need intermittent updating. Updating of rigging on a yacht in particular will often be a requirement for insurance purposes so any owner will ...
Bermuda Rig - Also known as a Marconi rig, this is the typical configuration of most modern sailboats. It has been used since the 17th century and remains one of the most efficient types of rigs. The rig revolves around setting a triangular sail aft of the mast with the head raised to the top of the mast.
This boat is centrally listed by Annapolis Sailyard. It is offered as a convenience by this broker/dealer to its clients and is not intended to convey direct representation of a particular vessel ... substantial SS wire standing rigging; Sail Area: IJPE : 811.00 sq ft. I : 54.00 ft. J : 15.00 ft. P : 47.75 ft. E : 17.00 ft. Working Sail Area ...
SAMMY KAYE is a 1996 40 Manta 40 for sale in League City Texas. Sammy Kaye is true and tested blue water cruiser, family fun in comfort and style.Well-equipped brand-new rigging and sails inventory.3 cabins, 2 heads , Accommodations...
Replacing the standing rigging on a sailing yacht may seem daunting. Our guide makes it a relatively simple process for anyone who is reasonably practical. Currency: GBP. EUR; GBP; Worldwide Delivery About Contact Trade 0. Subtotal £0.00. Shipping £0.00. VAT included in total (£0.00) Total £0.00 ...
Classic Sparkman & Stephens design built to the exacting standards by Hinckley Yachts. Hull and bottom paint new in 2024. Recent upgrades include new sails, running rigging, fuel tank and holding tank. Standing rigging and all teak in excellent condition. The decks themselves (fiberglass) need touchup to finish the renovation. Seattle Yachts is pleased to assist you in the purchase of this vessel.
Course Info: Course Length: 4 x 3.5-hour sessions. Minimum Age: 16 years. Maximum number of crew on a boat: Five (4 students + 1 instructor) Course Cost: $345 per person (mid-week0, $375 per person (weekend) Included in course fee: Minimum of 12 hours instruction by qualified instructors.
Time spent with family is worth every second . . . Join us as a family group for a two-hour sailing experience which provides that opportunity to get out on the water and spend time together doing something fun! Conducted on Friday afternoons during daylight savings times from 5:30pm to 7:30pm. $200 per boat, which can carry up to four family ...
Seattle Yachts is pleased to assist you in the purchase of this vessel. This boat is centrally listed by S&J Yachts. It is offered as a convenience by this broker/dealer to its clients and is not intended to convey direct representation of a particular vessel ... Sails and Rigging. Seldon Mast (with MDS car system), Boom, Vang, standing rigging ...
Newcastle Cruising Yacht Club and Port Hunter 16-Foot Skiff Sailing Club proudly present the annual SailFest Newcastle Regatta 22-24 March 2025. In a celebration of all things sail, Newcastle Harbour and the city's pristine coastline come alive with grand-prix TP52 yachts, offshore racers, high-speed skiffs and catamarans, Try-Sailing experiences and more.