Boat Pursuits Logo

How To Clean Sailboat Water Tanks? (An Easy Guide)

how to clean water tanks on sailboat

As a sailboat owner, having access to clean, fresh water is essential.

But how do you ensure that your sailboat water tanks are clean and safe to use? Fortunately, cleaning your sailboat water tanks is a straightforward process.

In this article, we’ll walk you through the basics of how to clean your sailboat water tanks, from why it’s essential to do so to the steps involved in sanitizing the tank.

Let’s get started!

Table of Contents

Short Answer

To clean sailboat water tanks, the first step is to empty the tank and rinse it with fresh water.

Next, mix a solution of 1 cup of bleach and 1 gallon of water and pour it into the tank.

Allow the solution to sit in the tank for 1-2 hours and then rinse the tank thoroughly with fresh water.

Finally, use a brush to scrub the inside of the tank and rinse it again with fresh water before refilling.

Why Cleaning Sailboat Water Tanks is Essential

Cleaning the water tanks of a sailboat is essential for a number of reasons.

Not only does it ensure that the water being stored is safe for use, but it can also help protect the tank itself from damage caused by contaminants, algae, and bacteria.

In addition, regular cleaning and maintenance can help the tanks last longer and remain in good condition.

Without proper cleaning, the tanks can become corroded, contaminated, and clogged, leading to costly repairs.

In short, cleaning the water tanks of a sailboat is essential to ensure that the water stored is safe to use, and to ensure the longevity of the tanks.

Preparing the Sanitizing Solution

how to clean water tanks on sailboat

When it comes to cleaning the water tanks of a sailboat, the most important part of the process is to create a sanitizing solution.

To do this, you need to mix two parts hot water with one part bleach.

This mixture should be stirred until the bleach is completely dissolved in the water.

Once this is done, the solution is ready to be used.

It is best to use hot water for the solution, as the heat helps the bleach to break down any bacteria and other contaminants in the tank.

Additionally, this solution should be made fresh each time you clean the tank, as the bleach in the solution can break down over time and become less effective.

It is also important to use a gentle bleach, as stronger versions can cause damage to the tank.

Once the solution is prepared, its time to move on to the next step of the process.

Filling the Tank with the Solution

When it comes to cleaning the water tanks of a sailboat, filling the tank with the sanitizing solution is one of the most important steps.

To create the sanitizing solution, mix two parts hot water with one part bleach and stir until the mixture is completely dissolved.

Once the solution is ready, fill the tank with the mixture and let it sit for at least 24 hours.

This will give the bleach enough time to effectively sanitize the tank and kill any bacteria or contaminants that could be present.

It is important to make sure that the solution is distributed evenly throughout the tank, as this will ensure that all areas of the tank are properly sanitized.

Additionally, make sure that the solution is not too concentrated, as this could be potentially harmful to the surrounding environment.

Once the solution is in the tank, let it sit for at least 24 hours before proceeding to the next step.

Letting the Solution Sit for 24 Hours

how to clean water tanks on sailboat

When it comes to cleaning sailboat water tanks, allowing the sanitizing solution to sit for at least 24 hours is of the utmost importance in ensuring that the water stored is safe for use.

During this period, the bleach works to break down any harmful bacteria or other contaminants that may be present.

It is important to note that the tank should be kept sealed during this time to ensure that the solution can properly sanitize the tank.

If the tank is not sealed, the solution may evaporate before it can do its job.

During this period, it is a good idea to periodically check the solution and add more if necessary.

Also, it is important to make sure that the temperature of the solution does not drop too much, as this can reduce its effectiveness.

Therefore, it is best to store the tank in a sheltered area with an ambient temperature that is not too far off from the temperature of the solution.

This will help to ensure that the bleach is able to do its job properly.

After the solution has sat for the requisite 24 hours, it is time to empty the tank and rinse it thoroughly with fresh water.

This will help to ensure that any residual bleach is removed, thus making it safe for use.

It is also a good idea to use a brush to scrub the inside walls of the tank before rinsing it, as this will help to remove any remaining dirt or debris.

Doing this will help to ensure that the tank is properly sanitized and safe for use.

Emptying the Tank

Emptying the tank is an important step in the process of cleaning sailboat water tanks.

To do this, start by turning off the power to the tank.

Then, open the valve on the tank and allow all the water to drain out.

It is important to ensure that all the water is completely drained before moving on to the next step.

If any water remains in the tank, it will be difficult to clean it properly.

Once the tank is empty, close the valve and disconnect any hoses or pipes connected to the tank.

This will help prevent any of the sanitizing solution from entering the plumbing of the boat.

Finally, make sure to open the tank access port and allow any remaining air to escape.

Once complete, the tank is now ready to be filled with the sanitizing solution.

Rinsing the Tank

how to clean water tanks on sailboat

Once the tank has been filled with the sanitizing solution and left to sit for at least 24 hours, it is time to rinse it out.

This step is essential to ensure all of the solution has been washed away and the tank is safe to use.

The best way to do this is to use fresh water and a hose or faucet.

Make sure to get all of the corners and crevices of the tank, as this is where bacteria can hide and thrive.

Be sure to rinse the tank until there is no more chlorine smell present, as this is a good indication that the solution has been washed away.

Once the tank has been rinsed, it is ready to be scrubbed and sanitized.

Scrubbing the Inside with a Brush

Once youve filled the tank with the sanitizing solution and allowed it to sit for at least 24 hours, the next step is to empty the tank and rinse it thoroughly with fresh water.

After this is done, youll need to take a brush and scrub the inside of the tank.

This is important as it will help to remove any residue that may have been left behind after the sanitizing solution has done its job.

Its best to use a brush specifically designed for cleaning sailboat water tanks, as this will help to ensure that no damage is done to the inside of the tank.

When scrubbing, make sure to get into all the nooks and crannies of the tank, as this is where bacteria can hide and build up.

Youll want to move the brush in a circular motion to help dislodge any residue that may be stuck to the walls.

Be sure to also scrub the lid of the tank, as this is a place where bacteria can often hide.

Finally, rinse the tank thoroughly with fresh water after scrubbing to remove any remaining residue.

By following these steps, you can ensure that your sailboat water tanks are properly sanitized and safe to use.

Cleaning the tanks periodically will help to prevent any buildup of bacteria and keep your water safe and free from contamination.

Final Thoughts

Cleaning the water tanks of a sailboat is an essential task that must be done periodically to ensure that the water stored is safe to use.

By following the steps outlined above, you can easily and effectively clean your sailboat water tanks.

So the next time you find yourself needing to give your water tanks a good clean, remember the steps outlined here and you’ll be sure to have safe and clean tanks in no time.

James Frami

At the age of 15, he and four other friends from his neighborhood constructed their first boat. He has been sailing for almost 30 years and has a wealth of knowledge that he wants to share with others.

Recent Posts

When Was Banana Boat Song Released? (HISTORICAL INSIGHTS)

The "Banana Boat Song" was released in 1956 by Harry Belafonte. This calypso-style song, also known as "Day-O," became a huge hit and remains popular to this day for its catchy tune and upbeat...

How to Make Banana Boat Smoothie King? (DELICIOUS RECIPE REVEALED)

To make a Banana Boat Smoothie King smoothie at home, start by gathering the ingredients: a ripe banana, peanut butter, chocolate protein powder, almond milk, and ice. Blend the banana, a scoop of...

How To Clean Your Boat's Freshwater Tank (Plastic & Aluminum)

Cleaning the fresh water tank in your boat is one of the most essential things you should do regularly to ensure smooth sailing. You need safe and clean water onboard to drink, bath, cook and clean. This can only be achieved by maintaining a clean water system. Today, I will guide you step by step on how to clean your freshwater tank, both plastic, and aluminum.

How to clean your boat's freshwater tank:

  • Drain the tank completely
  • Measure 1 teaspoon/gallon of household bleach (aluminum) or vinegar (plastic) into the tank and add fresh water until it’s full
  • Let it sit for 24 hours to sterilize, then drain the water
  • Fill with fresh water and drain repeatedly until all the bleach/vinegar odor is gone

This job should take you anywhere from 5-10 hours.

After this process, your tank should be clean and safe to put in fresh water for use. The problem is that sometimes your tank needs more than this method to be clean. Continue reading to find out how you can leave your tank sparkling clean.

Dirty freshwater tank with black streaks and grass

On this page:

How to ensure the water tank is uncontaminated and squeaky-clean, the freshwater tank refill, filtering and sterilizing the incoming water, related questions.

Sanitizing your fresh water tank will greatly help in removing the strange odor and bad taste of the water onboard. It will greatly reduce the occurrence of coliform bacteria and will ensure the health of everyone onboard.

Fortunately, keeping the water tank in a better condition to provide good-tasting and drinkable water is very easy.

To start with , check if there’s detritus accumulation on the tank. You can do this from the equipped with inspection and cleaning ports on the tank.

To check , put on a sanitary glove and swab inside the tank with your finger. If it’s slimy or emits an odor, your tanks should be cleaned with detergent and sanitized.

If you haven’t cleaned your water tanks properly in a long time, you might find a thick even stubborn crud layer in the bottom.

Even though removing the tank out of the boat and steam-clean it works great, many of the times it’s not practical. For tough cases though, you should probably steam clean them.

Otherwise, you can use the following steps:

  • Empty all the water in the tank
  • Add a few inches of ice cubes in the tank
  • Add a small amount of water for the cubes to slide the bottom of the tank
  • Take the boat in a place with wave action for the cubes to slosh on the bottom of the tank. - The cubes will scrub the bottom as they melt
  • Remove the water filters to avoid the clogging and then flash the tank until everything is clear
  • Make sure you flush with clean water to avoid sanitizing again later

What to Use to Clean Water Tanks?

  • For the first rinse, steam cleaning is the most effective way. If your tank is in bad shape, steam cleaning is the way to go.
  • If you don't have a steam cleaner, use a pressure washer instead.
  • For steel and aluminum tanks , you can use bleach to flush the system.
  • For plastic tanks , you can use vinegar or lemon.
  • You can also get a special Water Tank Flush, which works well, but is more expensive.

This last one works surprisingly well. The organic acids will dissolve any debris. Vinegar, however, won't leave any odors.

Some tips on using bleach

Plastic tanks may retain chlorine flavor, so I'd recommend trying to use vinegar before trying anything else. Also, if you're using bleach, I would disconnect all the outlets. If it gets into your lines, your water will taste like chlorine for a while. It doesn't hurt, but it doesn't taste nice either.

After cleaning the tank from the buildup, it’s time for sanitizing the water system: “System” because it does no good to clean the tank and leave the pump, lines, and others.

You can sanitize the system by adding home bleach 1 teaspoon per gallon or precisely 8 ounces per 10 gallons of the water in the tank.

CAUTION : This bleach is to sanitize the system, it’s not fit for drinking!

Pressurize the water with the system open but turn off the end outlets. Let it sit for 24 hours;

After that flash the water with each outlet starting with the furthest from the pump. Do this with all the outlet and repeat the flush until all the bleach smell is gone.

Warning : for Aluminum tanks, you should not sit the bleach for more than 24 hours. Also, you should not repeat this process for more than twice a year.

At this point, the system is clean and sanitized. It’s now time to fill the water tank with fresh water from different sources; you can get from outside sources or use the onboard water maker to refill the tank (water from the onboard maker is often sterile and pure).

If the water is coming from outside source however you must take extra caution. For starters, make sure the fill cap is in good condition to avoid water leaks into the tank with contaminants. It makes no sense to clean the tank and put in contaminated water from outside.

Ensure the hose pipe that you are using to fill in your tank is FDA rated to use for potable water. Also, before you put it directly into your tank, let the water run first to flush the hose. Understand: a hose with water in the sun can be a home to many living organisms.

Note: A better solution is to have your own horse which you flush after use and store safely.

Also running water will help you to know the condition of the water from the source. If the water looks dirty, don’t fill in your tank with it. It might be contaminated with things like cyst, bacteria or even metals, there is no need to take chances.

Tip: the key to having clean water onboard is usage. Keep the water flowing in and out of the system regularly to reduce the chance of it becoming stale.

IF you are getting water from an outside source that you are unsure of its safety, you must take extra caution to make sure you are getting quality and clean water. You can guarantee this if you use sterilizers and filters.

When buying a water filter, make sure that it has met all the Microbiological Purification Standards. With this, you can eliminate all the cysts, viruses and bacteria from the water.

Alternatively, go for an Ultraviolet Sterilizers. With this, the water is sterilized by UV lamp that produces UV radiation to kill bacteria.

In addition, add a filter to remove other contaminants.

Chemical water treatment

A good alternative to treat the onboard fresh water in the tanks is by use of chemical products. There are different varieties you can find out there although you be cautious to read on the label because different products have different usage. You might find some that just remove the smell and taste of the water while other sterilizes the water to make it bacteria free.

Often, Iodine and Chlorine based products are better solutions to make questionable water safe to use. If this is not available, use home bleach; ½ teaspoon for 5 gallons and let it sit for 30-60 minute and it will be good to drink.

Checking if the water is safe for use

The best way to determine if the water in the tank is safe for use is to have it tested. Visit a local lab. if you don’t know any visit your local health department and they will direct you.

This method though is only valid only for the water in the tank. Alternatively, purchase a self-testing kit, which although they are not as accurate they can indicate if there is a problem with the water.

How to empty holding the tank on the boat? There are two ways that you can empty the holding tank; one, go at least three miles offshore and empty the tank there or go to a fuel dock with a Marine Sanitation Device (MSD) and a waste pump to empty it for you.

How to install a freshwater tank on a boat? The freshwater tank should be installed close to the middle of the boat. Have a small water pump and enough hose. Get the measurement where the hose should run and fit it. Add a T connection to the pickup line on the pump and run one hose into the tank and the other outside of the boat. Next cut the drainage outlet, place the tank to the selected location and fix everything tight and the tank is ready for use.

How to prime a fresh water pump on a boat? To prime water pump on your boat, start by ensuring there is enough water in your tank then checking the filters and screens to make sure they are working alright. Next opening an outlet like the facet to let the air out and it will prime.

Pinterest image for How To Clean Your Boat's Freshwater Tank (Plastic & Aluminum)

John Robbins

One teaspoon in 1/6 of an ounce. One teaspoon per gallon is 1.67 ounces for 10 gallons, not 8 ounces! That is way too much bleach.

Elina Brooks

Thank you for letting us know that steam cleaning is the most effective way to clean a fuel tank, especially if it’s in a bad shape. My dad owns a fishing boat, and he was thinking of getting a new fuel tank for it soon. I’ll be sure to tell him about this before he gets a custom order for his aluminum fuel tank soon. https://www.mycarrenterprise.com/boat-fuel-tank

Leave a comment

print logo

  • Boat Accessories
  • Where to Buy

Boat Life

Special until September30th: 20% off Git-Rot (all sizes). Use Code SEPT24 at checkout. *restrictions apply

Free ground shipping in the Continental US for any orders over $150!

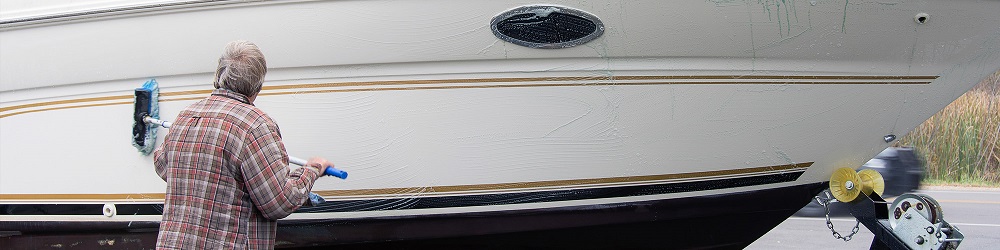
How to Clean a Boat Fresh Water Tank...

How to clean a boat fresh water tank.

boating

The water in your boat’s fresh water tank won’t always stay fresh. When it sits in the tank with poor circulation, it eventually takes on an unpleasant odor. That’s why it’s important to regularly clean out the tank the right way, every time. Here’s how to clean a boat’s fresh water tank.

Drain the Tank

how to clean water tanks on sailboat

It’s important to adequately prep for proper drainage. You’ll not only want to have a designated place to drain out the water, but you also should make sure that the place your draining won’t lead to nasty water spilling somewhere you don’t want it. In addition, try to drain your tank somewhere that won’t negatively affect the environment. Then, you can remove the old water to prepare for cleaning. Turn on your water pump, open all of the taps, and let the water drain out.

Clean Out the Tank

how to clean water tanks on sailboat

The key to cleaning a fresh water tank is to allow the new, clean water to do the work. It will be the carrier of the cleaning detergent, the rinsing agent, and will continue flowing through the tank until there’s nothing but a clean tank and more freshwater left.

The question here is, what kind of cleaning agents should you use? Do you use bleach, or should you go with another product?

Be wary of bleach if you’re concerned about the environment. You also shouldn’t use bleach anywhere that could affect the marine life. If you do decide to use bleach, just be sure you have a proper place to drain it after cleaning.

Instead, add the appropriate cleaner—one designed for this specific purpose and with the environment in mind. You can find a plethora of boat cleaning options here at BoatLIFE for the cleaning of your tank!

Mix in your cleaner and fill the tank with enough water to dilute the cleaner to an appropriate amount. You can then turn off the pumps and the taps to allow this cleaner some time to go to work. Leave it overnight for the best results.

Shop Cleaning Products from BoatLIFE

Drain and Rinse

how to clean water tanks on sailboat

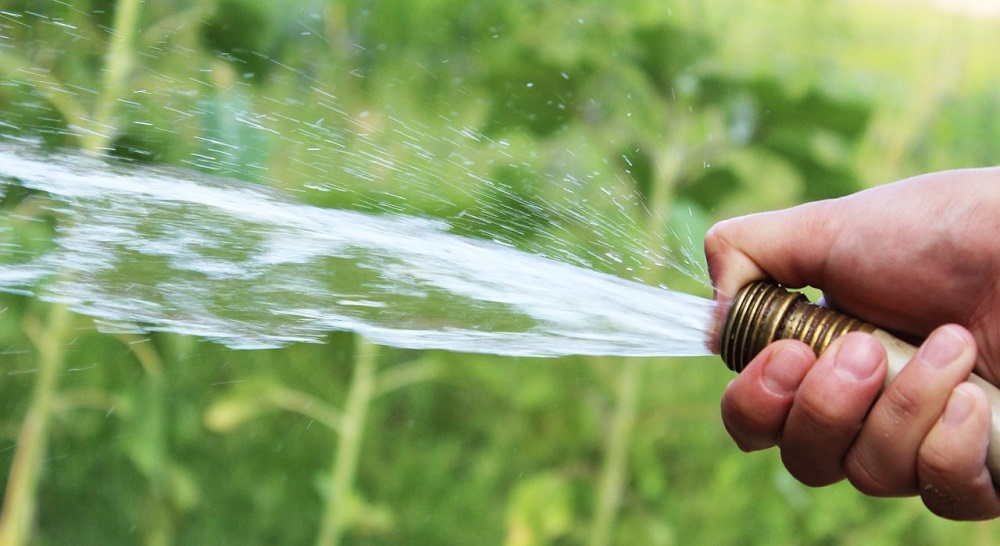
Drain the tank somewhere safe, repeating the draining process. Then, rinse with fresh water. Smell the water coming out if you’re still unsure; if it has the odor of bleach or cleaner, rinse again.

Keep in mind that even after a thorough cleaning, your fresh water tank will still not be suitable for drinking—after all, the freshwater you keep in there will tend to stay. However, you can use fresh water for other purposes on the boat, including rinsing its surfaces, especially if you’re sure to keep changing it out periodically.

Keep Your Boat Clean!

Now that you know how to clean a boat’s fresh water tank, are you looking for more great ways to keep your boat in top shape? Investing in boat cleaners will do the trick. BoatLIFE offers the boat accessories, sealants, and restoration products you need to help keep every aspect of your boat in top condition.

Share this:

  • Click to share on Twitter (Opens in new window)
  • Click to share on Facebook (Opens in new window)

Featured Products

how to clean water tanks on sailboat

Liquid LifeSeal® Sealant 5.2 fl. oz. Clear

how to clean water tanks on sailboat

Stainless Steel Cleaner 16 fl. oz.

Related blogs, how to paint a fiberglass boat.

Caring for your fiberglass boat takes time, money, and a lot of patience. One aspect of maintaining your investment is […]

Replacing Fiberglass Flooring on Your Boat

Here at BoatLIFE, we’ve been in business over 65 years perfecting the art of DIY boat maintenance, boat restoration, and […]

Maintaining Your Boat Cover Investment

    Protecting your boat investment with the proper boat cover is paramount. Once you select a boat cover, be […]

All products proudly made in the usa

Sale Image

  • PRO Courses Guides New Tech Help Pro Expert Videos About wikiHow Pro Upgrade Sign In
  • EDIT Edit this Article
  • EXPLORE Tech Help Pro About Us Random Article Quizzes Request a New Article Community Dashboard This Or That Game Happiness Hub Popular Categories Arts and Entertainment Artwork Books Movies Computers and Electronics Computers Phone Skills Technology Hacks Health Men's Health Mental Health Women's Health Relationships Dating Love Relationship Issues Hobbies and Crafts Crafts Drawing Games Education & Communication Communication Skills Personal Development Studying Personal Care and Style Fashion Hair Care Personal Hygiene Youth Personal Care School Stuff Dating All Categories Arts and Entertainment Finance and Business Home and Garden Relationship Quizzes Cars & Other Vehicles Food and Entertaining Personal Care and Style Sports and Fitness Computers and Electronics Health Pets and Animals Travel Education & Communication Hobbies and Crafts Philosophy and Religion Work World Family Life Holidays and Traditions Relationships Youth
  • Browse Articles
  • Learn Something New
  • Quizzes Hot
  • Happiness Hub
  • This Or That Game
  • Train Your Brain
  • Explore More
  • Support wikiHow
  • About wikiHow
  • Log in / Sign up
  • Cars & Other Vehicles

How to Clean a Boat Water Tank

Last Updated: July 10, 2024 References

This article was co-authored by Craig Morton and by wikiHow staff writer, Megaera Lorenz, PhD . Craig Morton is the CEO of Aquarium Doctor Inc. based in Huntington Beach California and servicing Orange County, Los Angeles County, and the Inland Empire. With over 30 years of aquarium experience, Craig specializes in creating custom aquarium designs along with aquarium installation, service, and maintenance. There are 11 references cited in this article, which can be found at the bottom of the page. This article has been viewed 23,055 times.

Having a fresh water system on your boat is super convenient if you tend to go on long boating trips. You can use it to cook, clean, or even take showers while you’re out on the water. Unfortunately, boat water tanks can become home to mold, bacteria, and algae, giving the water an unpleasant smell and taste or even making it unsafe to drink. Keep the water on your boat fresh and clean by cleaning out your tank and disinfecting it with bleach at least once a year.

Emptying out the Tank

Step 1 Turn on your boat’s water pump.

  • The location of the pump and water tank varies from one boat to another. If you’re not sure where to look, consult a schematic of your boat or your owner’s manual, if you have it.

Step 2 Open your taps and let the water run out.

  • Listen for air coming out of the taps. This will tell you that the tank is empty.

Step 3 Shut off the pump to keep it from burning out.

  • Many boats have pumps that automatically turn on after the water pressure drops below a certain level. This is meant to keep your water moving as the level in the tank gets lower. [4] X Research source

Removing Dirt and Residue

Step 1 Open the cap on the tank.

  • In some cases, the cap might be difficult to remove. You may need a special tool to open it. Consult the user manual for your boat or your specific water system. [6] X Research source

Step 2 Use a flashlight to look for dirt in the tank that needs to be cleaned out.

  • If you’re able to get your hand in through the opening of the tank, feel the inside walls. If they feel slick or slimy, that’s a sign of bacterial buildup.

Step 3 Scrub out the tank with a long-handled brush or power washer.

  • If you use a power washer, you’ll need some angle attachments to get into hard-to-reach corners.

Step 4 Turn on the pump and drain the tank.

  • If you emptied the tank completely the first time, it will probably take a few minutes for the water to start flowing again since there will be air in the pipes.

Disinfecting the Tank

Step 1 Turn off your pump and hot water heater.

  • Consult your user manual if you’re not sure where the water heater is located.

Step 2 Remove and clean any filters or faucet aerator screens.

  • To remove your faucet aerators, unscrew them with a wrench. Clean the aerators with hot, soapy water and a scrub brush. If there are a lot of mineral deposits on the screen, you can remove them by soaking the aerator in white vinegar for a few minutes before scrubbing it. [12] X Research source
  • If your pump has a protective mesh strainer, leave that in place. It will help protect your pump during the cleaning process.
  • If your water tank has a vent hose and screen, detach those as well. Clean them with hot, soapy water if they appear dirty.

Step 3 Measure out enough 5% bleach to make a 50 ppm solution in your tank.

  • You can use this chlorine calculator to determine the correct amount of bleach to use: https://www.publichealthontario.ca/en/health-topics/environmental-occupational-health/water-quality/chlorine-dilution-calculator .
  • For example, if you have a 50 US gal (190 L) tank, you’d need to use about 6.7 fluid ounces (200 mL) of bleach.

Warning: Never mix bleach with other household cleaners, since it could create toxic chlorine fumes. Always use bleach in a well-ventilated area.

Step 4 Mix the bleach with 1 gallon (3.8 L) of water.

  • Combining the bleach with water before you pour it in will also help prevent corrosion if your tank is aluminum.

Step 5 Pour the bleach and water mixture into the boat tank.

  • Alternatively, you can fill the tank with fresh water before adding the bleach to the tank.

Step 6 Top off the tank with clean, drinking-quality water.

  • If your tank has a vent, let a little of the water and bleach solution spill out through the vent in order to sanitize the vent line. If the vent is exterior, put a bucket or other container under it to keep the bleach solution from entering the water outside your boat.

Step 7 Switch the pump back on and let the water run until you smell chlorine.

  • It may take a few minutes for the pump to push all the air out of the lines and get the water flowing again.

Step 8 Let the bleach solution sit in the tank for 12 hours.

  • If you don’t have time to let the bleach stay in your water tank for a full 12 hours, try to leave it for at least 4 hours. [18] X Research source

Step 9 Refill and drain your tank 2-3 times or until you can’t smell bleach.

  • If you still smell a hint of bleach after flushing and refilling the tank twice, add 1 teaspoon (4.9 mL) of hydrogen peroxide per 20 gallons (76 L) of tank capacity and flush the tank again. The hydrogen peroxide should neutralize the remaining bleach.

Step 10 Replace the filters and vent screen.

  • Start with the tap farthest from the pump and work your way to the closest one. Make sure to let the air out of each tap to get your system working properly again. [22] X Research source

Expert Q&A

  • Even with regular cleaning, the water on a boat can quickly take on an unpleasant smell and taste. Try adding a little lemon juice to the tank to keep your water fresh longer and improve its odor. [23] X Research source A solution of about 2 tablespoons (30 mL) of lemon juice per .26 gallons (0.98 L) of water can effectively disinfect drinking water. [24] X Research source Thanks Helpful 0 Not Helpful 0

how to clean water tanks on sailboat

You Might Also Like

Read a Nautical Chart

Expert Interview

how to clean water tanks on sailboat

Thanks for reading our article! If you’d like to learn more about cleaning a water tank, check out our in-depth interview with Craig Morton .

  • ↑ https://youtu.be/FM93IVN5fjk?t=9
  • ↑ https://youtu.be/FM93IVN5fjk?t=18
  • ↑ https://www.sailmagazine.com/diy/let-it-flow
  • ↑ https://youtu.be/-Ov-24uJ8oE?t=101
  • ↑ https://youtu.be/-QzsEvw67ec?t=141
  • ↑ https://www.practical-sailor.com/blog/decontaminating-a-tainted-water-tank
  • ↑ https://www.goodhousekeeping.com/home/cleaning/a28198674/how-to-clean-dirty-faucet-aerator/
  • ↑ https://youtu.be/-Ov-24uJ8oE?t=254
  • ↑ https://www.pbo.co.uk/gear/boat-water-tank-treatments-tested-20504
  • ↑ https://www.researchgate.net/publication/15339874_Lemon_juice_as_a_natural_biocide_for_disinfecting_drinking_water

About This Article

Craig Morton

  • Send fan mail to authors

Reader Success Stories

Natalie Te

Nov 15, 2021

Did this article help you?

Natalie Te

Featured Articles

Enjoy Your Preteen Years

Trending Articles

The Office Trivia Quiz

Watch Articles

Make French Fries

  • Terms of Use
  • Privacy Policy
  • Do Not Sell or Share My Info
  • Not Selling Info

wikiHow Tech Help Pro:

Level up your tech skills and stay ahead of the curve

how to clean water tanks on sailboat

Sailboat Owners Forums

  • Forums New posts Unanswered threads Register Top Posts Email
  • What's new New posts New Posts (legacy) Latest activity New media
  • Media New media New comments
  • Boat Info Downloads Weekly Quiz Topic FAQ 10000boatnames.com
  • Classifieds Sell Your Boat Used Gear for Sale
  • Parts General Marine Parts Hunter Beneteau Catalina MacGregor Oday
  • Help Terms of Use Monday Mail Subscribe Monday Mail Unsubscribe

Bleach in water tanks

  • Thread starter NYSail
  • Start date Jul 3, 2021
  • Forums for All Owners
  • Ask All Sailors

NYSail

Hello all. So every season I thoroughly clean my water tanks using bleach with several good rinses. This also includes running the mixture into all hoses and letting sit. Water tanks are clean and I have no issue using it for drinking / cooking. A friend does same however he also adds 2/3 tsp of bleach per 8 gallons when he fills up. How many folks do this…… doesn’t seem like a bad idea to keep things non toxic just in case. Btw for drinking we do run the water through a “Epic Water filter” Thanks greg  

If the water is coming from a reliable municipal supply, I don't think adding bleach adds much. Flush the hose before filling. If the water source was somehow suspect, then perhaps. Replace the O rings on the fill caps, when they deteriorate water from the deck can enter the tank. That would be a cause of contamination.  

Terry Cox

The first and only time I commissioned our water tanks was when we took possession from the PO in 2002. I also alternate tank use after each fill up. Never added bleach to a fill up. Water tastes fresh and odor free to this day.  

Ken Cross

If the water comes from a municipal supply, it may already contain chlorine. Adding more can make you sick. Our Washington State Health folks say to add one teaspoon of bleach per gallon of cold water and leave it to sit for 40 minutes, then flush well. I usually do this annually. Make sure to flush the hot water heater as well to get the bleach taste and smell out.  

dlochner said: If the water is coming from a reliable municipal supply, I don't think adding bleach adds much. Flush the hose before filling. If the water source was somehow suspect, then perhaps. Replace the O rings on the fill caps, when they deteriorate water from the deck can enter the tank. That would be a cause of contamination. Click to expand

dLj

I do not like the taste of Cl so I avoid adding it after cleaning. A water filter is a good idea for drinking depending upon where you are. If you are typically filling at a reliable source, then not needed, but if you travel and may have unknown reliability, then a filter seems like a really good idea. I prefer not to chlorinate my water. dj  

For under $20 on Amazon you can get a Total Dissolved Solids meter which will yield an estimate of how clean the water is. It won't assess pathogens, however if the water has low TDS levels and it is from a municipal source it is likely safe.  

BigEasy

Sanitize my tanks annually as per instructions from Peggy Hall's book. Bleach is added to filled tank and allowed to circulate and remain in lines for 8 hours. Tank is then emptied and wiped clean, refill tank with filtered municipal water, after water hose is allowed to run for about 5 minutes prior to inserting it into deck fill. Diluted bleach solution is finally flushed from onboard water lines. I do not add additional chlorine to the water after the tanks are refilled. Have never had an issue and water is clean with no odor. I usually have bottled water onboard for drinking, same as at home.  

Helpful

I usually add a splash of bleach to each 30-gallon tank when I fill it. I don’t turn the water over fast enough, and I found that by the time I switched to a full tank, it was a little “skunky”, particularly in the hot summer. I don’t drink the water, but I do brush my teeth and wash dishes with it. I can smell a faint hint of chlorine, but it is preferable to the skunky smell I get without the bleach. I could use one and refill it twice as often, and maybe I wouldn’t need the disinfectant, but I haven’t tried that yet. Greg  

ifmdalvey

First, what is your tank made of? if its aluminum then bleach is the last thing you want anywhere near it. Clean the pipes with bleach, as per Peggy but not aluminum tanks.  

Good point…mine are plastic. Greg  

Plastic tanks. And like I said I clean them once a year with bleach including the lines with a great flush. I also use my water extensively so it never sits for long periods. I’ve never had a problem with bad water I was just interested when my friend told me that he puts bleach in his. Thanks for all the responses guys!  

We do the Peggie‘s shock treatment every Spring when we launch. Use 4oz. of bleach per 10 gallons of water. Run the taps to fill the lines and till you can smell the bleach. Let it sit for no more than 24hrs. Then dump the tank, flush it out, then refill.  

Peggie Hall HeadMistress

Peggie Hall HeadMistress

So many of you have misquoted important parts of the fresh water recommissioning instructions from my book that I'm posting those instructions here: Although most people think only in terms of the tank, the plumbing is actually the source of most foul water, because the molds, mildew, fungi and bacteria which cause it thrive in damp dark places, not under water. Many people—and even some boat manufacturers—believe that keeping the tanks empty reduce the problem, but an empty water tank only provides another damp dark home for those “critters.” There are all kinds of products sold that claim to keep onboard water fresh, but all that’s really necessary is an annual or in especially warm climates, semi-annual recommissioning of the entire system—tank and plumbing. The following recommendations conform to section 10.8 in the A-1 192 code covering electrical, plumbing, and heating of recreational vehicles (which includes boats). The solution is approved and recommended by competent health officials. It may be used in a new system a used one that has not been used for a period of time, or one that may have been contaminated. Before beginning, turn off hot water heater at the breaker; do not turn it on again until the entire recommissioning is complete. Although most people think only in terms of the tank, the plumbing is actually the source of most foul water, because the molds, mildew, fungi and bacteria which cause it thrive in damp dark places, not under water. Many people—and even some boat manufacturers—believe that keeping the tanks empty reduce the problem, but an empty water tank only provides another damp dark home for those “critters.” There are all kinds of products sold that claim to keep onboard water fresh, but all that’s really necessary is an annual or in especially warm climates, semi-annual recommissioning of the entire system—tank and plumbing. The following recommendations conform to section 10.8 in the A-1 192 code covering electrical, plumbing, and heating of recreational vehicles (which includes boats). The solution is approved and recommended by competent health officials. It may be used in a new system a used one that has not been used for a period of time, or one that may have been contaminated. Before beginning, turn off hot water heater at the breaker; do not turn it on again until the entire recommissioning is complete. Icemakers should be left running to allow cleaning out of the water feed line; however the first two buckets of ice—the bucket generated during recommissioning and the first bucketful afterward--should be discarded. 1. Prepare a chlorine solution using one gallon of water and 1/4 cup (2 oz) Clorox or Purex household bleach (5% sodium Hypochlorite solution ). With tank empty, pour chlorine solution into tank. Use one gallon of solution for each 5 gallons of tank capacity. (Simpler way to calculate: 1 quart bleach/50 gal water tank capacity) 2. Complete filling of tank with fresh water. Open each faucet and drain cock until air has been released and the entire system is filled. Do not turn off the pump; it must remain on to keep the system pressurized and the solution in the lines 3. Allow to stand for at least three hours, but no longer than 24 hours. 4 Drain through every faucet on the boat (and if you haven't done this in a while, it's a good idea to remove any diffusion screens from the faucets, because what's likely to come out will clog them). Fill the tank again with fresh water only, drain again through every faucet on the boat. 5. To remove excess chlorine taste or odor which might remain, prepare a solution of one quart white vinegar to five gallons water and allow this solution to agitate in tank for several days by vehicle motion. 6. Drain tank again through every faucet, and flush the lines again by fill the tank 1/4-1/2 full and again flushing with potable water. An annual or semi-annual recommissioning according to the above directions is all that should be necessary to keep your water tasting and smelling as good as anything that comes out of any faucet on land. If you need to improve on that, install a water filter. Just remember that a filter is not a substitute for cleaning out the system, and that filters require regular inspection and cleaning or replacement. To keep the water system cleaner longer, use your fresh water...keep water flowing through system. The molds, fungi, and bacteria only start to grow in hoses that aren't being used. Before filling the tank each time, always let the dock water run for at least 15 minutes first...the same critters that like the lines on your boat LOVE the dock supply line and your hose that sit in the warm sun, and you certainly don't want to transfer water that's been sitting in the dock supply line to your boat's system. So let the water run long enough to flush out all the water that's been standing in them so that what goes into your boat is coming straight from the water main. Finally, while the molds, fungi and bacteria in onboard water systems here in the US may not be pleasant, we're dealing only with aesthetics...water purity isn't an issue here--or in most developed nations...the water supply has already been purified (unless you're using well-water). However, when cruising out of the country, it's a good idea to know what you're putting in your tanks...and if you're in any doubt, boil all water that's to be drunk or used to wash dishes, and/or treat each tankful to purify. It's even more important in these areas to let the water run before putting it in the tank, because any harmful bacteria will REALLY proliferate in water hoses left sitting on the dock. These are not MY instructions...I found them in the owners manual for a 1985 Sea Ray I owned...you can also find them on most of the RV sites. People have expressed concern about using this method to recommission aluminum tanks. While bleach (chlorine) IS corrosive, it’s effects are are cumulative. So the effect of an annual or semi-annual "shock treatment" that's completely flushed out of the tank within a few hours is negligible compared to the cumulative effect of holding chlorinated city water in the tank for years. Nevertheless, it's a good idea to mix the total amount of bleach in a few gallons of water before putting it into either a stainless or aluminum tank. People have also expressed concern about the potential damage to rubber and neoprene water pump parts. Again—the cumulative effect of carrying chlorinated water is far more damaging over time than the occasional “shock treatment.” And it’s that cumulative effect that makes it a VERY bad idea to add a little bleach to each fill. Not only does it damage the system, but unless you add enough to make your water taste and smell like a laundry, it’s not enough to do any good. Even if it were, any “purifying” properties in chlorine evaporate within 24 hours, leaving behind only the corrosive properties. --Peggie  

  • This site uses cookies to help personalise content, tailor your experience and to keep you logged in if you register. By continuing to use this site, you are consenting to our use of cookies. Accept Learn more…

How To Clean Boat Water Tank? Without Removing It

How To Clean Boat Water Tank

Cleaning your boat’s water tank isn’t more complicated than cleaning anything else. You don’t have to be a professional or have special skills to do it.

The surprising thing is that a lot of boat owners still choose contractors to clean their boat water tank(s), which can cost up to many times the price of a DIY solution. To help you get the task done let’s walk through a simple step-by-step boat water tank cleaning process. knowing that boat water tanks come in different shapes, sizes, and places, some are reachable to remove or accessible inside to clean, and others are hard to get to. But regardless of its reachability or accessibility, and what materials are the tank(s) made of. There is always a convenient way to get the job done.

To make the task easy I will present two methods:  Cleaning the water tank without removing it.  Removing and cleaning the water tank.

Let’s begin with Cleaning the water tank without removing it:

How To Clean Boat Water Tank Without Removing It.

Cleaning the water tank without removing it is not as difficult or complicated a process as some think. Let’s see how:

  • Remove all filter cartridges, aerators at all outlets .
  • Turn off the water heater from the electrical panel. (If installed)
  • Drain the tank completely through every faucet.
  • Fill half of the tank with hot water. A  temperature that does not cause any damage to the tank and water lines (check the manual). approx 50 Celsius – 122 Fahrenheit will be fine.
  • Shake the tank safely as possible. Take the boat for a short trip, about 30 minutes, to churn the hot water inside the system, which helps loosen the stickiness of sticky filth inside. Or try any appropriate way to shake the tank.
  • Drain the tank completely through every faucet. Drain it as fast as you can. Do it while the boat is moving if possible. To prevent any sediments from remaining inside.
  • Fill half the tank with water and an appropriate cleaner. Bleach damages aluminum tanks and has some environmental concerns. Read more about bleach in The Guardian If your choice is bleach Do Not Use More than (approx half an ounce ( 15 Ml ) of household bleach per gallon of water).
Bleach alternatives are a mix of lemon and vinegar ( approx 4OZ – 120Ml ) per gallon. Or my favorite one the regular dish soap will be an effective and inexpensive solution.
  • Fill the entire system with a cleaning solution. Run the water from each faucet until you can see or smell the solution at each outlet.
  • Close and plug all faucets, outlets, and aerators.  Plug all aerators and the tank’s air breathers. Leave the system pressurized with the cleaning solution in it for 4 to 12 hours.
  • Drain the entire system and flush it thoroughly.   Flush it with potable water. Fill and drain at least 2 times, or until you are sure there is no cleaning solution left in the tanks.”
  • Clean and reinstall all aerators, and filter cartridges . Install new ones as appropriate. ( Recommended )
  • Fill the tanks with potable water.  

That’s How you clean a water tank on a boat without removing it.

Now your waters are clean and potable. You may still smell or taste something strange for a while as a result of the cleaning solution or chlorination but it should not be strong or very noticeable, otherwise, you are fine. 

For additional protection, you can install Drinking-Water Filter & Purifier Systems. And keep in mind you have to clean the tanks once a year at least to keep the supply of potable water available.

As for the water tanks that you can remove , cleaning them is not complicated, just follow the following steps:

  • Remove any filter cartridges and any aerators at faucets and outlets.
  • Turn off the water heater (if installed) from the electrical panel.
  • Remove all hoses and fittings connected to the tank. 
  • Remove the water tanks following the instructions manual.
  • Brush, scrape, and wipe the tank from the inside wherever your hand can reach. Use a stick and wrap a rag over the top for places far from your hand.
  • Install the tank in place and connect the lines.
  • Fill the entire system with a cleaning solution (approx. one ounce per gallon).
  • Run the water from each faucet until you can smell bleach at each outlet.
  • Close all the faucets and outlets and plug all aerators and the tank’s air breather, and leave the system pressurized with the solution in it for 2 to 6 hours.
  • Drain the entire system, and flush it thoroughly with potable water (fill and drain at least 2 times) until you are sure there is no residual solution left in the tanks. 
  • Clean and reinstall all the aerators and filter cartridges or install new ones as appropriate.
  • Fill the tanks with potable water. 
  • How to clean a boat’s fuel tank
  • How To Clean Boat Holding Tank
  • How To Clean A Boat Engine Compartment

Boat Water Tank Cleaning Tips & Nots

  • Algae, bacteria, and other contaminants can thrive in the entire water system, not just the tanks.
  • Make sure there is no sediment left at the bottom, a yellowish layer on the inner walls, or any blackish green spots or dots anywhere you can see inside the tank
  • If you removed the water tank(s) and cleaned it with your hands; no need to use more chemicals or keep them in the system longer.
  • Bleach in these concentrations ( Half an ounce – 15 Ml ) and durations will not harm the tanks, plumbing, or pumps. And it will not require a lot of water to clear it out.
  • Bleach causes damage to aluminum tanks and has some environmental concerns.
  • Bleach causes damage to some types of watermakers. Read the instructions in the watermaker manual.
  • The freshwater in your boat water tank will not always be fresh;
  • During the cleaning process, it is noteworthy that repair and maintenance should be carried out if necessary.

Related Questions

How to know if the boat’s water tank is bad?

How to know if the boat's water tank is bad.

The boat water tank is bad if there are doubtless signs such as; odd water smell or taste or color, jammed pumps, clogged filters, visual inspection – sediments and dirt, or through water test . 

How often should a boat water tank be cleaned?

boat fresh water

You should clean the boat’s water tank at least once every two years – annually would be better. Or after a longer storage time than usual. Or if there are signs that a cleaning procedure is needed. 

Final thought

Boat water tank problems can appear in several ways, the water tastes bad, looks dirty, has an unpleasant odor, water testing, or any combination of the four.

The freshwater in your boat water tank will not always be fresh; bad water source, bad filtrations, Leak into the tank, poor water circulation, rust flakes, paint chips, etc. 

Which will eventually lead to contamination of the water with bacteria, algae, or chemicals. 

That’s why it’s important to regularly clean out the tanks the right way, every time.

I hope this guide was helpful. Bookmark this page to remember and come back to it whenever you need it. Share this post to help someone else.

Visit our Popular Forums

  • Monohull Sailboats
  • Multihull Sailboats
  • Powered Boats
  • General Sailing
  • Antares Yachts
  • Fountaine Pajot
  • Lagoon Catamarans

Cruising Business

  • Boat Classifieds
  • General Classifieds
  • Crew Positions
  • Commercial Posts
  • Vendor Spotlight

Life Aboard a Boat

  • Provisioning: Food & Drink
  • Families, Kids, & Pets Afloat
  • Recreation, Entertainment, & Fun
  • Boat Ownership & Making a Living
  • Liveaboard's Forum

Seamanship, Navigation & Boat Handling

  • Seamanship & Boat Handling
  • Training, Licensing, & Certification
  • Health, Safety, & Related Gear
  • Rules of the Road, Regulations, & Red Tape

Engineering & Systems

  • Const. / Maint. / Refit
  • Product / Service Reviews
  • Electronics: Comms / AV
  • Electrical: Batts / Gen / Solar
  • Lithium Power Systems
  • Engines & Propulsion
  • Propellers & Drive Systems
  • Plumbing / Fixtures
  • Deck Hdw: Rigging / Sails
  • Aux. Equipment & Dinghy
  • Anchoring & Mooring

Photo Categories

  • Member Galleries
  • Life Onboard
  • Sailing in the Wind
  • Power Boats
  • Cruising Destinations
  • Maint. & Boat Building
  • Marine Life
  • Scuba Diving & Divers
  • General Photos

Recent Photos

how to clean water tanks on sailboat

Listing Categories

  • African Cats
  • view more »
  • Crew Wanted
  • Crew Available
  • Enhance Your Account
  • Meet the Mods
  • Meet the Advisors
  • Signup for The Daily Cruiser Email
  > >

Cruiser Wiki

 
Please support our sponsors and let them know you heard about their products on Cruisers Forums.
02-10-2009, 09:33  
Boat: Endeavour 40
floating in the top of my forward tank after a fill-up. I have just purchased the recently and have not even used a full tank of through either tank, but due to length of time that they have set up prior to my I assume that they both need to be cleaned throughly.

My question would be what is the best solution and method for your water ?

I have a removable plate at the top of both metal that will easily accommodate a long brush to scrub the sides with, but is there something else that needs to be done? I will be moving on the soon so I want to make sure that this is done properly. Thanks in advance.

Daniel
02-10-2009, 09:50  
, pressure wash/scrub etc, hose out until the water runs clean out of the tank with no chunks. Seal it all up and fill the tanks. Do you have a good water filter? If not install one. Just a good household one is fine... plastic housing about a foot long and 4" diameter..
02-10-2009, 09:56  
Boat: 48' 1963 S&S yawl
almost as well.
02-10-2009, 09:59  
Boat: 1969 Morgan 40 Cruising Ketch "Lady Catherine II", 1973 Bristol 34 - "Our Baby"(RIP), Catalina 22
in it. Drain. Use a garden hose and spray nozzle to wash the mold off the walls and baffles. Drain. Get as much of the particulates out as possible, flush thoroughly. Also, it wouldn't hurt to change the supply lines as mold can set up house in there as well. Adding at least an inline sediment filter would be a good idea also (cheap Home Depot variety).

If you have plastic tanks, you'll need to use a biocide for that purpose instead of bleach cuz plastic retains that wonderful chlorine flavor!
02-10-2009, 10:13  
Boat: 1969 Morgan 40 Cruising Ketch "Lady Catherine II", 1973 Bristol 34 - "Our Baby"(RIP), Catalina 22

02-10-2009, 10:53  
Boat: Nordship 40ds
where a stronger than my fresh let the water out of the boat. Also helps clean the bilge. Fill the tanks again with water. Leave the fill caps open for a couple of days so any bleach can evaporate. Run the water thru the fawcets again for a few minutes each. I have no access to the tanks If I did I would scrub them with a brush or a pressure washer. On the third time of rinse/repeat the chlorine taste is gone for me but the admiral might say something different.

I was told by a water plant manager that I would be amazed about how much seditment is in a water supply. I use a household filter to fill my water tank. It has two hose adapters on the end and I trap quite a bit of stuff when I use the filter.
02-10-2009, 11:01  
Boat: Island Packet 31 (35'), Black Squirrel
, you have options and issues. First, "clean" is a relative term. As several have pointed out, you need to sanitize. Worse (or better), you need to do it in an environmentally safe fashion. Dumping chlorine , in the concentrations required to kill a visible mold issue is going to be...problematic.

For my RV, I follow these instructions ( ). If you can see "stuff," you have a serious issue. You will hear people say they have drank worse and not even been sick. Good for them, and if you like to gamble - go for it. Otherwise, presume the system was contaiminated with for a better idea of what you want to accomplish in regards to "clean" (see WHO example: )


A few things to consider, based on the fact you see colonies now: clean them, but it is probably hours of that will result in compromised lines at some point. , sinks, ?. - have it pumped first as this is going to screw up the balance in it. Then have it pumped after. Once it is clean and sanitized keeping it that way is the key: steps you are going to cause issues. good luck.
02-10-2009, 11:26  
Boat: Cascade
brush from IKEA for 2 bucks.

sinks.


cord and chewing up my zincs!!) also tends to leave the water hose end lying in the water. I finally purchased a new hose to use while filling the tank.

02-10-2009, 11:50  
Boat: 1969 Morgan 40 Cruising Ketch "Lady Catherine II", 1973 Bristol 34 - "Our Baby"(RIP), Catalina 22
02-10-2009, 11:50  
Boat: Nordic Tug 37
. Peggy has written a very good book on boat heads and water systems.

To correct your water quality problems, start with a stem-to-stern of the potable water system. Start with the fills. To prevent someone from inadvertently filling your water tanks with (Believe me, it happens!), the fill fittings should be clearly labeled “water” or have a blue . With a deckplate key, unscrew each deck fill and look at its O-ring. If the plug isn’t water-tight (because the O-ring has deteriorated or is missing) contaminants will find their way into the tank.
Moving below, inspect the water hoses and clamps at the deck fill pipes. Look too at the condition of the hose. If the hose casing (outer surface) is discolored, cracked or tacky to touch, go get a tape and measure the hose run that needs to be replaced. Next, inspect the tank vent hoses. Vent hoses may run to external vent fittings or they may terminate inside the boat. In the latter case, make sure the end of the vent hose is higher than the tank’s deck fill. Ensure too that the exterior vents or ends of the vent hoses have screens to keep insects from taking a swim in your .
If your boat’s tanks have inspection , remove them and look inside. Tank cleaning to remove accumulated sediment may be in order. Next, follow the water system piping from each tank to the pressure . There should be a strainer (typically 50 mesh) installed in-line to prevent foreign debris from entering and damaging the pump. Clean this as needed. . From the water tanks to each fixture, note the type of piping used, its diameter and condition. Depending on your boat’s age, you may find annealed copper piping, PVC (polyvinylchloride) hose, gray PB (polybutylene) or PEX (cross-lined polyethylene) tubing or a mix of materials. Of the four materials, PVC hose typically has the shortest life. Identify piping segments that need to be replaced due to deterioration or the use of inappropriate (non FDA-approved) materials.


Always disinfect your boat’s potable water system at the start of each season and whenever water taste, or appearance becomes a concern. Before starting, ensure that the water is turned off at the panel. Ice-makers should be turned on to allow the feed line to be disinfected. Remove any filter cartridges as well as any aerators at faucets. Flush the entire system with potable water and then drain it completely through every faucet.
Next, fill the entire system with a chlorine solution (approx. 1 ounce of common household bleach per gallon of tank capacity). Run the water from each faucet or outlet until you can smell bleach at each location. Leave the system pressurized with this bleach solution in it for at least 4 hours, but not more than 24 hours. Drain the entire system again, flush it thoroughly with potable water (fill and drain at least 2 times), and discard the first two buckets of ice generated by the ice-maker (if installed). Fill the tanks with potable water, clean the sediment filter installed to protect the pressure pump, and install new water filter/purifier cartridges as appropriate. Clean and reinstall the aerators at the faucets.
Water treatment systems (filters) can be used to remove taste and as well as sediment, rust, algae and other microscopic solids. Point-of-use (POU) systems treat water at a faucet. Point-of-entry (POE) systems treat water as it’s drawn from tanks or enters the boat via a city water inlet. I recommend both.

Remember, algae and contaminates can thrive in the entire water system, not just the tanks. Other than tanks, which are not approved for , bleach in these concentrations (and durations) will not harm the tanks or .
Good luck and hope this helps,
Tom
02-10-2009, 12:12  
Boat: Island Packet 31 (35'), Black Squirrel
the water to the sinks and - remove any end of line filters. They will clog almost instantly making water spray in all sorts of interesting and unfortunate directions.

Also, make the first run into a bucket - no sense sending the goop into the drain lines.
02-10-2009, 12:26  
Boat: Endeavour 40
02-10-2009, 12:58  
Boat: A Lido 14 (for now)
02-10-2009, 13:47  
Boat: Prout Snowgoose 37


If you got one new,
02-10-2009, 14:32  
Boat: PDQ Altair, 32/34


We actually keep it on-deck in a pouch for easy use. I just screw it on the end of the hose, where ever we are cruising.

The point is to keep fine solids out.
 
Thread Tools
Rate This Thread
:
Posting Rules
post new threads post replies post attachments edit your posts is are code is are are are
Similar Threads
Thread Thread Starter Forum Replies Last Post
cyberkitty Plumbing Systems and Fixtures 7 12-02-2010 14:16
S/V Willow Plumbing Systems and Fixtures 4 15-01-2010 16:01
CruiserHopeful Monohull Sailboats 9 22-10-2009 10:29
btrayfors Cruising News & Events 5 01-08-2008 16:02
Lynx Plumbing Systems and Fixtures 1 22-05-2007 05:27
- - - - - - -

Privacy Guaranteed - your email is never shared with anyone, opt out any time.

ACTIVE STORM TRACKER Hurricane and Tropical Storm Information Learn more

BoatUS Boating Association Logo

Service Locator

  • Angler Endorsement
  • Boat Towing Coverage
  • Mechanical Breakdown
  • Insurance Requirements in Mexico
  • Agreed Hull Value
  • Actual Cash Value
  • Liability Only
  • Insurance Payment Options
  • Claims Information
  • Towing Service Agreement
  • Membership Plans
  • Boat Show Tickets
  • BoatUS Boats For Sale
  • Membership Payment Options
  • Consumer Affairs
  • Boat Documentation Requirements
  • Installation Instructions
  • Shipping & Handling Information
  • Contact Boat Lettering
  • End User Agreement
  • Frequently Asked Questions
  • Vessel Documentation
  • BoatUS Foundation
  • Government Affairs
  • Powercruisers
  • Buying & Selling Advice
  • Maintenance
  • Tow Vehicles
  • Make & Create
  • Makeovers & Refitting
  • Accessories
  • Electronics
  • Skills, Tips, Tools
  • Spring Preparation
  • Winterization
  • Boaters’ Rights
  • Environment & Clean Water
  • Boat Safety
  • Navigational Hazards
  • Personal Safety
  • Batteries & Onboard Power
  • Motors, Engines, Propulsion
  • Books & Movies
  • Cockpit Confessions
  • Communication & Etiquette
  • Contests & Sweepstakes
  • Colleges & Tech Schools
  • Food, Drink, Entertainment
  • New To Boating
  • Travel & Destinations
  • Watersports
  • Anchors & Anchoring
  • Boat Handling

The Care And Feeding Of Your Boat's Water Systems

Advertisement

Boating is all about water, inside and outside your boat. Let's take a close look at important maintenance tasks to stay on top of all your water systems.

Boat water system illustration

Illustration: Dick Everitt

  • Anchor/foredeck washdown with pressure pump and foot switch
  • Galley sink. Filter for cleaner cold water. Sink drains above waterline at max heel. All thru-hulls must comply with ABYC standards
  • Condensation drip tray drains overboard above waterline at max heel per ABYC standards
  • Icemaker door open when not used
  • Bilge pump drain well above water line on max heel. Smooth inner lining to hose. Vented loop may be needed if drain is near or below water line at max heel
  • Head sink with filter on cold water and drain above waterline at max heel
  • Shower sump pumped overboard to discharge above water line at max heel. Shower drain hose goes to shower evacuation pump. Head intake hose has a strainer and thru-hull
  • All thru-hulls equipped with seacocks. Note double hose clamps
  • Holding tank vented with minimum bends for better airflow
  • Head discharges to MSD Type 1 with Y-valve
  • Holding tank has pumpout hose and gravity discharge overboard after treatment where it's legal
  • Water heater has anti-backflow valve to prevent expanding hot water from entering cold water system (This tank is shown lying on its side, an installation seen on some boats. Normally, hot-water tanks are upright.)
  • Anti-siphon loops and valves where appropriate
  • Potable water tank with fill and vent
  • Potable water tank has sediment filter prior to pressure pump
  • Accumulation tank diminishes pulsation
  • Scuppers drain cockpit. Some boats need scuppers with hose to discharge

Seawater Washing (1) — Seawater systems such as anchor washdown and dishwashing with a seawater foot pump (if you're in clean water and rinse well with potable water) can conserve water. Frequently bathing in saltwater causes skin problems in many people; a freshwater rinse helps. Washdown water pump should be a short distance from the thru-hull but above the waterline.

Drinking Water Purity (2, 6) — When in question, can be improved by adding a small amount of bleach. Some authorities recommend adding approximately 1 teaspoon of household bleach with no perfumes, dyes, or other additives per 10 gallons of water. If possible, agitate the water after adding bleach and then let it sit for an hour. Chlorine odor will dissipate after a day. Bleach may initially make the water to which it's added unclear because it's killed the “bugs.” The water clears as these settle to the bottom. Ultimately they should be flushed out. It's preferable and safer to add product manufactured for the purpose; camping stores are good sources. If you have questionable water purity and no way to remedy it, boil water before drinking. Drinking-water filters such as GE's FXUVC under-the-sink cartridge remove many impurities and greatly improve taste. A water system UV light, such as those used in some reverse-osmosis systems, can kill viruses.

Air Conditioning & Refrigeration (3) — Condensation drain trays should occasionally be inspected to clear any blockage in drain hoses, which should preferably drain overboard rather than into the bilge. If trays don't drain fully, they'll develop a musty odor that will be circulated by the air handler.

Icemakers (4) — Should be left open and off when not being used for a few days or longer to avoid odor and mold. Often the incoming water line is behind the unit in an area warmed by the unit. This facilitates stagnation and odor, particularly in the filter that may be in that area. When in use, the ice bin should be dumped at least every few days to keep water flowing. Good ventilation helps.

Bilge Water (5) — Oil-absorbent pads in bilges under the engine and whenever there's oil-spill potential are critical. They must not interfere with the operation of a bilge-pump float switch. Always clean loose fuel and oils out of the bilge with an oil-absorbent pad, and discard appropriately. Proper bilge-pump installation is critical and will vary with different boats. The hose interior should be smooth, the water column in the hose should be no more than needed, and great care must be taken to avoid backflooding from the sea. Visual and audible alarms at the helm are crucial.

Bilge pump hose should exit well above water line at maximum heel within the parameters of ABYC standards. Pumps should be in sections where water can pool more than minimally.

Basic bilge pump schematic

A basic bilge pump schematic.

Sumps (7) — Those used for showers should be cleaned and flushed through regularly, even if the shower isn't often used. Shower sumps should discharge well above the water line at maximum heel within the parameters of ABYC standards.

Thru-Hulls (8) — Should be checked for obstruction every time you haul the boat and/or dive the bottom. Inspect them with a strong light, such as Streamlight's Stylus Pro 360 , while hauled. While in the water, you may need to carefully (to avoid damaging hose and valve) work an old table knife or similar tool around inside the hole to clear it of barnacles and other obstructions. A carrot peeler makes a good tool for small holes. If the hole is covered by an external filter, this should be removed, when hauled, for painting inside, inspection, and cleaning.

Seacock illustration

Water Passages (8, 6) from thru-hull openings — Sinks, heads, engines, air conditioners, refrigeration, bilge pumps, and other components use thru-hull openings and hoses. Regularly inspect and operate all thru-hull valves . Some valves periodically require disassembly and lubrication or cleaning while the boat is hauled. You may need to close one quickly when a breach occurs in a water passage inside the boat.

Regularly inspect all hoses and connections . Old or suspect hoses will deteriorate over time and should be replaced. Eventually, wire inserts will rust and harm inner and/or outer hose walls. Preferred hose clamps are AWAB brand or similar. Double the clamps (unless doing so would cut into the hose, in which event a longer hose barb is indicated) and regularly inspect.

All components should be 316 grade stainless or better. Cheap hose clamps tend to rust and break. Use hose appropriate for the job, such as marine-sanitation hoses for heads. ABYC standards should be followed in these and all other aspects.

Holding Tank (9, 10, 11) — Some chemicals added to holding tanks can harm the environment if spilled, either from the boat or from pumpout-disposal systems and system failures. Various companies market what they claim to be environmentally friendly holding-tank additives with varying degrees of effectiveness. Some boaters install a Raritan ElectroScan MSD plumbed to treat and discharge overboard where it's legal, and treat and discharge into the holding tank at other times.

Head Water (10) — Regular addition of products such as Star brite Instant Fresh Toilet Treatment and Raritan CP help keep head water odorless and improve operation of the head . Petroleum-based products can harm valves, seals, and gaskets. Check manufacturer's recommendations. Regularly pouring white vinegar into the head and flushing will help diminish calcium buildup on inside walls of head plumbing. Raritan's CH is stated to be environmentally harmless and is specially formulated to remove heavy calcium buildup as well as prevent buildup if used regularly.

Head discharge hoses should be specified for MSD use. Other types of hoses are usually more likely to develop calcium buildup, deposits, blockages, and odor permeation. Plumbing the head to flush with fresh water can reduce odor. The head intake hose is positioned as it is in the illustration for clarity, but should be far enough from the head discharge to avoid sucking up waste.

Water Heater (12) — Should be standing upright with a backflow valve between the incoming cold water and the heater. Requires periodic flushing by squirting in clean dock water with a water hose under moderate pressure through a discharge port at top, squirting around inside as much as practical, and draining through open intake port at bottom. Some water heaters have an anode for cathodic protection that should be checked yearly.

Vented loop illustration

Anti-Siphon Loops and Valves (13) — Are needed in some hoses that exit underwater to prevent water from siphoning into the boat. Whether anti-siphon valves and loops are used depends in part on the location of relevant components in the boat and whether they're below the waterline or could end up below the waterline. These components may include heads, sinks, and engines and their raw-water intake and exhaust systems. As a precaution, when you're away from your boat, close the underwater seacocks.

Potable Water Tank (14, 15, 16) — Should be treated periodically with a product such as Star brite AQUA Water Treatment & Freshener to remove odors, scale, and bad taste. Also, thoroughly flush tank with clean water and pressure nozzle. Drain from bottom if possible; if not, pump it out. Follow manufacturer directions when applying anything to drinking water.

Follow instructions and warnings for cleaning additives, particularly with aluminum tanks. New tanks, especially fiberglass or plastic, may smell of the material of which they're made. Often, adding baking soda to the water will help, as well as with other odors later. The amount depends on the severity of the problem and volume of the tank.

Clarity of water may vary with source, such as from wells, cisterns, public water works, and reverse osmosis. The latter source, if coupled with a UV light and maintained well, probably produces the best water.

Drains and Scuppers (17) — Cockpits, side decks, and other areas of a boat normally have drains to rid the boat of rain and boarding seas. Test these regularly with a hose to be sure they're draining adequately. Leaves, plant material, dirt, and other debris can quickly obstruct them. Boats can sink if drains aren't kept clear. Clear them with a high-pressure hose nozzle or plunger.

Related Articles

The truth about ceramic coatings for boats.

Our editor investigates the marketing claims of consumer-grade ceramic coatings.

Fine-Tune Your Side Scan Fishfinder

Take your side-scanning fishfinder off auto mode, and you’ll be spotting your prey from afar in no time

DIY Boat Foam Decking

Closed-cell foam flooring helps make boating more comfortable. Here’s how to install it on your vessel

Click to explore related articles

Technical Editor, BoatUS Magazine

One of the top technical experts in the marine industry, Tom Neale, BoatUS Magazine Technical Editor, has won nine first-place awards from Boating Writers International, and is author of the magazine’s popular "Ask The Experts" column. His depth of technical knowledge comes from living aboard various boats with his family for more than 30 years, cruising far and wide, and essentially learning how to install, fix, and rebuild every system onboard himself. A lawyer by training, for most of his career Tom has been an editor and columnist at national magazines such as Cruising World, PassageMaker, and Soundings. He wrote the acclaimed memoir All In The Same Boat (McGraw Hill), as well as Chesapeake Bay Cruising Guide, Vol. 1. These days, Tom and his wife Mel enjoy cruising their 2006 Camano 41 Chez Nous with their grandchildren.

BoatUS Magazine Is A Benefit Of BoatUS Membership

Membership Benefits Include:

Subscription to the print version of BoatUS Magazine

4% back on purchases from West Marine stores or online at WestMarine.com

Discounts on fuel, transient slips, repairs and more at over 1,200 businesses

Deals on cruises, charters, car rentals, hotel stays and more…

All for only $25/year!

We use cookies to enhance your visit to our website and to improve your experience. By continuing to use our website, you’re agreeing to our cookie policy.

The charity making life better by water

Making life better by water

Keeping your water tank clean

In this article on water tank hygiene from our Boaters Update, we continue our series on boat maintenance with help from the experts at River Canal Rescue.

From the latest gadgets for boaters to the best maintenance tools for boats - it's all at Crick this year

Leisure marine domestic water tanks are typically constructed of three types of material; plastic, stainless steel or mild steel, each with differing maintenance requirements and associated risks.

Types of tank

The highest risk material is mild steel - it reacts with oxygen to produce rust which drastically depreciates the water quality and creates an environment for bacteria to develop. While the bacteria is not known to be dangerous, if a bacterial infection takes hold, it can give the water a foul smell and taste. When inspecting the tank, the bacterial infection will take the form of slime attached to the sides.

Plastic tanks offer greater protection from bacterial infection however, dependent on material and age, they will start to release toxins into the water when they begin to break down so it's important to replace plastic tanks in accordance with their shelf life.

They're also more likely to absorb or hold any chemicals added to purify the water. For example, the chemical in purifying tablets used to flush the system may remain in the water for a year or so and while these toxins are not dangerous, a chemical smell and taste will persist.

The lowest risk material is stainless steel – this offers protection from rusting and bacterial infection and as it doesn't retain toxins, it avoids persistent foul smells and tastes.

Match your maintenance to the type of tank

Stainless steel tanks require a purification cycle of at least once a year. To do this, add a purifying tablet to a full water tank and leave to activate for the advised time period. Once purification has occurred, turn all the taps on and drain the system as much as possible. This will ensure purification flows through the system. Next, refill and flush the tank twice more to evacuate any residual chemical within the system (with the taps on and a running hose pipe in the tank).

Mild steel tanks require the same purification cycle as a stainless-steel tank but they also need deep cleaning every three to five years. This entails removing the inspection cover and power washing the inside. Do not sand down or rub the rust off - rust is not dangerous and the power washer will remove any loose rust and debris build up. Do not paint the inside of the tank (unless specialist paint is used) as this will leach toxins into the water.

Plastic tanks also need a yearly purification cycle, but instead of using chemicals, they should be cleaned out manually using hot water. If the tank is inaccessible a hot water flush will suffice. If a chemical is the only method available, regularly flush the system with fresh water. Furthermore, do not allow water to stand in the tank for long periods of time as this will increase the build-up of toxins in the water.

Finally, filtration is advisable for any domestic water tank. A filter will remove any debris or sediment, drastically improving the water quality and consistency, and there are also filters that can remove toxins. Filtration however, does not replace the need for tank maintenance and if this is neglected, water will be foul smelling/tasting water even if filters are installed.

Thanks again to the experts at River Canal Rescue for sharing their knowledge.

Boaters Update

Sign up for Boaters Update

Keeping water out of your fuel

Fuel tank maintenance

Boating services

Find boating services near you

Last Edited: 11 February 2019

Stay connected

Sign up to our monthly newsletter and be the first to hear about campaigns, upcoming events and fundraising inspiration

Phone icon

Looking for Hassle-free Home construction?

Overhead Water Tanks: Design, Capacity, and Essential Cleaning Services

' src=

In residential, commercial and industrial buildings, overhead water tanks are one of the essential components and basic requirements. Overhead tanks are designed to store water at a height above the ground level and ensure a pressurised and steady water supply through gravity to various parts of the building. This article discusses the important aspects of overhead water tanks in detail, so keep reading to learn about these technical features.

Brief on Overhead Water Tanks

Overhead water tanks are installed at elevated levels, mostly on rooftops or specially constructed towers, to use gravitational force to supply water. They are important water distribution systems in buildings, ensuring that water flows through pipes in taps and other outlets without the need for additional pumps. When the area is limited or there is undesirable water pressure, overhead water tanks are a vital part of the project. 

Overhead Tank Design

Overhead tank design involves several key considerations to ensure it functions safely and effectively. The main aspects are material selection, structural integrity, shape, size and foundation. 

Let’s discuss these in detail. 

1. Material Selection

Overhead tanks are commonly made from materials like concrete, steel or plastic. There are advantages and drawbacks to each of these materials. 

  • Concrete tanks: They are strong and durable and offer great resistance to weathering and leakage. However, they are heavy and need strong structural support and may be prone to cracking over time.
  • Steel tanks: They are lightweight and easier to install compared to concrete tanks. They are resistant to cracking, but might need protective coatings to prevent corrosion, particularly in coastal or humid environments. 
  • Plastic tanks: Plastic tanks are the most lightweight, cost-effective and easy to install. They are resistant to corrosion and are available in various sizes and shapes. They may degrade over time due to exposure to ultraviolet (UV) light if not treated properly.

2. Structural Integrity

The structural design of an overhead water tank must consider the load of the stored water, which can be huge. The tank must be designed such that it carries static loads and dynamic loads, like wind or seismic forces depending on the location. It also involves ensuring the tank foundation can bear the total load without excessive settlements, buckling or failure.

3. Shape and Size

The shape of the tank is often rectangular, cylindrical or spherical. Each shape has its own structural advantages which are mentioned briefly below.

  • Rectangular tanks: Easier to construct with concrete, especially for large capacity overhead tanks, but requires careful attention to internal stresses and may be challenging to clean.
  • Cylindrical tanks: They offer great structural stability and are used for both steel and plastic tanks.
  • Spherical tanks: Although they are more difficult to design and build, they offer the best stress distribution. 

The size of the tank is determined by the demand for water, which depends on the number of occupants in the building, the number of plumbing fixtures, and other specific water usage factors.

Estimating the Capacity of Overhead Water Tanks

Calculating the overhead tank capacity is vital to ensure an adequate water supply. It is generally based on the factors mentioned below:

1) Water Demand Estimation

The water demand for a building depends on the type of occupancy, i.e. residential, commercial or industrial and the number of users. For example, in a residential building, the per capita water requirement might be calculated at 135 litres per person per day, as per standard guidelines. The total demand can be estimated by multiplying this by the number of occupants.

2) Peak Demand Considerations

Overhead tank design should be such that they can meet the peak demand scenarios, like the morning and evening times when the water usage is normally highest. The overhead tank capacity should be sufficient to handle these peak times without getting empty.

3) Settings for Fire Fighting

Majorly for commercial or industrial buildings, the capacity of the overhead water tank must also account for water required in case of a fire emergency. In residential buildings, there must also be sufficient water capacity for emergency situations. In these cases, the fire safety regulations may dictate a minimum volume of stored water dedicated to firefighting purposes.

Cleaning Services and Maintenance 

Overhead water tank cleaning is important to ensure the water remains safe for consumption and the tank remains in good structural condition. Regular cleaning and inspection are vital components of this maintenance.

Over time, overhead tanks can accumulate sediments, algae and other contaminants that may compromise water quality. Regular cleaning is necessary to remove these deposits and ensure that water remains potable. 

Cleaning Process of Overhead Water Tanks

The following steps must be followed for the overhead water tank cleaning:

  • Draining the tank: The tank is emptied, either by using the water until it’s depleted or by manual/ pump draining.
  • Scrubbing: The interior surfaces of the overhead tank are cleaned to remove any sediments or biological growths. Special brushes and non-toxic cleaning agents are used for this purpose.
  • Disinfection: After scrubbing, the tank is disinfected using chlorine or other approved disinfectants, which kills any remaining microorganisms.
  • Rinsing and Refilling: The tank is thoroughly rinsed to remove any cleaning agents or disinfectants and is then refilled with fresh water.

Frequency of Cleaning

The frequency of the overhead water tank cleaning depends on the type of tank, the local environmental conditions, and the quality of the incoming water. It is generally recommended that overhead tanks be cleaned at least once every six months. In areas with poor water quality or high sediment content, more frequent cleaning may be necessary.

Structural Inspections

Just like cleaning, regular structural inspections are essential. These inspections should check for signs of cracking, corrosion, and other structural damage that could compromise the integrity of the tank. Any issues found should be quickly repaired to avoid more serious problems.

Overhead water tanks are an important part of the infrastructure in buildings, providing a reliable water supply through gravity-fed systems. The design and capacity of these tanks must be carefully planned to meet the needs of the building while assuring structural integrity. Regular maintenance, like cleaning and inspections, is important to keep the water safe and the tank in good working condition. By following best practices in design, capacity planning and maintenance, overhead water tanks can provide many years of reliable service.

Consult our team of experts at Brick & Bolt, to know the technical aspects and use of overhead water tanks, whether it’s for residential, commercial or industrial buildings.

Recent Post

Shuttering in construction: types, importance, and key factors for selection.

Shuttering in Construction

Resilient Design: Principles, Architecture, and the Future of Sustainable Building

Resilient Building Design

Exploring the Physical and Chemical Properties of Cement

Properties of Cement

Structural Steel: Properties, Composition,Types and Applications

structural steel

  • New Sailboats
  • Sailboats 21-30ft
  • Sailboats 31-35ft
  • Sailboats 36-40ft
  • Sailboats Over 40ft
  • Sailboats Under 21feet
  • used_sailboats
  • Apps and Computer Programs
  • Communications
  • Fishfinders
  • Handheld Electronics
  • Plotters MFDS Rradar
  • Wind, Speed & Depth Instruments
  • Anchoring Mooring
  • Running Rigging
  • Sails Canvas
  • Standing Rigging
  • Diesel Engines
  • Off Grid Energy
  • Cleaning Waxing
  • DIY Projects
  • Repair, Tools & Materials
  • Spare Parts
  • Tools & Gadgets
  • Cabin Comfort
  • Ventilation
  • Footwear Apparel
  • Foul Weather Gear
  • Mailport & PS Advisor
  • Inside Practical Sailor Blog
  • Activate My Web Access
  • Reset Password
  • Customer Service

how to clean water tanks on sailboat

  • Free Newsletter

how to clean water tanks on sailboat

Blue Jacket 40 Used Boat Review

how to clean water tanks on sailboat

Catalina 270 vs. The Beneteau First 265 Used Boat Match-Up

The Ericson 41's solid build and stylish 1960s lines offer an offshore-ready cruiser with class. The slender cockpit means you can brace yourself with a foot on the the leeward side. Which, as it turns out, makes you look classy as well. (Photo/ Bert Vermeer)

Ericson 41 Used Boat Review

how to clean water tanks on sailboat

Mason 33 Used Boat Review

how to clean water tanks on sailboat

How to Create a Bullet-Proof VHF/SSB Backup

AquaMaps with Bob’s blue tracks and my green tracks at the start of the ICW with bridge arrival times. (Image/ Alex Jasper)

Tips From A First “Sail” on the ICW

Make sure someone is always keeping a lookout on the horizon while the tillerpilot is engaged. If there are a few crew onboard, it helps to rotate who is on watch so everyone else can relax.

Tillerpilot Tips and Safety Cautions

Irwin Vise-Grip Wire Stripper. (Photo/ Adam Morris)

Best Crimpers and Strippers for Fixing Marine Electrical Connectors

We like going one size over what is often recommended for smaller boats. The advantages are a.Less stretch. Nylon can be too stretchy, but polyester not stretchy enough. One size over can be a Goldilocks answer. b.Better wear resistance. Because we like using short chain when hand-hauling, we cover the first 10 feet with a webbing chafe guard. This is very cut resistant, because unlike the rope inside, it is floating and not under tension. c. Better grip. ⅜-in. is pretty hard to grab with the wind is up. ½-in. fits our hands better. (Photo/ Drew Frye)

Polyester vs. Nylon Rode

how to clean water tanks on sailboat

Getting the Most Out of Older Sails

how to clean water tanks on sailboat

How (Not) to Tie Your Boat to a Dock

how to clean water tanks on sailboat

Stopping Mainsheet Twist

This is the faulty diesel lift pump, the arrow is pointing to the sluggish primer lever. That is an issue because the fuel lift pump needs to provide the right amount of fuel and fuel pressure to the injector pump. (Photo/ Marc Robic)

Fuel Lift Pump: Easy DIY Diesel Fuel System Diagnostic and Repair

shorepower connection

Ensuring Safe Shorepower

how to clean water tanks on sailboat

Sinking? Check Your Stuffing Box

Old, decomposing fiberglass boats in Hennebont, next to Lorient, in the Morbihan region of Bretagne, France. (Photo/ Angie Richard)

What Do You Do With Old Fiberglass Boats?

Replacement door latch made from an off-cut aluminum angle. The crafty DIY repair was made in the remote archipelago of Saint Pierre et Miquelon, where no hinges were readily available. (Photo/ Brett Campbell)

Boat Repairs for the Technically Illiterate

This is the original Yanmar 4JH5E 54hp normally aspirated engine supplied by Beneteau. We've done 6,000 hours over the last 13 years. (Photo/ Brett Campbell)

Boat Maintenance for the Technically Illiterate

how to clean water tanks on sailboat

Whats the Best Way to Restore Clear Plastic Windows?

Odorlos Holding Tank Treament Packets

Stopping Holding-tank Odors

how to clean water tanks on sailboat

Giving Bugs the Big Goodbye

how to clean water tanks on sailboat

Galley Gadgets for the Cruising Sailor

Instead of dreading a squall, think about it as a way to fill up your water tanks. PS tested ways to make sure the rainwater you catch is clean, tasty and safe to drink.

The Rain Catcher’s Guide

how to clean water tanks on sailboat

Sailing Gear for Kids

how to clean water tanks on sailboat

What’s the Best Sunscreen?

The edges of open shade can read as high as 25 percent of sunlight when surrounded by a white deck. (Photo/ Drew Frye)

UV Clothing: Is It Worth the Hype?

how to clean water tanks on sailboat

Preparing Yourself for Solo Sailing

The R. Tucker Thompson is a tall ship based in the Bay of Islands, Aotearoa New Zealand. It operates as a not-for-profit, and takes Northland’s young people on 7-day voyages. (Photo courtesy of R. Tucker Thompson)

R. Tucker Thompson Tall Ship Youth Voyage

how to clean water tanks on sailboat

On Watch: This 60-Year-Old Hinckley Pilot 35 is Also a Working…

America's Cup sailboats have progressed from deep-keel monohull J-class Yachts, to regal Twelve Meters, to rambunctious wing-sailed catamarans. The rule now restricts boats to a single hull, but allows retractable, hydraulically actuated foils. Top speeds of 40 knots are common. (Photo/Shutterstock)

On Watch: America’s Cup

how to clean water tanks on sailboat

On Watch: All Eyes on Europe Sail Racing

how to clean water tanks on sailboat

Dear Readers

  • Belowdecks & Amenities
  • Living Aboard

We tasked our resident chemical engineer to help us tame the terrible in marine sanitation.

Odorlos Holding Tank Treament Packets

In recent years, PS testers have investigated holding tank chemicals ( Fighting Odor with Chemical Additives ) in concert with ongoing investigations of sanitation hoses and holding-tank vent filters. We’ve investigated some old-school deodorizing products with disappointing results, but we also tested the latest generation of holding tank treatments that use enzymes, nutrients for bacteria, and live bacteria to kill odors by more natural—and often more effective—means. Our readers quickly responded, suggesting we look at some of their personal favorite products, so thats what this test is about.

Talk about holding tank chemicals, and many sailors think of that familiar port-a-potty smell—disinfectants and surfactants mixed with deodorizers. And yes, these products are still being used in holding tanks, usually by those who don’t know any better. Some chemicals also claim to help liquefy the waste and prevent clogging. While larger boats can use vent filters ( PS , March 2012) and enhanced ventilation to reduce odors, the only practical option for the small-boat owner with a portable toilet is some sort of treatment in a can.

Holding tank treatments are fertile ground for innovation. We prefer to attack the problem with the latest bio-augmentation products, avoiding harsh chemicals.

The newer, enzyme-loaded products are known as bio-augmentation treatments, because they supplement the natural biological processes. Some work primarily by providing nitrate as both a nutrient and as an alternative oxygen source for bacteria. Bacteria convert nitrate to nitrite or nitrogen, liberating oxygen and encouraging aerobic decomposition.

Several products claim to contain live bacteria to aid in digestion, but in our last test, we were unable to develop cultures. This time around, however, we did get a culture on some products, and one of these, Bactank T3 , turned out to be one of the most effective.

In the end, the complex chemistry and shifting nature of holding tank conditions make it difficult to pinpoint all of the chemical processes at work. Given the variables that can impact this particular test, the best we could do is measure what we found and add a little growth-fostering air to the biologically active treatments.

WHAT WE TESTED

Our previous test looked at many of the big players in the recreational vehicle market. This time, we included products from smaller companies, those recommended by our readers, and those developed for home septic systems. We only included one product from our previous test, Yara Chemicals Odorlos , which we used as a control.

Two familiar manufacturers in this round are Raritan, the New Jersey-based maker known for its marine toilet systems, and the Southern California-based Forespar, a longtime player in the marine market. Other contenders included Happy Camper, which as the name implies, is geared toward the camping market; Rid-X, a familiar septic tank product; and Zoal No-Flex, a chemical powder recommended by a Practical Sailor reader.

HOW WE TESTED

For the test, we created a series of small holding tanks containing real sanitary waste. The sanitary waste was supplied by a 20-pound iguana named Ziggy. (Ziggy typically poops in a tray of water, and we knew the mixture to be plenty foul.) This was supplemented with additional sanitary waste during the start-up period each spring. Seawater flush was used, as the odor problems associated with seawater are known to be more severe (the result of bacteria-reducing sulfate into more odorous sulfide chemicals). Tank tests were supplemented with field testing aboard a boat on Chesapeake Bay.

There is only one true measure of effectiveness: whether the vent stinks when the head is flushed. Since calibrating noses presents certain challenges, its nice to have an analytical number to compare as well. A hydrogen sulfide monitor (the type used to test sewer gas) was used to back-up our sniff testing. At regular intervals, testers gave each sample a sniff rating in addition to recording the hydrogen sulfide levels.

OBSERVATIONS

Some of the products worked faster than others, but don’t expect overnight results. All of the products seemed to perform much better in this round, whether environmental factors came into play, we’re not sure. We had no products registering the high hydrogen sulfide numbers that we saw in earlier reports. As for odor control, this group of products also seemed to go easier on the perfumes and dyes that bothered testers in the first round.

Temperature makes a difference. This round of testing took place in the late spring, when temperatures had not yet reached the summer highs ripe for odors. Fall and winter sailors, and those in cold-water areas (Maine, Pacific Northwest), may find that chemicals that claim to use live bacteria will be less effective on their boats. Ventilation also seemed to be less effective during the cooler-season testing, but smell was less noticeable then, too. Generally, you’ll see less odor problems in true winter weather.

Again, all of the products claiming to contain live bacterial cultures tested negative for bacteria. Control inoculations flourished, however, quickly producing both bacteria and fungus. But, we are not certain this is too important. What was clear from our previous test was that chemicals that add oxygen, along with better venting, can materially affect odor in less than 12 hours, far quicker than an aerobic culture could blossom. Finally, it is important to avoid adding toxic chemicals-formaldehyde and related compounds, and bleach being the most common holding-tank offenders. These destroy the biomass that promotes a healthy holding tank.

Perhaps more than any other element in the sanitation system, the health of the holding tank can have a great effect on odors. In many cases, the source of the odor is not the waste, but the water. Like most ocean sailors, we used seawater flush for our testing. Seawater is known to contribute to odors. Many newer systems use freshwater, and very little of it. Others use several pints per flush. Temperatures vary, and ventilation varies.

Individual tanks will be subject to a number of variables that our test tanks were not. To compensate for this, we tested all the chemicals more than once under different conditions. Those that showed the most merit in early testing underwent additional testing. All of the recommended products did well, and we encourage you to try each and see which one works best for your special circumstances.

Stopping Holding-tank Odors

A bacterial spore powder packaged with a small scoop for metering out the dose. We got a positive culture and super odor control. It wasn’t the fastest— it took a week to get going— but it eliminated virtually all odor and kept it that way for over a month, until testing was discontinued on that tank.

Bottom line: A rare convergence of price and performance, this was an inexpensive product that really worked.

Forespar Refresh

The Forespar Refresh was the fastest-acting product tested, making a remarkable difference in two days. It also continued to work for three weeks, making it one of the longer-lasting formulas. The makers describe this as a biodegradable product that uses a special

Stopping Holding-tank Odors

chemistry instead of enzymes. This is a new product and certainly one to watch. The product line includes other deodorizing products that we did not have a chance to investigate.

Bottom line: If you’ve got guests coming for the weekend and need something that works quickly, we Recommend Refresh.

  • Happy Camper

We like the name of this product, and it did make us happy campers, with an important caveat. It is a bacterial spore powder with absolutely no masking odors, which was nice. It comes packaged in a variety of ways, including self-dissolving pouches. Slower to start than some, the Happy Camper did work, and it remained reasonably effective after two weeks. However, because it contains zinc, which is harmful to the environment and is a problem for wastewater treatment plants, we would not use it ourselves.

Stopping Holding-tank Odors

Bottom line: PS Not recommended. We wouldn’t consider this a top-tier product in this test field, and the inclusion of zinc is unnecessary in our view.

Odorlos did well in Round 1, so we kept it as a control for the second round to see how it compared with the other products. Containing only sodium nitrate as an active ingredient, this product is quite effective when holding tank ventilation is provided. We liked the absence of dye, mess, and perfumes.

While not the most effective in our testing, Odorlos is a solid performer with a large following. We tested the 10-pack of powder packets, the most popular option with cruisers and the one that requires the least storage space; it is also available in liquid form.

Bottom line: Odorlos is not the cheapest, nor the most effective, but it is consistent, a good bet for most odor problems that can be handled with a chemical treatment. PS Recommended.

Raritan C.P. (Cleans Potties)

This product from toilet-maker Raritan is a head-cleaning product. We did not test Raritan CP as a holding-tank treatment. Raritan makes KO for that application. Stated to be 100-percent bacterial, it was the top-performing head cleaner, eliminating odor and cleaning while you’re away.

Testers were impressed. It also produced the most rapid cultures in dip-slide testing, the only clear correlation that we found.

Bottom line: Recommended as a head cleaning product and Best Choice for toilet bowl maintenance.

Stopping Holding-tank Odors

Raritan Kills Odors

Raritan KO (Kills Odors) is supposed to be similar to Raritan CP (Cleans Potties). It performed well, but it also was the most expensive product we tested (on an annual basis).

It wasnt the fastest, nor the longest lasting, but it did reduce odors significantly. Given the results of the Raritan CP, we were surprised it didnt do better.

Bottom line: A solid performer that knocks down odors. Recommended.

This product is probably the best known hardware-store septic tank treatment. It is marketed for a different purpose, reducing solids in septic tanks. However, a few sailors have said that it works. Rid-X has this to say: RID-X has not been tested on recreational vehicles (RVs); therefore we cannot recommend using it in RVs. After reading that statement and witnessing its poor odor control, we suggest leaving this product for home use.

Stopping Holding-tank Odors

Bottom line: This is a different animal designed for a different set of problems. Not recommended.

Zoal No-Flex

A white chemical powder containing an oxygen source, Zoal No-Flex behaves something like Odorlos and Camco TST Ultra Concentrate, products included in Round 1.

It is reasonably effective, but not as good as the Camco TST, which is about half the price per year.

Stopping Holding-tank Odors

Bottom line: This product worked well and was the second cheapest in this group.

Conclusions

As we found in the last test, chemical treatments that relied on disinfection, surfactants, and deodorants were better than nothing. However, most were messy, and all left a characteristic portable-toilet smell. You can’t mask head odor, or scour it away. We do not recommend this class of products.

We like the enzyme and biological (bacterial) products best, but users should be aware that some of these products might not perform as well in cold weather. However, odors in cooler temperatures also tend to be less.

Our experience in Round 2 highlighted the same challenges as Round 1. Few products seemed to work well on boats that sit unused for three weeks or longer, which can prevent the exchange of air. None were effective when the air exchange was overly restricted by a long vent line. The conventional wisdom that a vent line can be no longer than five feet, no smaller than -inch inside diameter, and have a rise no more than 18 inches, has proven sound.

Good tank ventilation helps significantly. Larger vents will help reduce odors in boats that are left unattended for weeks at a time. In a larger tank or one where good ventilation is very difficult to achieve, active ventilation offers a viable and robust approach. We used a homemade bubbler system, similar to Grocos Sweet Tank System, and this offered some improvement over natural ventilation.

Click the following links for the results from Round 1, reported in the February 2012 issue , and our March 2012 test of vent filters, with tips on ventilations.

Of course, there is another, better, way to help agitate the holding tank and promote the natural processes that fight odors: Go sailing more often.

Stopping Holding-tank Odors

  • NaturE-zyme
  • Zaal No-Flex

This article was first published on November 19, 2012 and has been updated.

RELATED ARTICLES MORE FROM AUTHOR

Great review!

Do you have any comment about Walex Bio-Pak enzyme treatment? Can Noflex Digestor be used with enzyme or probiotic treatment?

What do you suggest for re claim tanks? (carwash recycling water tanks).

Stopping Holding-tank Odors: recommended product Bactank T3 is available where? links are dead and company seems to be gone.

I can see old stock a few places. The corporate link is gone, the phone number is dead, and the Facebook page has contained nothing but political bile unrelated to Bactank since January 2017 (the site does not appear to have been maintained since then, when the last home page title photo was loaded). It seems the page just stayed up.

Our guess is that the owner retired. She celebrated her 80th birthday in 2017. The PS article was written in 2011. I would also guess that old stock is way beyond it’s expiration date at this point and will not work as tested.

LEAVE A REPLY Cancel reply

Log in to leave a comment

Latest Videos

Cabo Rico 34 Boat Review video from Practical Sailor

Cabo Rico 34 Boat Review

Super Shallow Draft Sailboat: The Leeboard Sharpie video from Practical Sailor

Super Shallow Draft Sailboat: The Leeboard Sharpie

Hans Christian 41T - Boat Review video from Practical Sailor

Hans Christian 41T – Boat Review

Seven dead after superyacht sinks off Sicily. Was the crew at fault? Or the design? video from Practical Sailor

Seven dead after superyacht sinks off Sicily. Was the crew at...

Latest sailboat review.

how to clean water tanks on sailboat

  • Privacy Policy
  • Do Not Sell My Personal Information
  • Online Account Activation
  • Privacy Manager

IMAGES

  1. How To Clean Sailboat Water Tanks? (An Easy Guide)

    how to clean water tanks on sailboat

  2. How To Clean Sailboat Water Tanks? (An Easy Guide)

    how to clean water tanks on sailboat

  3. How To Clean Sailboat Water Tanks? (An Easy Guide)

    how to clean water tanks on sailboat

  4. Clean Water Tank In 5 Easy Steps (Step By Step Guide)

    how to clean water tanks on sailboat

  5. The Different Types of Tank Cleaning Services and Their Benefits

    how to clean water tanks on sailboat

  6. How to Clean a Boat Water Tank

    how to clean water tanks on sailboat

VIDEO

  1. RV Tank Drain

  2. #GreenHouse Magical Deep Cleaning✨

  3. How to Clean Your Sails

  4. Boat Cleaning

  5. water tank cleaning machine #tankcleaning #youtubeshorts

  6. Deerma BY200 Multi Purpose Carpet and Upholstery Cleaner Wet And Dry Vacuum Cleaner For Carpet Sofa

COMMENTS

  1. How To Clean Sailboat Water Tanks? (An Easy Guide)

    To clean sailboat water tanks, the first step is to empty the tank and rinse it with fresh water. Next, mix a solution of 1 cup of bleach and 1 gallon of water and pour it into the tank. Allow the solution to sit in the tank for 1-2 hours and then rinse the tank thoroughly with fresh water. Finally, use a brush to scrub the inside of the tank ...

  2. How To Clean Your Boat's Freshwater Tank (Plastic & Aluminum)

    Drain the tank completely. Measure 1 teaspoon/gallon of household bleach (aluminum) or vinegar (plastic) into the tank and add fresh water until it's full. Let it sit for 24 hours to sterilize, then drain the water. Fill with fresh water and drain repeatedly until all the bleach/vinegar odor is gone.

  3. Keeping Water Clean and Fresh

    For treating water that is clear and chlorinated at the tap, 1 teaspoon of bleach per 50 gallons will provide a 2 ppm booster, the very most that should be needed. Chlorine aftertaste is the most common onboard water-quality complaint; however, chlorine at the tank can be efficiently removed with carbon filtration.

  4. Fresh Water Holding Tank on a Boat

    Each spring we need to commission our fresh water holding tank to rinse out antifreeze from winterizing, clean out the water tank, add water purifier & clean...

  5. How to Clean a Boat Fresh Water Tank

    In addition, try to drain your tank somewhere that won't negatively affect the environment. Then, you can remove the old water to prepare for cleaning. Turn on your water pump, open all of the taps, and let the water drain out. Clean Out the Tank. The key to cleaning a fresh water tank is to allow the new, clean water to do the work.

  6. How to Clean a Boat Water Tank (with Pictures)

    3. Scrub out the tank with a long-handled brush or power washer. Take a long-handled scrub brush and a little dishwasher detergent and scrub away any grime on the sides and bottom of the tank. Alternatively, you can hose it down with a power hose attached to a clean source of water.

  7. How to clean your boat water tank

    Get more information on Checklists for Sailors here: https://sailingbritican.com/product/checklists-for-sailors-paperback/PLEASE subscribe to my channel and ...

  8. Sanitizing Fresh Water Tanks

    With tank empty, pour chlorine solution into tank. Use one gallon of solution for each 15 gallons of tank capacity. (2) Complete filling of tank with fresh water. Open each faucet and drain cock until all air has been released and entire system is bled. (3) Allow to stand for three hours.

  9. Ask the Expert: Cleaning Your Boat's Water System

    Learn how to flush, sanitize and maintain your boat's water tanks and plumbing system with tips from an engineer and cruiser. Find out when and how to use antifreeze, bleach, water-purification tablets and watermakers.

  10. Decontaminating a Tainted Water Tank

    Mix the proper amount of bleach within a 1-gallon container of water. This will provide better mixing and reduce spot corrosion of aluminum tanks. Pour the solution (water/bleach) into the tank and fill the tank with potable water. If possible, allow some solution to escape though the vent. (If the vent is exterior, prevent any spillage into ...

  11. Bleach in water tanks

    A discussion thread about using bleach to clean and disinfect water tanks on sailboats. Some participants share their practices, opinions and tips, while others ask questions and seek advice.

  12. How To Clean Boat Water Tank? Without Removing It

    Learn how to clean your boat's water tank without removing it using hot water, cleaning solution, and bleach alternatives. Follow the step-by-step process and tips to prevent algae, bacteria, and contaminants in your water system.

  13. What to Use to Clean Water Tanks ?

    Add bleach to the tanks, fill with water to the top (!), cap, and let sit a couple days. This kills every bit of mold in it. Drain. Use a garden hose and spray nozzle to wash the mold off the walls and baffles. Drain. Get as much of the particulates out as possible, flush thoroughly.

  14. The Care And Feeding Of Your Boat's Water Systems

    As a precaution, when you're away from your boat, close the underwater seacocks. Potable Water Tank (14, 15, 16) — Should be treated periodically with a product such as Star brite AQUA Water Treatment & Freshener to remove odors, scale, and bad taste. Also, thoroughly flush tank with clean water and pressure nozzle.

  15. Cleaning the Holding Tank

    Holding tank maker Dometic/Sealand recommends that boat owners empty the tank, then fill it about halfway with fresh water, and add 8 ounces of a liquid, bleach-free, biodegradable laundry detergent to the water before getting underway, preferably for a few hours of sailing in choppy conditions. Sealand Communication Manager Patrick Snyder also ...

  16. How to CLEAN your BOAT Water Tank

    In this episode, we tear up the floorboards and tackle the cleaning of our fiberglass water tanks. Who knows how long it's been since they were last cleaned,...

  17. Keeping your water tank clean

    Stainless steel tanks require a purification cycle of at least once a year. To do this, add a purifying tablet to a full water tank and leave to activate for the advised time period. Once purification has occurred, turn all the taps on and drain the system as much as possible. This will ensure purification flows through the system.

  18. Water Tank Cleaning on a Sailboat and Installing 10" Water ...

    #Amelyacht #powertools #sailinglife #boatdiy #sailboat #boatlife #boating #sailingboat #sailingyacht #boatrepair #boatmaintenance #watertank #waterfilter If...

  19. Overhead Water Tank: Design, Capacity & Cleaning Services Explained

    The frequency of the overhead water tank cleaning depends on the type of tank, the local environmental conditions, and the quality of the incoming water. It is generally recommended that overhead tanks be cleaned at least once every six months. In areas with poor water quality or high sediment content, more frequent cleaning may be necessary.

  20. Maintenance: Cleaning Mould (Mold) from Water Tanks and ...

    All of our sailboat repair and maintenance blogs are now hosted on our dedicated maintenance channel, MOTHERSHIP MAINTENANCE Check it out here: https://www.y...

  21. Stopping Holding-tank Odors

    Some chemicals also claim to help liquefy the waste and prevent clogging. While larger boats can use vent filters (PS, March 2012) and enhanced ventilation to reduce odors, the only practical option for the small-boat owner with a portable toilet is some sort of treatment in a can. Holding tank treatments are fertile ground for innovation.

  22. Lake Hartwell debuts new litter collection boat

    LAKE HARTWELL, S.C. (WSPA) - An Upstate nonprofit has a new tool to keep waterways clean for boaters and wildlife. Lake Hartwell Partners for Clean Water said litter costs the U.S. $11 billion a ...

  23. How to clean a sailboat water tank for drinking water!

    This video is about How to clean a sailboat water tank for drinking water!