How To Build A Wooden Boat [Step By Step]
Building a wooden boat requires the right tools, materials, patience and information.
To build a wooden boat:
- Collect all the materials and tools needed
- Plan the boat layout and design
- Create the center rib & transom
- Create the boat frame
- Add the seat rails & keel strip
- Add the wood planks & seats
- Add epoxy, sand & paint the boat
Building a wooden boat will take approximately 1 month when building a smaller wooden boat under 20 ft. and it will take 2 to 3 months when building a larger wooden boat over 20 ft.
The cost to build a wooden boat will range from $2,500 for a smaller wooden boat to over $3,500 to $5,000 for larger wooden boats. This cost includes all materials and tools needed for the build.
The largest cost when building a wooden boat is the cost of wood. The cheapest cost when building a wooden boat is the boat plans and designs.
The types of wooden boats that can be built include cabin cruisers, sailboats, canoes/kayaks, runabout outboard boats, paddle wheel & runabout inboard boats, novelty boats, houseboats, hydroplanes and race boats.
We include products we think are useful for our readers. If you buy through links on this page, we may earn a small commission.

1. Collect All The Materials & Tools Needed
The first step in building a wooden boat is the collect all the materials and tools need to complete the boat build.
The tools and materials needed to build a wooden boat are:
- Wood : Boat builders will need to get all the wood needed for the build. Popular woods used to build a wooden boat are teak wood, oak and marine plywood for the boat's exterior and pine wood for the boat's interior. Pine is best used for the boat's interior since it has a nice color, finishes well and is light, thereby reducing the overall weight of the boat. The price of marine plywood ranges from $50 to $250 per sheet depending on the thickness and dimensions of the sheet
- Screws : Boat builders will need many batches of screws to screw sections of the boat and wood together. A 100-screw pack will typically cost $10
- Safety gloves & goggles : Boat builders will need safety gloves and goggles when operating tools. This will prevent sawdust and other materials from getting in the eyes. Safety gloves and goggles will cost approximately $25
- Drills & saws : Boat builders will need drills and saws to cut wood and attach it to other wood pieces. Drills and saws will cost approximately $200 to $300
- Wood sanding machine : Boat builders will need a wood sanding machine for sanding wood. A sanding machine will cost approximately $300 to $500
- Epoxy resin : Boat builders can use epoxy resin on the wood material to protect the wood and help keep it waterproof. Epoxy resin costs approximately $70
- Wooden boat paint : Boat builders will need marine wooden paint to paint the wooden boat and protect the wood from the elements. Marine paint will cost approximately $200
- Boat designs & plans : Building a boat will require the boat builder to work from a boat plan. Boat builders can pick up over 500 boat plans for approximately $50
- Varnish : Varnish will add protection and shine to the boat's interior wooden surfaces. Varnish will cost approximately $60
2. Plan The Boat Layout & Design

The second step in building a wooden boat is to plan the boat layout and design.
A boat builder will need boat designs, dimensions, and plans to build the exact wooden boat they want.
Boat builders can access 518 boat plans with 40 boat construction videos. This will provide the exact dimensions to build the majority of recreational wooden boats.
Finding the right boat plans and designs should take 20 minutes to do.
3. Create The Center Rib & Transom

The third step in building a wooden boat is to create the center rib and transom.
To create the center rib & transom:
- Glue the hardwood floorboards together to create the transom
- Sandwich the transom in between two flat pieces of wood or metal and then clamp it tight to make sure that the transom is flat. Use some kitchen wrap to make sure that the two pieces of wood do not get glued to the transom
- Sand the pieces of wood that will be used for the center rib, glues them and clamp them before you glue them together.
- Once the glue is dry, cut out the keel and chines
Creating the rib and transom will take a boat builder 2 to 3 hours. However, this timeframe will vary massively based on the size of the boat and the boat design.
4. Create The Boat Frame

The fourth step in building a wooden boat is to create the boat frame.
To create the boat frame:
- Follow the boat design : Determine the size, shape, and style of your boat. This will dictate the number and spacing of frames required
- Make a full-size drawing : A full-size drawing will help you to lay out the frames accurately. This can be done using paper, plywood or a computer program.
- Cut the keel and stem : The keel and stem are the backbone of the boat. Cut them to the appropriate size and shape
- Determine the frame spacing : Calculate the distance between each frame based on the size and shape of your boat. This will vary depending on the design chosen
- Cut the frames : Use the full-size drawing to create a template for each frame. Trace the template onto the wood and cut out each frame
- Install the frames : Place each frame in its designated location and secure it to the keel and stem using clamps or screws
- Check the alignment : Ensure that each frame is aligned properly with the keel and stem. Adjust as necessary
- Install the stringers : The stringers are the horizontal members that connect the frames. Install them in the appropriate location and secure them to the frames
- Install the planking : The planking is the outer layer of the boat. Install it over the frames and stringers, securing it with screws or nails
Creating a frame for the boat will take approximately 3 to 5 hours to complete. However, this timeframe can vary based on the size of the vessel being built.
5. Add The Seat Rails & Keel Strip

The fifth step is to add the seat rails and keel strip. Then sand and patch the area.
To create the seat rails:
- Determine the location and size of the seat rails : This will depend on the design of your boat and the type of seat you plan to install
- Measure and cut the seat rails : Use a saw to cut the rails to the appropriate length. Ensure that they fit snugly into the boat
- Sand the edges of the seat rails : Use sandpaper to smooth the edges of the seat rails
- Install the seat rails : Secure the rails in place using screws or bolts making sure they are level and well-supported
To create the keel strip:
- Determine the length of the keel strip : Measure the length of the keel and cut the keel strip to match
- Sand the surface of the keel : Use sandpaper to roughen the surface of the keel. This will help the adhesive to bond more effectively
- Apply the adhesive : Apply a marine-grade adhesive to the keel strip making sure to spread it evenly
- Install the keel strip : Press the keel strip firmly onto the keel ensuring that it is centered and well-aligned
Creating the keel strip and seat rails will take approximately 1 to 2 days to complete. This will vary based on experience and the size and design of the boat being built.
6. Add The Wood Planks & Seats

The sixth step in building a wooden boat is to add wooden planks and seats.
To add wooden planks:
- Prepare the planks : Cut the planks to the appropriate size and shape for your boat. If necessary, steam or soak the planks to make them more pliable and easier to work with
- Apply glue to the frames and keel : Apply a marine-grade adhesive to the frames and keel where the planks will be installed
- Install the planks : Begin at the bottom of the boat and work your way up. Place each plank onto the adhesive and secure it to the frames using clamps or screws
- Repeat the process : Continue adding planks until the entire boat is covered. Be sure to sand each plank before installing the next one to ensure a smooth and even surface
- Finish the planks : Once all of the planks are installed, sand the entire surface of the boat to smooth out any rough spots. Finish the planks with paint, varnish, or another protective coating.
To add the seats to the wooden boat:
- Determine the location of the seats : Decide where you want to install the seats and mark the locations on the boat
- Cut the seat supports : Cut pieces of wood to the appropriate size to serve as the supports for the seats
- Install the seat supports : Secure the supports to the frames using screws or bolts. Ensure that they are level and well-supported
- Cut the seat planks : Cut the seat planks to the appropriate size and shape. Sand the edges to ensure a smooth surface
- Install the seat planks : Place the seat planks onto the supports and secure them using screws or bolts. Be sure to leave enough space for cushions or other seat padding
- Finish the seats : Sand the surface of the seats to smooth out any rough spots. Finish the seats with paint, varnish or another protective coating
Adding wooden planks and seats to the boat will take 2 to 3 days to complete. This timeframe will vary based on the size and design of the wooden vessel.
7. Add Epoxy, Sand & Paint The Boat
The seventh step of building a wooden boat is the add epoxy, sand and paint the boat.
After the wooden boat has been constructed, adding epoxy, sanding, and painting it are important steps to protect the wood and provide a finished look.
Here are the general steps for adding epoxy, sanding, and painting a wooden boat:
- Prepare the boat : Before adding epoxy, ensure that the boat is completely dry and free of any dust or debris. Cover any areas that you don't want to be coated with epoxy
- Mix the epoxy : Follow the manufacturer's instructions to mix the epoxy resin and hardener. Use the recommended ratio of resin to hardener for the best results
- Apply the epoxy : Using a brush, apply the epoxy to the boat's surface. Work in small sections, and apply enough epoxy to cover the surface without it running or dripping.
- Sand the epoxy : After the epoxy has dried, use sandpaper to sand the surface smooth. Start with coarse grit sandpaper and work your way up to a finer grit sandpaper. Be sure to wear a mask and safety glasses to protect yourself from the dust
- Clean the boat : After sanding, wipe down the boat with a clean, damp cloth to remove any dust
- Paint the boat : Apply a marine-grade paint to the boat using a brush or spray gun. Follow the manufacturer's instructions for the best results. Allow the paint to dry completely before applying a second coat
- Sand the painted surface : After the paint has dried, use a fine grit sandpaper to sand the surface of the boat. This will help the next coat of paint to adhere better
- Apply additional coats of paint : Apply additional coats of paint as necessary, sanding between each coat. This will help to build up a smooth, even finish
- Finish the boat : Once the final coat of paint has dried, inspect the boat for any rough spots or imperfections. Sand any areas that need attention, and touch up the paint as needed
Frequently Asked Questions
Below are the most commonly asked questions about building a wooden boat.
What Types Of Wood Are Used To Build A Wooden Boat?
The types of wood used to build a wooden boat are:
- Natural Wood : Natural wood like teak, cedar, oak and tuatara are commonly used to build a wooden boat. They are hard and have natural chemicals that prevent marine animals from interfering with the boat's structure. Oak is the most popular hardwood used to build the wooden boat's exterior like the hull and keel area which are always exposed to the seawater
- Plywood : Most amateur boat builders like to use marine plywood since it is easy to bend into the shapes that they want. It is also considerably cheaper than natural woods
- New Woods : Azobe, Iroko, Mahogany, Okoume Keruing and Merbau are popular new woods used in building wooden boats
The ideal wood is one that will is resistant to rot and will not allow marine wildlife to get inside and destroy the structure. The wood used to build a wooden boat should be Forest Stewardship Council (FSC) certified.
The buoyancy of wood means that it will ride higher in the water.
The abrasion resistance of the wood will vary according to how dense and hard the wood is so typically hardwoods are used to make the exterior of the boat while softwoods are used for the boat's interior.
What Are The Best Types Of Wood To Build A Wooden Boat?
The best types of wood to build a wooden boat are teak wood and marine plywood as it is dense, hard, can handle stress and abuse from seawater, it can naturally bend and it contains natural chemicals that prevent rotting.
What Is The Worst Type Of Wood To Build A Wooden Boat?
The worst type of wood to build a wooden boat is pine wood on the exterior as pine wood will rot very fast. While pine wood is fine to use on a boat's interior, using it for constructing the exterior should be avoided.
What Are The Construction Methods Used To Build A Wooden Boat?
There are 5 main construction methods used to build a wooden boat which are:
- Stitch & Tape : This is the simplest and fastest technique when it comes to building a boat. This construction method employs the use of plywood which is then “stitched” together using epoxy resin or glue and some other complex cuts to form the hull of the boat. You do not need specialized tools when using this method. Duct tape, copper wire and cable ties are popularly used to stitch the plywood together. If the boat is being built for marine waters, then copper wires are the best since they do not corrode easily. Once the boat has been stitched together, a thick layer of epoxy or fiberglass is used to keep water away from the “stitched” areas
- Ply On Frame : This is another popular construction method that begins with the creation of a wooden frame commonly known as “ribs”. The next step is to build frame members which are joined to the ribs through slots. The individual frame members are the keelson which is a frame that runs down the center of the boat, the sheer clams which run at the top of each side of the boat and the chine log which are two frames that run along the bottom of the boat and curve up to join the sides of the hull. The joint is called a chine
- Strip Planking (Carvel) : Strip Planking is a quick method of building a wooden boat since there is not much joining to be done. Narrow strips of wood and placed on forms and due to their narrow nature, they can easily be bent to form the shape of the boat. Once the shape of the boat is attained, the strips are then fastened together using strong epoxy adhesives(no fasters are needed in this technique). This is a method suitable for experienced boat builders and not amateurs. This is because there are several methods of strip planking and it should therefore be left to those who know how to go about it. The method is popularly used to create small vessels such as canoes
- Clinker : This is a technique that uses planks of wood that overlap across the edges. This overlapping joint is called a “land”. Clinker, also called lapstreak, creates a boat that is generally lighter and easy to sail. There is less water being displaced along the sides of the hull, which increases the efficiency when the boat is moving. The use of this technique is also for the experts and not amateurs
- Cold Molding : This is a method that uses two or more layers of wood to create the hull. This is a composite method and the wood is known as veneers. The veneers have different orientations, resulting in a powerful hull similar to one made of fiberglass but are much lighter in weight. The orientation is 45 degrees from the center line of the veneer and is also referred to as the double-diagonal method. Cold molding may simply use the layers of veneers or has basic strip planking layers, followed by the veneers. Cold molding is used to create all types of boats, from small boats to large wooden superyachts. To build a boat, the builder uses different woods to put more density in areas of high stress and makes the low-stress areas such as the bow and stern out of lighter veneers
The most popular construction method used to build a wooden boat is the stick & tape method, also known as the "tack and tape method".
How Do You Waterproof A Wooden Boat When Building It?
To waterproof a wooden boat:
- Prepare the wood for applying waterproof materials : Make sure that there are no loose layers of wood shavings or others finishes by properly sanding the wood on the boat. Start off with a rough sandpaper to remove the loose parts and then use a fine one to give the wood a fine smooth finish
- Apply the sealing compound : Using a brush, apply a marine-grade epoxy sealant. Make sure the coats dry completely before applying a second or third coat of the sealant to the wood
- Let the wood cure : A marine-grade epoxy sealant can take up to 7 days to fully cure. Read the instructions on your specific epoxy sealant for exact timeframes but allow for up to 7 days
Although the wooden boat is now waterproofed, it's important that you periodically remove the boat from the water, typically every 2 months, and inspect the wood to make sure that there are no moisture-laden surfaces.
This way, the wooden boat is not exposed to water and moisture for a long time.
What Are The Benefits Of Building A Wooden Boat?
The benefits of building a wooden boat are:
- It costs less money : Building a wooden boat is 30% to 40% cheaper than buying a wooden boat
- Better customizability : Wooden boats can be designed and built to suit individual preferences and needs allowing for a high degree of customization. This can be especially important for those who plan to use the boat for specific purposes such as fishing or leisure activities
- Aesthetic appeal : Wooden boats are known for their classic and timeless beauty. The natural grain and texture of the wood can give the boat a warm and inviting appearance
- Sense of personal fulfillment : Building a wooden boat can be a challenging and rewarding experience that allows individuals to learn new skills and develop a sense of personal fulfillment
- Ease of repair : Wooden boats can be easier to repair than boats made of other materials. If a section of the boat is damaged, it can often be replaced or repaired without having to replace the entire boat
What Are The Disadvantages Of Building A Wooden Boat?
The disadvantages of building a wooden boat are:
- Vulnerability to water damage : Wood is prone to water damage which can cause rotting and cracking. If not properly maintained, this can lead to boat structural problems and ultimately compromise the safety of the vessel
- Higher maintenance costs : Wooden boats require more maintenance than boats made of other materials. They need to be regularly inspected, sanded, painted, and varnished to prevent water damage and maintain their appearance
- Fire hazard : Wood is a combustible material making wooden boats more susceptible to fires. This can be a safety hazard and increase insurance costs
- Susceptibility to pests : Wooden boats are more susceptible to pests like termites and woodworms which can weaken the structure of the boat and require costly repairs
What Should Be Avoided When Building A Wooden Boat?
When building a wooden boat, avoid:
- Building a boat without a plan : Boat builders should avoid building a wooden boat without following a plan with design drawings and dimensions
- Using poor quality materials : When building a wooden boat, avoid using low-quality materials to construct the boat as this will become problematic when the boat is out on the water
- Not adding a protective coating : When building a wooden boat, avoid not adding a protective coating to the wood and this will leave it exposed to the harsh marine environment
- Rushing the building process : Building a wooden boat takes time and patience. Rushing the process can lead to mistakes, poor craftsmanship, and other problems that can affect the boat's quality and safety
- News & Views
- Boats & Gear
- Lunacy Report
- Techniques & Tactics
WOOD BOAT CONSTRUCTION: Practical and Traditional

HUMANS HAVE BEEN building boats out of wood for many thousands of years. Many assume therefore it must now be obsolete. Wood certainly does not lend itself to mass production the way fiberglass does, though there were a few builders who manufactured wood boats on something like a production basis not long before the advent of glass. Wood does have some distinct virtues. It is light, even compared to modern building materials, and in terms of tensile strength is stronger per pound than common electrical-grade fiberglass. In terms of stiffness, it is stronger per pound than S glass, E-glass, and Kevlar. In terms of its total structural efficiency, it is better than all of these materials, including carbon fiber.
One big problem with wood, however, is that certain lifeforms like to eat it. Various fungi can infest and consume it, causing what is known as dry rot. Marine borers like the Teredo worm, or boring insects like carpenter ants and termites, can also chew their way through a boat pretty quickly. Wood also rots when it gets too wet, is easily ignited, and is soft, with poor abrasion resistance. Structurally, in one important sense, it is deficient in that it is much less dense than other materials and thus takes up a lot of space. A wood hull must normally be much thicker than an equivalent glass hull, and its interior structural parts must also be larger. Indeed, wood cannot be used at all to make certain small parts that carry great loads (such as bolts, tie-rods, and rigging wire) simply because it is too soft and too fat to fit.
Perhaps the biggest advantage wood has over any other material, especially when it comes to building boats, is that it is inherently romantic. For this reason alone, it is likely someone somewhere will always be building wooden cruising boats, and that other people will always be sailing them.
Plank-on-Frame Construction
This is the most traditional method of building a wood boat. The principle is simple, though the details are complex. The fundamental structure of a plank-on-frame vessel is defined by a keel, which is the horizontal backbone of the hull; a more vertical stem, which forms the bow; and a vertical sternpost (plus, in the case of many yachts with long overhangs, a much less vertical horn timber that terminates in the transom), which forms the back of the boat. On deep-keel vessels, especially on sailboats, there is also often what is called deadwood fastened beneath the keel. This forms part of the lateral plane well below the waterline and makes up a good part of what sailors normally call the “keel,” particularly its aft section. The forward section is normally inhabited by a solid casting of metal ballast, preferably lead, that is fastened to the bottom of the boat.
A full-keel plank-on-frame sailboat under construction. You can see both the deadwood and the lead ballast down low (Photo courtesy of Rockport Marine)
Fastened to the spine created by these parts is a series of parallel transverse frames that describe the vessel’s hull form. To help support the hull, lateral stringers are installed inside the frames. The skin of the hull consists of a series of planks fastened to the outside of the frames. These planks may be laid on the frame with their edges slightly overlapping, which is known as clinker, or lapstrake, construction. This is often done with smaller boats, but hardly ever with larger boats, as the many ridges formed where the planks overlap greatly increases wetted surface area. Alternatively, planks can be laid on the frame edge to edge, creating a fair, smooth surface, which is known as carvel construction. To make the hull watertight, the seams between carvel planks must be caulked with long strands of cotton and/or oakum.
Open seams on a carvel hull awaiting caulking. Note the tufts of cotton hanging out where caulking is underway (Photo courtesy of Rockport Marine)
The deck of the boat, meanwhile, is supported by a series of transverse deck beams, the ends of which are fastened to lateral shelves installed along the inside of the hull at the top of the frames. Traditionally, the deck consists of planking fastened to the deck beams with all seams, again, carefully caulked. Another common way to seal decks, often used on yachts, is to cover the planking with painted canvas. These days, however, many wood decks are simply good-quality marine plywood sealed with epoxy.
Even from this abbreviated description it should be clear this is a labor-intensive way to build a boat. Much skill is also required. Just selecting wood to build with is an art, as there are numerous criteria to meet. The best wood should be cut only in winter to minimize the retention of moisture and microorganisms. It should then be air-dried in a climate-controlled environment for as long as possible–many months at a minimum. The lumber should also be carefully milled to produce planks and pieces with the wood grain properly aligned to carry anticipated loads in the boat. Finally, if you’re truly fanatic, all pieces should be hewn to size by hand, rather than ripped with power tools, as traditional hand tools do less damage to the fiber of the wood and make it much less prone to fungal attacks.
The biggest issue is embraced in that single verb “to fasten.” A plank-on-frame boat consists of hundreds of pieces of wood, all of which must be carefully shaped and then bound together by thousands of small metal fasteners. Even if you use the best fasteners (silicon bronze screws and bolts are preferred, though Monel is technically superior) what ultimately limits the strength of a plank-on-frame boat is not the wood it is made from, but the fasteners holding it together.
This weakness manifests itself in various ways. First, because they are made from many different pieces, and in particular because so many plank seams are permanently submerged, plank-on-frame boats are apt to leak. Many are continually taking on water when afloat, and normally the only variable is the rate at which water is coming aboard. Invariably this increases when conditions get worse. I once sailed across the North Atlantic aboard a plank-on-frame schooner–one time we almost sank; the other time we did (though, fortunately, this was in a river on the other side). Prior to the voyage, a friend warned me: “A wood boat is nothing but a collection of leaks loosely organized as a hull.” Nothing in my experience proved him wrong.
Plank-on-frame boats also often have deck leaks. The problem here is that wood in the deck is constantly swelling and shrinking as it gets wet and dries out. If the deck has open seams, all this expanding and contracting is apt to create gaps somewhere. Even with painted canvas covering the seams, or with a solid plywood deck sealed in epoxy, there are again many fasteners securing hardware, each offering a potential route for water intrusion. Other structures sprouting from the deck–deckhouses, hatches, raised gunwales, etc.–also present seams and cracks where they join the deck that water can eventually seep through.
World-famous small-boat cruiser Larry Pardey waters the deck of his boat, Taleisin , to keep the planks swollen tight. That’s his equally famous wife Lin peering out the companionway. Larry is a master boatwright (he built Taleisin himself) and maintains his boats scrupulously
Finally, plank-on-frame boats can be a bear to maintain. All that wood, above the water and below, needs to be either painted or varnished on a regular basis. Leaks must be policed and stanched if possible. Moist areas in the structure must be sought out, constantly monitored for rot, and replaced if the rot gets out of hand. As Bernard Moitessier once put it: “The maintenance of my wooden boats had always confronted me with delicate problems and required real qualifications, for I had to be ‘Doctor of Rot,’ ‘Doctor of Teredos’ and ‘Doctor of Leaks.’ ” Some people enjoy this sort of work and anxiety. Most, however, like Moitessier, would much prefer to just go sailing.
Wood-Epoxy Construction
Plank-on-frame boats still have a strong cult following and a relatively large number of older wooden yachts are sailed and maintained by devoted owners. Some new plank-on-frame yachts are also built from time to time, and a few boatyards–the most prominent are probably Gannon & Benjamin on Martha’s Vineyard and Rockport Marine in Maine–even specialize in this sort of work. But the most exciting wooden boatbuilding these days is done with composite wood-epoxy construction.
The key ingredient is modern epoxy, which is not only a tenacious adhesive, but is also highly elastic and nearly impermeable to water. By sealing and coating every piece of wood in a boat with epoxy, and by using epoxy to help glue these parts together (aided, too, by the judicious use of metal fasteners), it is possible to take full advantage of wood’s excellent structural properties while negating its tendencies to rot and swell and contract when exposed to water. Epoxy also protects the wood from hungry creatures that want to eat it.
Furthermore, a wood-epoxy hull forms a one-piece monocoque structure that cannot leak unless punctured. In most cases, to improve abrasion and impact resistance, the hull and deck are also sheathed in one or more layers of fiberglass cloth. The result is a boat with many of the virtues of fiberglass, with the added benefits of built-in insulation, plus all the fuzzy romantic feelings inspired by a genuine wood finish.
There are many ways to construct a wood-epoxy boat. One could, for example, build a wood-epoxy plank-on-frame vessel, but this would be labor intensive and the boat would be needlessly heavy and thick. In practice, there are three basic approaches–strip-plank construction, sheet plywood construction, and so-called cold-molded construction. Each has many variations, and to some extent different techniques can be combined in a single hull.
In a simple strip-plank hull the frame is an important part of the structure, and the strip planks, which are narrow–with a square section shape, are both attached to the frame and edge-nailed to each other. Boats were often built like this in the traditional manner (and are still built) without being encapsulated in epoxy. In more modern variations, there is more reliance on epoxy, fiberglass sheathing, and internal accommodations structures (including bulkheads) to support the hull, with framing reduced to a minimum. Some of these vessels are essentially fiberglass boats with solid wood cores. Strip-planked wood-epoxy hulls are probably the most common type built today, as they are generally the most cost effective.
Sheet plywood construction is the least common type, at least as far as larger sailboats go. Mostly this technique is used for smaller boats like dinghies, skiffs, and daysailers. The one major exception are Wharram catamarans, which are usually built of plywood, and may or may not be coated in epoxy. In a plywood boat of any size, a substantial amount of framing is needed, but construction otherwise is relatively simple and fast, as large sheets of plywood can be set in place more easily and quickly than many narrow planks. Plywood construction does limit design options. Normally plywood hulls are hard-chined, although lapstrake construction–as seen, for example, in some very interesting Dutch Waarschip designs–can also be employed.
The third major variation, cold-molded construction, is more properly described as diagonal-veneer construction. Here the hull is composed of several layers of thin wood veneers that are laid up on a diagonal bias over light framing or a jig. The layers of veneer are oriented at right angles to each other and are glued together and stapled in place until the epoxy sets up. Often there are one or more layers also oriented laterally at a 45-degree angle to the diagonal layers. By laminating thin sheets of unidirectional veneer atop one another like this, a light monocoque structure that is strong in multiple directions can be created. These cold-molded boats are, generally speaking, the lightest of wood boats, but this method of wood construction is also by far the most labor intensive. The technique is shunned by some, but is favored by those for whom weight reduction is critical. It is also sometimes used in conjunction with strip-planking, with layers of diagonal veneer laminated over a planked hull in place of fiberglass sheathing.
This Wharram-designed Islander 65 catamaran is being professionally constructed of diagonal veneers (Photo courtesy of James Wharram)
The hull of this large cold-molded yacht has diagonal veneers being laid over strip planking (Photo courtesy of Hodgdon Yachts)
The term cold-molded is something of an historical anomaly. The first laminated wood hulls were composed of veneers laid up in female molds and glued together with adhesives that could only cure in an oven. The expression “cold-molded” was born later when it became possible to use adhesives that cure at room temperature. The term is still used to describe diagonal-veneer hulls, but not other types. Technically speaking, any wood-epoxy hull laid up at room temperature can be said to have been cold-molded.
Whatever they are called, wood-epoxy vessels in fact make superb cruising boats. The only problem is that wood-epoxy construction does not lend itself to series production. If you want a new wood-epoxy boat, you must commission its creation as a one-off, and many people with money to burn have done just that. Many modern wood-epoxy boats are based on traditional designs but take full advantage of modern design and construction techniques to minimize weight and maximize performance. Others are full-out modern superyachts measuring over 100 feet in length and a few are flat-out race boats. For example, Bruce Schwab’s very intriguing Open 60 OceanPlanet was a wood-epoxy boat. So, too, was Holger Danske , an early BOC boat designed by Dave Gerr that had a phenomenally low displacement/length ratio of 40. This is one of the lowest D/L ratios ever achieved in an ocean-racing monohull, which gives some idea of just how cutting-edge wood-epoxy can be.
Dave Gerr’s ocean racer Holger Danske , a very light boat built out of wood (Photo courtesy of Gerr Marine)
Gusto , a Chuck Paine design, is a modern wood-epoxy cruising boat with more traditional lines (Photo courtesy of Chuck Paine)
Wood-epoxy boats can also, of course, be found on the used-boat market. Recently built boats are relatively rare and normally command a significant premium, but older boats, some dating back to the early 1970s, are often quite affordable. Be sure to have them carefully surveyed, however, as construction techniques have improved considerably in recent years. As with any older boat, there will likely be problems that need addressing.
Related Posts

COASTAL DELIVERY: From Marblehead MA to Southport CT On a Classic Aage Nielsen Sloop

NICK SKEATES ON WYLO II: The Ultimate Barebones Cruiser and his Ultimate Dirt Simple Boat

I love wood boats and have built my share over the years but one thing that is worth mentioning is that a wood boat behaves differently in the water compared to a fiberglass or boat built of other materials. It is hard to quantify but the motion is ‘softer’.

I bought these plans ( https://sites.google.com/view/boatbuilder/home ) and building started last June 14th and it was ready to launch August 6th . I’ve been building boats since I was 12 years old…a long time ago!…and wish these plans were around, then. Martin Reid is the real deal. His materials are very informative and inspiring…an excellent investment for anyone who is interested in building boats.

@Mark: ahoy sir! good to see you here! very interesting comment. I am very willing to believe that construction materials affect the quality of a boat’s motion. wood especially. another factor most people don’t think of is the position of the ballast. in my experience, the closer the crew is to the ballast, the more comfortable the motion. charlie

You didn’t say anything about stitch and glue construction. I think it’s the only way to go. It’s the way I built the boat of my own design.

The softer motion is due to the bigger moment of inertia the mass of the boat is spread out more. Kinder motion less seasickness seasickness is a major safety factor.

Shop Silicon Bronze Screws

What are the exact things I will need to build this boat? And do you have any suggestions on what kind of wood to make a boat? Thank you!
Hello Robert: Which boat are you referring to??? As to what wood to use, that depends a lot of what construction technique you will employ, but generally hard woods are best.
Hello Charles: First off, Thanks for your reply. The boat I referring is 16′-18′, less than 800 lbs with deck and center console. Do you have any suggestions? Thank you again.

Search for dinghy boat plan
It’s not possible to build a boat, which are bigger than a dinghy, i.e. the type of boats shown in the pictures above, if it has to weight less than 800 lbs.

It seems to me that the large number of dived woodships in the world has one reason. Most of wood boat buildings dont aplay enginering concepts. The few others never proved the right use full time for the project in the sea. Its wrong?

I’m glad you talked that using plank-on frames could offer a durable function for your boat but needs detailed creation. Yesterday, my close friend told me he and his family hoped to find boat-building epoxy products to help them create a durable project boat for their fishing adventures. He asked if I had thoughts on the best buying option. I’m thankful for this informative boat creation article. I’ll tell him they can consult the boat products online store to gather details about their boat products.

I wish I could get in touch with the boat architect, and get a boat construction plan from him
Leave a Reply Cancel Reply
Save my name, email, and website in this browser for the next time I comment.
Please enable the javascript to submit this form

Recent Posts
- BAYESIAN TRAGEDY: An Evil Revenge Plot or Divine Justice???
- MAINTENANCE & SUCH: July 4 Maine Coast Mini-Cruz
- SAILGP 2024 NEW YORK: Lifestyles of the Rich and Famous
- MAPTATTOO NAV TABLET: Heavy-Duty All-Weather Cockpit Plotter
- DEAD GUY: Bill Butler
Recent Comments
- Gweilo on SWAN 48 SALVAGE ATTEMPT: Matt Rutherford Almost Got Ripped Off! (IMHO)
- Alvermann on The Legend of Plumbelly
- Charles Doane on BAYESIAN TRAGEDY: An Evil Revenge Plot or Divine Justice???
- Nick on BAYESIAN TRAGEDY: An Evil Revenge Plot or Divine Justice???
- jim on BAYESIAN TRAGEDY: An Evil Revenge Plot or Divine Justice???
- August 2024
- January 2024
- December 2023
- November 2023
- October 2023
- September 2023
- August 2023
- February 2023
- January 2023
- December 2022
- November 2022
- September 2022
- August 2022
- February 2022
- January 2022
- December 2021
- November 2021
- October 2021
- September 2021
- February 2021
- January 2021
- December 2020
- November 2020
- October 2020
- September 2020
- August 2020
- February 2020
- January 2020
- December 2019
- November 2019
- October 2019
- September 2019
- August 2019
- January 2019
- December 2018
- November 2018
- October 2018
- September 2018
- August 2018
- February 2018
- January 2018
- December 2017
- November 2017
- October 2017
- September 2017
- August 2017
- February 2017
- January 2017
- December 2016
- November 2016
- October 2016
- September 2016
- August 2016
- February 2016
- January 2016
- December 2015
- November 2015
- October 2015
- September 2015
- August 2015
- February 2015
- January 2015
- December 2014
- November 2014
- October 2014
- September 2014
- August 2014
- February 2014
- January 2014
- December 2013
- November 2013
- October 2013
- September 2013
- August 2013
- February 2013
- January 2013
- December 2012
- November 2012
- October 2012
- September 2012
- August 2012
- February 2012
- January 2012
- December 2011
- November 2011
- October 2011
- September 2011
- August 2011
- February 2011
- January 2011
- December 2010
- November 2010
- October 2010
- September 2010
- August 2010
- February 2010
- January 2010
- December 2009
- October 2009
- Boats & Gear
- News & Views
- Techniques & Tactics
- The Lunacy Report
- Uncategorized
- Unsorted comments
WOODEN BOW TIES
How to build a wooden sailboat: a beginner's guide.
Are you interested in building your own sailboat? If so, building a wooden sailboat can be a rewarding and fulfilling experience. Not only will you have a unique vessel to call your own, but you’ll also learn valuable woodworking skills along the way.
To get started, you’ll need to gather the necessary materials and tools. This may include oak plywood, epoxy resin and hardener, thickener, brad nails, masking tape, a pull-saw, and a table saw. Once you have everything you need, you can begin the process of building your sailboat. From creating a jig and frame assembly to making the mast, there are many steps involved in building a wooden sailboat. But with patience and attention to detail, you can create a beautiful and functional vessel that will bring you joy for years to come.
Understanding the Basics of a Wooden Sailboat
If you are interested in building a wooden sailboat, it’s important to understand the basics of how a sailboat is constructed. In this section, we’ll cover the parts of a wooden sailboat and the different types of wooden sailboats.
Parts of a Wooden Sailboat
A wooden sailboat is made up of several parts, each with its own unique function. Here are some of the most important parts:
- Hull : The hull is the main body of the boat. It is the part of the boat that sits in the water and provides buoyancy.
- Keel : The keel is a long, narrow fin that extends down from the bottom of the hull. It helps to keep the boat from capsizing by providing stability.
- Rudder : The rudder is a flat piece of wood or metal that is attached to the back of the boat. It helps to steer the boat.
- Mast : The mast is a tall, vertical pole that supports the sails.
- Sails : The sails are large pieces of fabric that are attached to the mast and other parts of the boat. They catch the wind and propel the boat forward.
- Boom : The boom is a horizontal pole that is attached to the bottom of the mast. It helps to control the shape of the sail.
Types of Wooden Sailboats
There are many different types of wooden sailboats, each with its own unique characteristics. Here are some of the most common types:
- Dinghy : A dinghy is a small sailboat that is typically used for recreational sailing or racing.
- Sloop : A sloop is a sailboat with a single mast and a fore-and-aft rig.
- Ketch : A ketch is a sailboat with two masts, with the main mast taller than the mizzen mast.
- Yawl : A yawl is a sailboat with two masts, with the mizzen mast located aft of the rudder post.
When choosing a type of wooden sailboat to build, it’s important to consider your needs and experience level. A dinghy is a good choice for beginners, while a ketch or yawl may be more suitable for experienced sailors.
By understanding the basics of a wooden sailboat and the different types available, you can make an informed decision about which type of boat to build.
Choosing the Right Materials
When building a wooden sailboat, choosing the right materials is crucial to ensure the boat’s durability and performance. In this section, we will discuss the two most important materials you’ll need to choose: wood and sails/rigging materials.
Selecting the Right Wood
Choosing the right type of wood for your sailboat is critical. You want a wood that is strong, lightweight, and resistant to rot and decay. Some of the most popular types of wood used in sailboat building include:
- Cedar: Lightweight and easy to work with, cedar is an excellent choice for planking and decking.
- Mahogany: Strong and durable, mahogany is often used for building frames and keels.
- Oak: A dense and hard wood, oak is commonly used for building frames and planking.
When selecting your wood, make sure it is free of knots, cracks, and other defects that could weaken the boat’s structure. You should also consider the wood’s grain pattern, as this can affect the boat’s strength and appearance.
Choosing Sails and Rigging Materials
The type of sails and rigging materials you choose will depend on the type of sailboat you’re building and your sailing needs. Some of the most common materials used in sail and rigging construction include:
- Dacron: A strong and durable synthetic material, dacron is commonly used for sailcloth.
- Nylon: Lightweight and flexible, nylon is often used for spinnaker sails.
- Stainless Steel: Strong and corrosion-resistant, stainless steel is commonly used for rigging hardware.
When selecting your sails and rigging materials, consider the conditions you’ll be sailing in and the type of sailing you’ll be doing. For example, if you’ll be racing, you may want to choose lightweight sails and rigging materials that will help you achieve maximum speed. On the other hand, if you’ll be cruising, you may want to choose more durable materials that can withstand rougher conditions.
By choosing the right materials for your wooden sailboat, you can ensure that your boat is strong, durable, and performs well on the water.
Designing Your Sailboat
Before you start building your wooden sailboat, you need to design it. This will involve creating a blueprint and determining the size and shape of your boat.
Creating a Blueprint
Creating a blueprint is an essential step in designing your sailboat. It will help you visualize your boat and ensure that you have all the necessary components in place. You can create a blueprint using software such as AutoCAD or SketchUp, or you can draw it by hand.
When creating your blueprint, consider the following:
- The length, width, and height of your boat
- The position of the mast and sails
- The location of the rudder and keel
- The number of cabins and their layout
- The placement of any storage compartments or equipment
Determining the Size and Shape
The size and shape of your sailboat will depend on several factors, including your budget, the type of sailing you plan to do, and the number of people who will be on board.
Consider the following when determining the size and shape of your sailboat:
- The type of sailing you plan to do (coastal cruising, racing, etc.)
- The number of people who will be on board
- The amount of storage space you will need
- The amount of deck space you will need
- Your budget
Once you have determined the size and shape of your sailboat, you can start gathering materials and building your boat.
Building the Hull
When building a wooden sailboat, the hull is the most important part of the boat. It is the main structure that holds everything together and keeps the boat afloat. Building the hull requires cutting and assembling the wooden frame.
Cutting the Wood
To begin building the hull, you will need to cut the wood into the appropriate sizes and shapes. The wood should be cut according to the plans or blueprints that you have created. You can use a saw or a jigsaw to make the cuts.
It is important to use high-quality wood that is free of knots or other defects. The wood should be strong enough to withstand the pressure and weight of the water. Common types of wood used for building a wooden sailboat include cedar, oak, and mahogany.
Assembling the Frame
Once you have cut the wood, you can begin assembling the frame of the hull. The frame is made up of vertical pieces of wood called frames, which hold the shape of the boat. The frames are attached to the keel, which is the main structure that runs down the center of the boat.
To assemble the frame, you will need to use a sawhorse or other support to hold the lumber in place. You can then use screws or bolts to attach the frames to the keel. It is important to ensure that the frames are level and straight.
After the frames are attached to the keel, you can add the planks to the hull. The planks are attached to the frames and keel using screws or nails. It is important to ensure that the planks are properly aligned and spaced.
Once the planks are attached, you can sand and finish the hull to give it a smooth and polished look. This will also help to protect the wood from the elements.
Building the hull of a wooden sailboat requires patience and attention to detail. With the right tools and materials, you can create a strong and beautiful hull that will last for years to come.
Installing the Deck and Cabin
Installing the deck and cabin of your wooden sailboat is a crucial step in the construction process. It not only adds to the aesthetics of your boat but also provides structural support. Here are some tips to help you through the process.
Deck Installation
The deck of your wooden sailboat should be installed after the hull has been completed and before the cabin is built. It is important to ensure that the deck is watertight to prevent any leaks. Here are the steps to follow when installing the deck:
- Cut the deck to fit the hull and sand the edges to ensure a tight fit.
- Apply a layer of epoxy to the hull and deck joint to seal it.
- Secure the deck to the hull using screws or bolts.
- Apply a layer of fiberglass cloth and epoxy to the deck to make it watertight.
- Sand the surface of the deck to prepare it for painting or varnishing.
Cabin Installation
The cabin of your wooden sailboat provides shelter and storage space. It is important to ensure that it is properly installed to prevent any leaks. Here are the steps to follow when installing the cabin:
- Build the cabin on a flat surface using marine-grade plywood.
- Cut the cabin to fit the deck and hull and sand the edges to ensure a tight fit.
- Apply a layer of epoxy to the cabin and deck joint to seal it.
- Secure the cabin to the deck using screws or bolts.
- Apply a layer of fiberglass cloth and epoxy to the cabin to make it watertight.
- Install any windows, hatches, or doors in the cabin.
- Sand the surface of the cabin to prepare it for painting or varnishing.
By following these steps, you can ensure that your wooden sailboat’s deck and cabin are properly installed and watertight. This will not only make your boat look great but also ensure that you have a safe and enjoyable sailing experience.
Setting Up the Mast and Sails
Now that you have built your wooden sailboat, it is time to set up the mast and sails. This process may seem daunting, but with a little patience and attention to detail, you can have your boat ready to sail in no time.
Step 1: Install the Mast
The first step is to install the mast. Depending on the design of your boat, the mast may be a single piece or assembled from multiple sections. Make sure the mast is secured properly and is straight. Use a level to ensure the mast is vertical in both directions.
Step 2: Prepare the Sails
Next, prepare the sails. Make sure the sails are clean and free of any debris or damage. Attach the sail to the mast using the halyard, which is a rope used to raise and lower the sail. Make sure the sail is hoisted all the way to the top of the mast.
Step 3: Attach the Boom
Attach the boom to the mast and secure it with a boom vang, which is a rope used to control the angle of the boom. The boom is the horizontal spar that holds the bottom edge of the sail.
Step 4: Set the Sail
Once the boom is attached, set the sail. Adjust the angle of the boom and the sail to catch the wind and start moving. You can use the main sheet to control the angle of the sail and the boat’s speed.
Step 5: Trim the Sail
Finally, trim the sail to optimize its performance. This involves adjusting the sail’s shape and position to maximize its power and minimize drag. Use the sail controls, such as the cunningham and outhaul, to adjust the sail’s shape. Use the main sheet to control the sail’s position relative to the wind.
Congratulations! You have successfully set up the mast and sails of your wooden sailboat. Now it’s time to hit the water and enjoy the thrill of sailing.
Applying Finishing Touches
When it comes to building a wooden sailboat, applying the finishing touches is a crucial step that can make all the difference in the final product. Here are some tips and tricks to help you get the perfect finish.
Sanding and Finishing
Before you can apply any finish, you need to make sure the surface is smooth and free of imperfections. This means sanding the wood with progressively finer grits of sandpaper until you achieve the desired smoothness. Once you’ve finished sanding, you can apply a wood conditioner to help the wood absorb the finish more evenly.
When it comes to choosing a finish, you have several options. Some popular choices include varnish, paint, and oil. Varnish is a popular choice for wooden boats because it provides a durable, glossy finish that can withstand the harsh marine environment. Paint is another option, but it requires more maintenance than varnish and may not provide as much protection against the elements. Oil is a good choice if you want a more natural look, but it may not provide as much protection as varnish or paint.
Painting and Varnishing
If you decide to go with paint or varnish, there are a few things to keep in mind. First, make sure you apply the finish in a well-ventilated area to avoid inhaling fumes. Second, make sure you apply thin, even coats and allow each coat to dry completely before applying the next. This will help prevent drips and ensure a smooth finish.
When it comes to varnishing, it’s important to use a high-quality brush and work quickly to avoid brush marks. You may also want to consider using a foam brush for hard-to-reach areas. Once you’ve applied the final coat of varnish, you can buff the surface with a soft cloth to achieve a high-gloss finish.
Painting requires a different approach. You’ll need to choose the right type of paint for your boat and make sure you apply it evenly. If you’re painting a large area, you may want to consider using a paint sprayer to achieve a smooth, even finish. Once the paint has dried, you can apply a clear coat to protect the paint and give it a glossy finish.
In conclusion, applying the finishing touches to your wooden sailboat is an important step that requires careful attention to detail. By following these tips and using the right tools and materials, you can achieve a beautiful, long-lasting finish that will protect your boat and make it stand out on the water.
Safety Measures
When building a wooden sailboat, safety should always be your top priority. Here are some safety measures you should take to ensure a safe and successful build.
Installing Safety Equipment
Before you start building, make sure you have all the necessary safety equipment installed in your workshop. This includes fire extinguishers, smoke detectors, and first aid kits. You should also have a clear and unobstructed path to the exit in case of an emergency.
When working with power tools, always wear eye and ear protection, as well as a dust mask to protect your lungs. If you are using chemicals, make sure you are working in a well-ventilated area and wear gloves and a respirator if necessary.
Conducting a Safety Check
Before you start working on your sailboat, conduct a safety check to make sure everything is in order. Check that all tools and equipment are in good working order and that there are no loose or damaged parts. Make sure your work area is clean and free of clutter, and that all cords and cables are properly secured.
When working with wood, be aware of any knots or cracks in the wood that could weaken the structure of your sailboat. Use only high-quality marine-grade wood and be sure to follow the plans carefully to ensure a strong and safe boat.
By following these safety measures, you can ensure that your wooden sailboat build is a safe and enjoyable experience.
Maintaining Your Wooden Sailboat
Congratulations on building your own wooden sailboat! Now that you have a beautiful vessel, it’s important to keep it well-maintained to ensure its longevity and safety on the water.
Regular Maintenance
Regular maintenance is essential to keep your wooden sailboat in top condition. Here are some tips to keep in mind:
- Clean your boat regularly with a mild soap and water to prevent dirt and grime buildup.
- Check for any signs of damage, such as cracks, rot, or loose fittings, and address them promptly.
- Apply a fresh coat of varnish or paint every few years to protect the wood from the elements.
- Keep your boat covered when not in use to protect it from the sun and rain.
Seasonal Maintenance
In addition to regular maintenance, there are also some seasonal tasks that you should perform to keep your wooden sailboat in top condition:
- At the beginning of the season, inspect the hull for any damage or wear and make any necessary repairs.
- Check the rigging and sails to make sure they are in good condition and make any necessary repairs or replacements.
- Before storing your boat for the winter, make sure to properly winterize it to protect it from the cold and moisture.
Additional Tips
Here are some additional tips to keep in mind when maintaining your wooden sailboat:
- Use high-quality marine-grade products when cleaning and maintaining your boat.
- Avoid using harsh chemicals or abrasive materials that can damage the wood.
- Regularly check the bilge for any water buildup and pump it out as needed.
- Keep your boat well-ventilated to prevent moisture buildup and mold growth.
By following these tips, you can keep your wooden sailboat in top condition and enjoy many years of safe and fun sailing.
Leave a Reply Cancel reply
You must be logged in to post a comment.
How to Build a Wood Sailboat

Introduction: How to Build a Wood Sailboat

I've been wanting to combine my two favorite hobbies - woodworking and sailing for a long time, so I thought I'd build a boat. It's got classic lines and looks so dazzling in the sunshine that people constantly stop me at the boat ramp to ask me about it. There's something unbelievably rewarding about building something like this from scratch. This is definitely a boat that is much better built than bought . Here's how I did it.
The boat takes about 100 hours to build. I did it over 3 months, working a little bit just about every day and full days when my schedule permitted.
It will take about $1,000 in total to build if you buy everything at full retail cost (not including tools you might need to buy), but you can spread that across the length of the project. For example, you only need to buy one $30 sheet of plywood at a time, take it home, draw out the parts (loft) that fit on just that sheet and cut them out. That will take a couple of hours right there. Some boating supply stores (chandleries) might let you setup an account which might give you a discount if you tell them you're building a boat.
All of the skills needed to build a sailboat can be learned slowly, one step at a time. For example, if you've never fiber-glassed plywood before, just practice on a small piece first to get your confidence up. This was my first boat build, so I did a lot of learn as you go . Not only am I going to show you the right way to successfully build your own sailboat, but I'm going to share with you the mistakes I made along the way to hopefully save you from repeating them.
The end result will be a very attractive little 8 foot long pram, that is easily made out of 4x8 sheets of plywood that is light enough to put in the back of a small pickup truck or roll down to the local lake on the optional dolly. Anything longer would require you to either make a scarf joint (which is a bit tricky) or buy longer sheets of plywood (which is considerably more expensive).
What you will need:
Boat building plans
8 panels of 1/4" oak plywood 4'x8'
Pencil, Sharpie, ruler, tape measure, yard stick, etc.
Long flexible straight edge
Box of 1" brad nails
2 gallons of epoxy resin
1 gallon of epoxy hardener - SLOW
1 quart silica thickener
5 quarts wood flour thickener
1" masking tape
Japanese pull-saw
Table saw (helps, but optional)
Round-over router bit
Flush trim router bit
Palm/random orbital sander
220 sanding discs
Combination square
Drill bit set
Drill bit extension
Basic hand tools
Small diameter wire or zip ties
Wire cutter
12 C-clamps - 3"
Mixing cups, mixing sticks, rubber/nitrile gloves
16' x 60" of 6oz fiberglass cloth
2" plastic spreader
Gallon of waterproof glue
Glue roller
Silicone bronze screws
Stainless steel fasteners
Small blocks
Gudgeon & pintle - dinghy size
Patience - large
Elbow grease - large
For more detailed explanations on each step and more specific info/reviews on the materials and parts used, check out my boat build blog: www.Midnight-Maker.com
Step 1: Cutting Out the Parts...

First, you'll need boat building plans. I purchased some very nice ones from a popular boat building website because I had a specific style in mind to build, a "pram". It's a Norwegian design with lots of buoyancy in the bow and building a pointy boat is a little more difficult. There are a bunch of free boat building plans (search "dinghy") online. Also, I wanted my boat parts to fit in a standard (read cheap) 4'x8' sheet of plywood. It also had to be light enough for me to load/unload/move myself. This boat weighs in at about 70 pounds. When on the custom dolly I built, it's very easy to move from the parking lot to the lake.
Next, you'll need to draw out the parts of the boat full-sized onto the plywood (lofting). I actually did this step on hardboard/masonite because I wanted to make templates of all the parts in case I ever wanted to build another one.
This step requires you to be very meticulous. Carefully transfer the measurements (offsets). They may or may not look correct because it's very non-intuitive to look at curved boat parts that are laying flat. Some parts actually bend the opposite way you think they should. To make the curves, I nailed a bunch of 1" brads into the panel and used a long, flexible straight edge (yard stick, etc.) bent to follow the curve, then I traced the curve with pencil/Sharpie. Once I removed the brads, I had perfectly smooth curves. Keep in mind that with the side panels that are symmetrical to both sides of the boat, only draw out one version and cut two stacked sheets at a time. This ensures the boat will not be lop-sided. Make sure to immobilize the two sheets together with screws outside of the boat parts or use double-sided tape/clamps, etc. to keep the parts registered properly.
Using a Japanese pull-saw allows you to control the cuts very carefully and it can follow the graceful curves. They cut on the pull stroke which means they're very easy to control. Make sure you leave a bit of your cut line, meaning cut just outside the line. This allows you a bit of a safety margin and you can always sand to the line to sweeten it up. This is where the elbow grease really kicks in. It takes hours to cut out the hull panels by hand, but it's worth it. I tried cutting the first part out with the jigsaw and it wandered all over the place and quickly cut inside the line before I knew it. Also, a jig saw blade can lean to one side which could mean two panels might not be the exact same shape. Using hand tools is a classic way to do woodworking and is a very gratifying process. With hand tools, things happen slow enough for you to be in total control, whereas power tools can quickly do unexpected damage. With the understanding that you're building a classic boat, using hand tools wherever possible is part of the philosophy.
The plans I bought were in metric and called for 6mm (1/4") and 9mm (3/8") plywood, but I wanted to make everything out of 1/4" plywood so the thicker parts in the plans were glued together with two layers of 1/4" (so at 1/2" they were a bit thicker than designed). I actually liked this because it made the boat feel sturdier and of course it was cheaper that way. The trade-off was that the boat would be a bit heavier.
For any of the parts that need to be doubled-up/laminated (e.g. the transoms), now is a good time to do that. Make sure you use "waterproof" glue instead of "weatherproof" glue like I did...
Spread a thin layer of glue over one of the "bad" sides (plywood usually has a good side and a bad side, glue bad sides together so good sides show on both outside faces), making sure it's completely covered (I used a special glue roller), then carefully place the other half on top. Align all of the edges together, then clamp them in place. Now put heavy things carefully on top to press the parts together. The glue should be dry in about 6 hours.
NOTE: It's considerably easier and safer to do any woodworking processes to the parts before you assemble the boat. This way, you can safely clamp pieces to the work bench and cut out handle holes, etc. Since my boat is a "lapstrake" design, I had to route a rabbet (groove located on the edge) carefully on the bottom edge of each side panel. This creates a shoulder for the parts to sit on, positively locating them while you're stitching the panels together. Likewise, the grab handles in the transoms are much easier to cut out before putting the boat together.
Also keep in mind that any mistake will be considerably more painful the further you are along in the build. For example, if I biff cutting out the grab handle holes while they're just loose pieces rather than when they're a permanent part of the boat, it's much easier to recover - just make another transom. If you had to patch a hole in the boat, it would be difficult and possibly never look perfect. No pressure...
Step 2: Assembling the Hull...

Once you have the bottom and sides cut out, you can start to "stitch and glue" the hull together. This is a technique used usually for smaller boats to be able to pull the hull form together without the need to build a frame or mold (which can take almost as long and as much wood as the boat itself).
I built a gauge stick to make sure my holes were perfectly spaced at 4" at 1/2" in from the plywood edge. It was 1" wide so either edge was the required 1/2" from the centerline. I worked my way down one side of each of each mated seam and drilled all those holes at once while the panels could lay flat on the bench. Make sure to use a backer block to prevent tear out on the back side, even with such a small drill bit.
With one mating panel drilled with a 1/16" drill bit, hold the mating panel in it's relative position. I used some spare twine to wrangle my panels into the proper orientation as I was marking them. Make a pencil mark where the mating hole should be, remove the pre-drilled panel and drill the second set of holes 1/2" in from the edge. This makes sure there's enough strength to hold the boat together.
The first pass on the stitches is just to get the hull together structurally. You can always go back and make the stitches fancier/tighter and tweak the position of the panels.
The stitches go from the inside out. Cut 6" lengths of wire and bend them into long, narrow U's that are the width of the distance between the holes. Stick the ends through the holes and carefully twist the tails together on the outside of the hull, making sure not to damage the plywood. If you're using zip ties, then the holes you drill will need to be bigger and you'll have to start on the outside, go in, turn around, then back out, then "zip".
Make sure your panels' rabbet shoulders are resting securely on the mating panel and carefully tighten all the stitches. For my boat, once I had two panels stitched to the bottom panel on each side, it was time to attach the transoms (ends). Once all of the exterior parts are stitched together, you should have something that looks like a boat. It will be a little rickety at this stage, but that's okay.
NOTE: In the photos I took of my build, you'll notice that the transom doublers (reinforcers) aren't in place. That was because I was following the instruction manual, but I think that was a mistake, so I highly recommend laminating (gluing) the doublers to the transoms before you stitch the boat together.
Step 3: Reinforcing the Hull Joints...

Now that the hull is stitched together, flip it over upside down. You'll be surprised at how stiff it is, considering how difficult it was to wrangle all those panels into position. Be careful, there's lots of poky wire ends sticking out all over the place.
I used a technique called "tabbing", meaning I made small, structural tabs from thickened epoxy that fit between the stitches, then I removed the stitches and made one long, larger fillet to connect the hull panels together.
Make sure your panels are perfectly aligned and tightened. I used a nipper to lop off most of the tails so they wouldn't get in the way, but that left very sharp spikes.
Make sure your boat is square. Take diagonal measurements from corner to corner, make sure the boat parts are parallel to each other, etc. because if there's a twist in your boat, the next step will make it permanent, which will affect the boat's performance.
Now mix up a batch of epoxy and silica thickener according to the manufacturer's directions (meaning each type of epoxy has a different resin to hardener ratio) until it's between the consistency of thick ketchup, but runnier than peanut butter (make sure to mix the 2 parts of epoxy together first very well before adding a thickener). Too thick and it won't fill the void, too thin and it'll run down inside the boat. Both are bad. I used a small syringe to inject the mix into the V intersection between the panels and checked underneath/inside to see if there were any runs.
Once the epoxy has partially set, use a glove wet with denatured alcohol to smooth out the "tabs" so they fit inside the V groove and don't extend above the intersection between the panels. This will give you good practice for the seams that will show on the finished boat. Be careful of the wire spikes.
Repeat this process for every seam on the hull. Let it cure overnight.
Once the tabs have cured, carefully remove the stitches. If the wire seems to be epoxied permanently to the hull, heat the wire with a lighter. That will soften the epoxy enough to pull the wire out. Be careful not to scorch the boat (you don't want a Viking funeral). Now repeat the thickened epoxy process for each overlap, except this time each seam will need to be one long, smooth joint. Let it cure overnight. This goes a long way in making the boat hull structural.
Step 4: Fiberglassing the Hull...

Now that you've got a permanent hull shape, it's time to make it waterproof and rugged. Fiberglass and resin over plywood is a tried and true Do It Yourself boat building technique which makes it strong and light.
Mask off the bottom panel and roll out your fiberglass cloth. Smooth the cloth out very carefully so as not to snag or tweak the fibers' orientation. Mix up an unthickened batch of epoxy (it will be the consistency of syrup). Starting at the stern, pour a small puddle of epoxy and spread it out nice and thin. You should be able to squeeze most of the epoxy out of the cloth, leaving only saturated cloth with no dry spots (which will appear white) but the weave should still be showing (meaning no extra epoxy is pooling). You should easily be able to see the wood grain through the cloth now.
Let the epoxy partially cure and using a razor, slice the dry fiberglass cloth away on the taped seam. Then remove the masking tape. Let the epoxy cure overnight.
Flip the hull over and mix up a batch of epoxy that is the consistency of peanut butter. I masked off the joint, but this step is optional, but keep in mind that it will be visible if you plan on finishing the interior bright (varnished wood). It's not as critical if you're painting the interior. With a plastic spreader, carefully make a large radius transition (fillet) between the bottom panel and the first side panel (garboard). Remove the masking tape when the epoxy mixture is partially cured and carefully scrape/wipe any unwanted mixture. It's much easier to remove now than having to sand it all off later. At this point, it's also a good time to fillet the transoms to the sides using 3/4" radius tabs between stitches and 1" finished fillets after you've removed the stitches. Let the fillets cure overnight.
Now, repeat the entire fiberglassing process on the inside. Except instead of just doing the bottom panel, make sure both the bottom and the garboard are fiberglassed. This is basically the waterline of the boat. The fillet should allow the fiberglass cloth to smoothly make the bend between boards. Remove the excess cloth when partially cured and let sit overnight. Some people fiberglass up onto the transom at this stage which will make the boat stronger, but that means you have to have already filleted the transoms to the bottom.
Step 5: Installing Interior Parts...

The bulkheads get stitched in place just like the panels. They will make the already stiff (and much heavier boat) completely structurally sound and push/pull the sides into their final shape. Then make 3/4" "tab" fillets between the stitches to lock them in place, remove the stitches and make long, smooth 1" fillets. The smaller fillets will get covered by the larger fillets. I used two different modified plastic spreaders to do this step. Each spreader was cut with a box knife and filed/sanded into its final shape.
While you're doing the previous steps, if you're in a time crunch, go ahead and build the daggerboard trunk. It's made of numerous parts that are pre-coated with a couple layers of unthickened epoxy, then glued together with silica-thickened epoxy. This makes it strong and waterproof as it will be below the waterline so must be completely waterproof.
The daggerboard trunk is the most important part of the boat, especially if you're making a sailboat version (this boat can easily just be used as a rowboat). Not only does it support the center seat (thwart), but it has to transfer all of the force from the sail to the water and if you run the boat aground, it takes all the shock loading from the daggerboard.
The daggerboard gets filleted into place like everything else. Make sure it's perfectly on the centerline of the boat as that will affect its sailing characteristics.
Next, let's make the daggerboard slot in the center thwart. I set up a straight edge with a spiral upcutting router bit. Make sure to enlarge the slots at the end of the center thwart so that it can fit around the fillets of the center bulkhead. Now is the time to ease the edges of the center thwart because you'll be sitting on it a lot, so it needs to be comfortable. Because it's so thin, I only routed the top edge of the center thwart that shows and just hand sanded the edge underneath (it's very problematic to use a round-over bit on the second side of a thin board). Paint all of the thwarts with three coats of unthickened epoxy, especially the undersides. Once the woodworking is done, the thwart can be epoxied into place with peanut butter (or you can jump to cutting the daggerboard slot in the bottom of the hull). Make sure the thwart fits snugly in place. Drop dollops of peanut butter on the top edges of the center bulkhead and daggerboard case and spread it out evenly (make sure none gets inside the slot to interfere with the daggerboard). Firmly seat the thwart (pun intended) into the goop and weight it down. Let it cure overnight.
While you've making sawdust, cut out the mast hole (partner) in the forward thwart by drilling holes in the four corners (for the square mast we're going to make), then cut out the sides, file it smooth, then round over the top edge with the router.
Any time after the bulkhead thwart fillets have cured, you can seal the airtank chambers. Paint the bottom, sides, inside of the bulkhead and transom up to the level where the thwart will be.
Step 6: Rail & Sailboat Parts...

There are several processes in this boat building instructable that can be done concurrently. While you're waiting for the epoxy on one part to cure, you can be doing woodworking or epoxying another part. This step illustrates that point. While you're waiting for the epoxy on the rub rail (outwale) to cure, you can be fabricating the sailboat accessories (e.g. daggerboard, rudder, tiller, spars, etc.).
In order for the outwale to be thick/strong enough to be effective, you'll need to laminate it in two strips on each side. You can't bend a single piece that thick around the curvature of the hull without either breaking the wood or softening it by steaming it which is a complicated process.
Take a strip that's half the final thickness and a little longer than the boat edge (I made mine a bit beefier), mix up some peanut butter with the colloidal silica and carefully spread it on the inside of the strip. Starting at the stern, clamp it in place, perfectly align it with the top edge of the plywood. Now you have a long, springy lever to bend the wood strip along the compound curve. It dips both vertically (shear), and bows out at the widest part of the boat (beam), then back in toward the bow. At least every foot, clamp it as you go, moving forward. More is better. Toward the bow, the strip will get stiffer as it gets shorter. Once clamped in place, scrape/wipe off all the squeeze-out. It's much easier to remove now than after it hardens. Let it sit overnight. You'll have to repeat this three more times, meaning this step takes four days (if you're using "slow" epoxy hardener).
During those four days that you're dealing with the outwale, you can make major progress on the sailboat parts. They're completely separate from the hull. If you're just making a rowboat, then you can skip making these parts.
The daggerboard and rudder are cut out and laminated. Then a bevel is ground onto the leading and trailing edges to make it slice through the water more efficiently. Then they're covered in layers of epoxy. The mast step is assembled. This has to be very strong because all of the force of the sail is transmitted to the boat through the mast step and the mast is a very long lever arm. The rudder cheek plates and tiller also have to be assembled similarly to the daggerboard case.
NOTE: Whenever there's a hole to be drilled into any part of the boat, you must take additional steps to make sure the water doesn't penetrate and damage the wood. The correct procedure is to drill an over-sized hole, completely fill that hole with epoxy (I usually put a piece of masking tape on the back side to act as a dam), then once the epoxy cures, re-drill in the center of the epoxy plug the correct hole size. That makes each hole in the boat possibly a 2 day process, so plan accordingly. You can also use 5 minute epoxy to knock out a bunch of holes quickly, but be careful, they're not kidding. This stuff gets rock hard very quickly and will permanently glue anything touching. This is exactly how you drill the hole for the pivot point for the rudder/cheek plate assembly. If the pin is 1/4", then drill 1/2" hole and fill that with epoxy. Now the 1/4" hole will fit nicely in the center and be completely waterproof.
Since all the parts need several coats of unthickened epoxy and they just about all have holes in them, I hung them up with some twine and painted them on all sides, one layer at a time, for several days. Make sure the rudder doesn't get too thick to fit inside the cheek plates.
Step 7: Making the Spars...

More sailboat parts you can make while waiting for other parts to cure are the spars, the structural parts that support the sail. The mast is another glue up. I used 3 - 1x3's of hemlock. A relatively soft wood, but with a nice tight grain with no knots. A mast would break at a knot, regardless of how strong the wood is. Using the waterproof glue, align the pieces as perfectly as you can then clamp up the assembly and let dry overnight. Then run it through a table saw to get the final dimensions. Use a router and a round-over bit to ease the edges. Cut to length and sand the sharp corners. It should fit easily, but snugly into the forward thwart.
The boom (bottom of sail) is a little more complicated. Cut out the gooseneck (boom pivot point) by using a hole saw first, making sure to clamp it securely to the workbench, then cut out the profile. This gets attached to another piece of 1x3 hemlock, after it's been cut to length and the edges have been rounded over.
The yard (top of sail) is easy. Just cut to length and round over the edges. Drill and fill any holes in the spars at this time. You'll need at least one hole on each end to lash the sail grommets to.
This time, everything gets covered with several coats of varnish, epoxy is not necessary. The varnish protects the wood from water and UV damage.
The reason we had to make at least the mast at this point is because we'll need it in the next step to establish the location of the mast step.
Step 8: Finishing Up the Interior & Exterior...

Once the outwales are successfully attached, trim them flush with the face of the transom(s). While you're at it, use a flush cut saw (with no sawtooth offset to mar the wood) to trim the sides flush with the transom. This will show you how well your injected silica mix worked earlier. Now you're ready to install the mast step.
The mast step must be precisely located on the floor (sole) of the boat to give the mast the proper angle (rake). This is very important because it directly affects the boat's ability to sail upwind. Using your mast, insert it into the forward thwart (partner) and into the mast step. With the mast at a 3° angle (mostly vertical but with a small, yet noticeable and graceful tilt toward the stern of the boat), trace the location of the mast step. Use a combination square to make sure it's perfectly aligned side to side (athwartship). You can now set the mast aside. Drill and fill holes in the bottom of the boat so that you can securely screw the mast step from the outside of the hull. The mast base must also be epoxied to the sole with peanut butter. After it's screwed into place but before the epoxy cures, make sure to test fit the mast again and verify the rake angle is correct. It would be a little messy at this point if you had to tweak it, but at least you wouldn't have to cut it off.
Now comes the most unpleasant part of the whole build. On your hands and knees, make a 1" radius fillet on the underside of every part in the boat. I didn't worry about making these pretty, just structural and water tight (these create the flotation tanks that keep the boat from sinking if you capsize). Let that cure overnight.
Next is the scariest part of the build, making the slot in the hull for the daggerboard. Using a drill bit extension, from the inside of the boat, reach down through the daggerboard case and drill a hole at each end of the slot through the bottom of the boat (make sure to use a backer board). Drill a couple holes in between, then take a jigsaw and connect the dots. This weakens the hull enough so that the router won't tear out any extra wood. Note, this step can easily be done prior to affixing the center thwart. Using a flush trim/laminate router bit, let the bearing run around the inside of the daggerboard case. This will make the hole in the hull perfectly match the slot. This is important because you don't want a shoulder on the inside for the daggerboard to hit and you don't want to damage the waterproof lining of the case. Last, ease the sharp edge of the daggerboard slot with the router and a small radius round-over bit.
The skeg must be cut to fit the curve of the hull (rocker), then using silicone bronze screws, attach it to the hull using the same drill and fill/peanut butter techniques. Make sure to snap a chalk line on the centerline of the boat for reference. Then make a 1" fillet where it meets the hull which will support the skeg and make it strong. The skeg keeps the boat tracking straight in the water. I optionally used some fiberglass cloth to cover the skeg and overlap onto the bottom to make the entire assembly stronger and more waterproof. The skeg will take the brunt of the abuse when launching, beaching, loading and unloading, etc. I also installed a stainless steel rubstrake on the aft end of the skeg with this in mind. In wooden boat building, silicone bronze screws are often used because they won't corrode when encapsulated like stainless steel screws can.
Install the skids parallel to the skeg. These are solid pieces of hardwood because they will also take a lot of abuse when the boat is sitting on shore, protecting the thin hull from rocks, etc. They get installed the same way as the skeg, although it's a little tough to bend the wood along the rocker. Scrape off the excess peanut butter once they're screwed in place.
I also installed the optional outboard motor pad at this point because I plan to use an electric trolling motor on the back to quietly putter around the lake in the evenings to relax with the family after work.
That should be the last parts that go into making the boat!
Step 9: Finishing the Hull...

Now comes the last dash to the finish line. One of the more tedious steps is that you now have to sand the entire boat. I actually built the entire boat inside, but for the sanding stage, I took her outside. Several hours of sanding all of the fillets nice and smooth. Everything will show in the finished product whether you paint the boat or leave it "bright" (unpainted). If you've been careful about cleaning up the peanut butter as you go, you should be able to sand the boat with mostly 220 grit. Be careful not to sand through the thin veneer of the plywood. After the sanding is done (make sure to use a dust mask), vacuum the entire boat and then wipe it down with a tack cloth to remove any dust. I also reversed the hose on the shop vac and used it to blow the sawdust off since I was outside.
Next, you must coat the entire interior and exterior with 3-4 coats of unthickened epoxy. This makes the entire boat waterproof. It will also give you an idea of how beautiful the wood will look when varnished. This is why a lot of boat builders decide to leave their boats bright so the beauty of the wood shows through.
Mix up 1 cup batches of unthickened epoxy and pour out large puddles onto the surface. Taking a foam roller, distribute the epoxy in a smooth coat. Now take a wide foam brush and gently smooth (tip) the rolled out surface. This should remove any lap marks or bubbles. Move along to the next area, making sure to not touch the wet parts. Also, make sure no dust or bugs get on your finish or it'll mean even more sanding later.
Start with the exterior first. It'll be much easier to get good by practicing on the convex surfaces. The interior is more tricky because you want to prevent sags and pooling by only applying very thin coats.
Make sure to check with the manufacturer's directions during this step in case you have to deal with "blushing", a thin layer that can sometimes form on the surface of epoxy when it cures. This could cause your layers to not stick to each other. If your epoxy does blush, it's easy to just wipe the entire boat down with a rag soaked in acetone after each coat has cured. Some people sand between coats of epoxy. This is how you would make an extremely smooth/shiny finish, so if you want your boat to be museum quality, invest the effort. I'm planning on banging my boat around so opted out of an extreme, fancy, mirror finish.
I was originally going to paint the exterior of the hull, which would require priming and painting, but I'm leaving it bright for the time being. The good news is that you can always paint later if you change your mind, but if you paint it and change your mind, it's tough to go back. There aren't a lot of pics of this step, which took a couple of days because there wasn't much visible progress after that first coat went on. At this point, any surface that's not painted should be varnished using the same "roll and tip" method as the epoxy, with the optional sanding between coats. Note that epoxy has no UV resistance, so to keep your boat from getting sunburned, you must either paint or varnish every surface. Giving a boat a "museum quality" paint and/or varnish finish can literally take as long as building the boat.
Step 10: Making the Sail...

Another step you can do while other parts are curing is make the sail. This particular design uses a "lug" sail, a classic looking sail for small boats with wood masts. It increases the sail area (therefore the force generated by the wind) without it having to be as tall as a modern sailboat mast made of aluminum. There is a kit from an online sailmaking company that you can get for a reasonable price. The Dacron cloth panels are all cut out by a CNC machine, so they fit perfectly together. I used a regular, domestic sewing machine, not an industrial one. The only time I had trouble was when sewing through all 7 layers at the reinforcement patches. When I got to those parts, I had to manually push down on the foot of the sewing machine with a flat-bladed screwdriver (minus) to help push the needle through the Dacron. We jokingly call Philips head screwdrivers "plus".
The panels/parts all come labeled. The directions were a bit confusing because they suggest you make sub-assemblies after the fact to make wrangling the large sail easier but they mention it after you've already sewn the large panels together. It's important to understand what parts go together while the panels are still small and more manageable. For example, the batten pockets are tricky enough to build on a single panel, much less the finished sail. Building the sail was about as difficult for me as building the boat, but it was worth it.
The lug sail gets reinforcement patches on all four corners where you attach it to the spars (bend), and there's also a reefing point for when the wind starts to pick up (freshen). Modern sails have three corners (Marconi rig).
I opted for the less expensive white Dacron sail kit, but there's also a classic red (tanbark) colored kit that's $100 more expensive. Before I sewed a single stitch, I carefully traced every part of the sail kit onto painter's tarp poly film so I can always use the templates to build another sail, all I need to do is buy the tanbark cloth.
Step 11: Rigging Your Sailboat...

This seems to be the trickiest part for most people, probably because there are numerous ways it can be successfully rigged, depending on your experience, preferences or criteria. It's confusing because you have to know what the finished setup will look like in your mind while you're staring at a pile of ropes. I chose a setup that allows the most room in the cockpit for a full-sized adult, so the mainsheet is led forward of the skipper's position. This keeps the skipper's attention forward so they're looking where they're going. I have another boat where the mainsheet is behind the skipper and it takes some practice getting used to.
The lines I made up (rope becomes a line when you give it a job description) were the halyard (hauls the sail up), the mainsheet (adjusts the angle of the sail to the wind = trim) and a traveler bridle (where the mainsheet attaches to the boat). I got fancy and spliced all my ends, but you can just as well use a bowline knot.
I installed a cheek block at the top of the mast instead of the large diameter hole in the directions. I wanted the halyard to run as smoothly as possible when setting the sail. Then I installed a pair of cleats at the base of the mast, one for the halyard and one for the downhaul (cunningham). With both of these lines pulling in opposite directions, it locks the sail in place, flat, so it effectivley acts like a wing. The main halyard attaches to the gaff with a snap onto a padeye. This allows easy on/easy off when rigging at the boat ramp. I also used a small loop (parrel) around the mast and through the eye to keep the gaff located close to the mast. I looped the downhaul over the boom and down to the cleat to try to keep the gooseneck from twisting. Note, except for the blocks, just about all of the hardware used on rigging a boat this size can come in stainless steel or brass/bronze, depending on the look you're going for. If you plan on installing oarlocks to row the boat, this decision becomes even more important to the final look of the boat.
For the mainsheet, I made a short bridle between the handles on the transom with a small eye tied in the center. This allows a place for the snap on the end of the mainsheet to attach to. I could've just as easily allowed the snap to slide, which would give the bridle the function of a traveler, but would affect its pointing ability (sail upwind). The mainsheet is then run to a block on the end of the boom, then to another block in the middle of the boom. This leaves the main cockpit area unobstructed with running rigging. Make sure your mainsheet is long enough for your boom to swing forward of 90° to the boat, with enough to still come back to the cockpit for the skipper to control. A stop knot at the end of the mainsheet will keep the mainsheet from getting away from you and give you something to grip.
The rudder pivot hardware (gudgeons and pintles) must be installed perfectly vertical and on the exact centerline of the boat so that she will sail well. Drill and fill the necessary holes for this hardware. Be careful with the spacing. It's designed to be easily installed and uninstalled while underway.
With this particular rigging layout, when under sail, the skipper must constantly keep the mainsheet in hand, which is a good idea anyway for safety reasons (if you get hit by a gust of wind = puff, you won't get blown over = capsize). The tension on the mainsheet is easily manageable for any size skipper. On larger boats, the mainsheet is held by a fiddle block with a cam cleat, which is not necessary for a boat this size. With that being said, a possible future upgrade would be to install a block and a camcleat somewhere on the centerline of the boat so that more advanced sailors wouldn't need to constantly have to oppose the tension on the mainsheet. Of course the trade-off would be the hardware would probably be somewhere you might want to sit.
Another upgrade I figured out after actually taking her sailing would be to rig up a bungee/shock cord system that will hold the daggerboard both in an up and down position. With the current setup, the centerboard is held down by gravity and must be pulled out of the slot when beaching.
Step 12: Go SAILING!

Because I wanted to be able to go sailing by myself if needed, I made a dolly out of 2x4's and large pneumatic tires (which makes the dolly float). The dolly fits securely between the center and aft thwarts when driving out to the lake. The sides on the dolly lock against the skids on the bottom of the boat so it can't twist. Roll the sail up with the spars and wrap it with the main halyard. At the designed length, the mast doesn't fit inside the boat, but it seems a bit long, so some people have cut the mast down enough so that it fits inside the boat.
Out at the lake, unload the boat, slide the dolly underneath and you're ready to roll down to the ramp. At the launch, roll the boat out into the water until it floats off the dolly, toss the dolly off to the side out of everybody else's way. Drop the daggerboard into the slot and install the rudder assembly. Facing into the wind (important), stick the mast into the receiver hole (partner), tie off the downhaul (cunningham) and hoist the sail until the downhaul is tight, then cleat off the main halyard. Reave the mainsheet (run the line through the blocks) and you're ready to go sailing.
I've found that this boat sails very well. The lug sail makes it very easy to sail upwind (weather helm), it's a little more tender for a large adult, more so than a boat with a hard chine, like an El Toro/Optimist but it's a lot more graceful looking. The payload is very reasonable for a boat this size. My wife and son can easily (and safely) go sailing with me and I don't even need anyone's help to get it rigged and launched. All in all, this is one of the best projects I've every built. I hope you too can discover the joy of building your own boat and then take her sailing. Remember, in sailing, the wind is free, but nothing else is...
This is my very first Instructable after many years of referencing this excellent site to build numerous cool projects (you should see my next post). Anyway, I hope you enjoy it and please feel free to ask any questions you may have and I'll do my best to answer them. I'm planning on building a larger boat in the near future so stay tuned...
Six Ways to Build a Wooden Boat
A guide to common construction methods
From Issue Small Boats Annual 2015
How to Build a Small Boat Yourself
S mall boats are not small undertakings, not if we are contemplating their creation in our own garages from piles of wood. If we’re amateur builders, particularly first-timers, the prospect is daunting, maybe even frightening. We don’t know how to do this. We don’t know if we can do it. We’re about to commit epic blocks of time, money, and emotional capital to a project with no guarantees, except that—trust this formula!—it will cost twice the estimated budget and four times the projected hours to complete it. But if we stick it out, we will have not only refined our problem solving and tool skills, but also burnished our character. And we will have a boat to be proud of.

One way to gain an understanding of various methods of construction is to take a class. At WoodenBoat School in Brooklin, Maine, for example, students in a two-week Fundamentals of Boatbuilding class learn several styles of traditional hull construction. In the foreground, a students fits a floor timber to a carvel-built boat, while in the background students fit a lapstrake plank.
The question of how to build this boat is a basic one that has to be parsed at the outset, while we’re sorting through designs and deciding which to build. There are about six ways of building wooden boats today, with variations on each. Our choices have proliferated just since 1950, thanks to the innovations of plywood, epoxy, and synthetic fabrics. No particular method can be proclaimed the best; each comes with its own suite of advantages and drawbacks. The type of boat and its intended use figure in. Even more does the level of skill and mindset of the prospective builder. A powerful determinant of whether we’ll end up with a real boat is perseverance, which is most sustainable when we find joy in the work. Some people will love the painstaking process of carvel planking, inserting themselves into a continuum of craft that has hardly changed in 500 years. Others will find this ancient discipline ludicrous, and will really groove on epoxy’s magic. For obvious reasons, it’s wise to contemplate all this before making the commitment.
There are serious passions and partisans afloat in these waters, so I expect challenges and complaints. I will try to stay objective and keep my own prejudices in the locker. I’ve built strip-planked and stitch-and-glue boats, and currently am engaged in a glued-lapstrake daysailer, so I’ve had experience with three of these six methods. I’ve also been hanging out at the Northwest School of Wooden Boatbuilding, observing several boats being built with other methods, and I’ve been pumping the instructors for information (see WoodenBoat magazine No. 241 ). They’ve been generous in sharing both knowledge and opinions.
If you are a serial boatbuilder, you’ll find that your craftsmanship and problem-solving skills rapidly improve from one boat to the next. This is particularly true if you stick with one method. It’s like visiting France again and again—you feel more secure navigating; you begin to understand the nuances of the culture. But there’s also a powerful argument for exploring the new and unfamiliar. As the Zen teacher Shunryu Suzuki proclaimed: “In the beginner’s mind there are many possibilities, but in the expert’s there are few.” Who’d have predicted, back in the 1950s when the future of pleasure boats appeared to be a sea of white plastic, that the 21st century would offer so many new ways to begin a wooden boat?
Here are the six common ways to build a wooden boat:

Carvel-planked small boats are typically built upside-down over a building jig. First, the backbone is installed and frames bent into place, then the planking starts. At right, students use a “spiling batten” to determine the necessary curvature of the next plank.
1. Carvel Planking
This, one of the classic methods of wooden boat construction, is what made Columbus and Magellan possible. Since a carvel-planked boat derives most of its structural strength from its frames—the rib cage, in effect—its size is not limited by the length of the available timber. A shiplength strake can be made from several shorter, butt-joined planks. Hence the astonishing 262′ WILLIAM D. LAWRENCE, a carvel-planked square-rigger launched in Nova Scotia in 1874. The largest wooden ship ever built in the United States, just short of 330′ on deck, was the six-masted schooner WYOMING, launched at Bath, Maine, in 1909.
But for our purposes here, we’re talking about small boats. Until the mid-20th century, many rowboats and sailing dinghies of 10′ to 20′ long were also built with carvel planking. They were probably better suited to that time than today, because boat owners tended to leave their small boats in the water all season, which allowed the planks to swell with water, closing up the seams. A carvel-planked boat left in the driveway on the trailer will dry out in the summer sun; as the wood dried, the planks shrink, allowing its seams to open, and only a few days in the water will close them up again. That’s not an ideal scenario for impulsive trailer-sailing.

Carvel planking requires close fits; here, a student working on the final plank, called the “shutter,” uses inside calipers to determine the exact width at a frame.
But carvel planking still has its adamant and loyal partisans. Jeff Hammond, who has taught traditional for 30 years, believes it’s still the best medium to teach craftsmanship. “It’s complicated,” he says. “Every step requires you to stop and think about what comes next. A lot of care has to go into each piece.”
And here’s the clincher, for Hammond: “It’s a relatively pleasant experience, as opposed to covering yourself in goop all day long.”
But the word “complicated” remains embedded in any discussion of carvel planking. It’s hard to describe the whole process in a digestible paragraph, but at terrible risk of oversimplifying, here goes: Set up a regiment of molds (cross-sections of the hull form at regular intervals, typically one foot apart) over which the boat will be built upside-down. Connect them with temporary stringers called ribbands. Steam or laminate the frames, which are the structural ribs, to precisely fit outside the ribbands. Sculpt the planking around the frames to form the skin of the hull, precisely beveling each plank edge to mate with its neighbor, leaving a slight gap on the outside as a caulking bevel. Screw or rivet the planks to the frames, bung the fastening holes, caulk the seams, and assiduously fair the outside surfaces to eliminate any unevenness.

Planks fit tightly together on the side of the hull but are given a deliberate bevel—a “caulking bevel”—so the seams can be caulked with cotton, followed by primer paint and then seam compound.
The most difficult part of the operation is likely to be the rolling bevels on the planks. The builder will cultivate the patience for many trial fittings and excursions back to the workbench—with each one of the 16 or 20 planks typical on a small boat. Sometimes planks have to be steam-bent. Sometimes they crack during the final fitting and you start all over. If one is meticulous about fitting and caulking, however, the leakiness that plagues some carvel-planked boats may be spectacularly absent: They can be built so tightly that they don’t ship a drop.
Pros and Cons to Carvel Planking
- Teaches the builder to cultivate excellent craftsmanship
- Many classic designs available
- Damaged planks can be replaced with relative ease
- Heaviest method of construction
- Complex and difficult to master
- Happiest living in the water, not on a trailer or in seasonal storage
- Suitable materials may be difficult to find

Lapstrake construction sometimes involves building right-side up— and in the case of traditional Scandinavian practices, without any cross-sectional molds. Few frames are required, and along with floor timbers and other interior structure, they are fitted as the planking proceeds or after it is all finished.
2. Traditional Lapstrake
Lapstrake planking is cool for several reasons, but the most obvious is aesthetic: Small boats constructed of shapely overlapping planks are inherently attractive. The parallel flow of sweeping lines with their tiny shadows creates a rhythmic vitality and makes the hull form seem more like an organic creation. We are naturally attracted to repetition in lines and forms; it’s an aesthetic principle that seems rooted as deeply in boatbuilding as it is in art, architecture, music, and even the written word. Perhaps it makes complex things more understandable by breaking them into their component forms.
How complex are lapstrake boats? Lining off the individual planks, warns boatbuilding author Greg Rössel, is “more art than science.” Individual planks, off the boat and on the workbench, may assume unbelievable, bizarre shapes—some will be fingernail-clip crescents, others vague, squashed-snake S-curves. If these planks aren’t lined off with care and precision, the boat will take on a misshapen, bloated appearance. It will, however, still function as a boat: lapstrake forgives small imperfections more graciously than carvel. Some designers have begun making full-sized Mylar patterns available for cutting the planks, which greatly enhances the amateur builder’s chances for accuracy. After the planks are shaped, they must also be beveled or rabbeted on their edges so they mate tightly with their neighbors, and beveled again at the forward ends so the strakes become almost a flat, carvel-like surface as they flow into the stem. These can perplex like the very Devil’s bevels.
The tradition of lapstrake construction reaches even farther back in history than carvel. The Norse Nydam boat, excavated in present-day Denmark, has been dendrochronologically dated to A.D. 310–320. The modern builder echoes its manner of construction closely, even down to the rivets or clench nails used to fasten the planks to each other at the laps. Why not epoxy the plank overlaps together? Because the solid wood planks used in traditional lapstrake (today, typically cedar or sapele) will swell and shrink, so the fastenings need to allow for slight movement. The unyielding hold of epoxy, which can cause planks to crack, must be reserved for use with another contemporary material, which enables the lapstrake variant we’ll discuss next.

To secure one plank to another, copper rivets are driven from the outside through holes bored in the two planks and also through a washer-like “rove.” Once the fit is tight, the rivet is nipped off short and peened over the rove.
Enthusiasts like to point out the uniquely pleasant sound, a little sonatina of chuckling, that a lapstrake-built craft makes as it parts the water. The hull efficiency is a matter of debate. The ridges of a lapstrake hull present more resistance to the water than does a smooth hull. But its light weight may let it float higher in the water, reducing the wetted surface area. Even if it’s less efficient, for some of us the simple beauty and immersion in a millennia-old tradition well compensates for reaching the day’s destination a few minutes later.
Pros and Cons to Traditional Lapstrake
- Grace and beauty, including the possibility of a bright-finished (varnished) hull
- Comparatively light weight
- Complex, exacting craftsmanship needed in lining off and beveling the planks
- As with carvel construction, suitable materials may be difficult to find

Using plywood, glued-lapstrake relies on epoxy instead of mechanical fastenings to secure the plank overlaps, making a very strong hull and an exceptionally clean interior, with widely spaced frames.
3. Glued Lapstrake
This is becoming an increasingly popular construction method for small sailing dinghies, rowing boats, and even canoes. In this modern variation of lapstrake construction, marine plywood is used for the planking, and epoxy is used to glue the pieces together and seal them against water intrusion. Many designers in North America and Europe these days are deploying an even newer technology, pre-cutting pieces using CNC (computer numerically controlled) routers to achieve machine-perfect tolerances and thus supply the amateur builder with a kit for the hull. For do-it-the-hard-way purists who may disdain the idea of a “kit,” be assured that there will still be plenty of fabrication to do, such as the interior fitout, various hardwood pieces, and spars if it’s a sailboat. And many, many bevels.
Because the rigidly glued overlaps essentially function as longitudinal stringers, these hulls need little in the way of interior framing; they are more or less monocoque structures where the stressed skin of the hull creates its own structural integrity. They are wonderfully light and stiff. There is a lot of epoxy work—goop—involved, however, and it demands careful attention. If any exposed edge grain of plywood—any—isn’t thoroughly sealed, it will wick in water, inviting delamination and rot.

With glue spread on the overlapping part of both planks, a batten is temporarily screwed in place to clamp the seam together until the glue sets.
Some small-boat builders take a further step into composite construction by sheathing the garboards (the planks adjacent to the keel) with fiberglass cloth set in epoxy for better abrasion resistance in places vulnerable to damage when a boat is dragged onto a beach. A deep scrape by a rock or barnacle could allow water intrusion into plywood. At the Northwest School, instructor Bruce Blatchley recently oversaw the construction of a 22′ “glued-lap” Drascombe Longboat in which each plank on the entire boat was individually sheathed this way, sidestepping the impossibility of making the cloth stairstep over the plank laps. Purists may howl, but the result was one extremely tough, rigid, and lightweight hull.
Pros and Cons to Glued Lapstrake
- Light weight
- The grace and beauty of lapstrake
- Rigidity and excellent sealing against water and weather
- Except for the smallest boats (under 10′ ), the plywood must be scarfed; bright finishing is impractical
- Major repairs will be difficult

Strip-planking can be used for boats large or small, but it is especially practical for canoes and kayaks because of its very light weight. Woods of various colors can be used to accentuate the hull, often with great beauty.
4. Strip-Planking
Maybe you’ve seen a strip-planked kayak on a beach somewhere—kayaks and canoes are the most common products of strip-planked construction today—and after recovering from the shock of its sheer ravishing beauty, you worked up the nerve to ask what it cost. The answer, if a professional built it, will likely be in the range of $8,000 to $12,000.
If an amateur built it, however, it might consist of as little as $500 worth of materials, including wood, fiberglass cloth, and epoxy. The disparity, of course, represents the labor, of which there is a lot. Strip-planking is conceptually simple, but it takes a lot of time and care to execute it well.
You’ll first cut a series of molds from plywood or MDF that look like cross-sections of the boat, much as in traditional carvel construction. Mount them on a strongback (a stiff wooden rail) so the hull can be built upside-down, and line their edges with plastic to keep stray glue from adhering to them. Then you’ll prepare a flock of identical strips, which for a kayak could be as thin as 3⁄16″ and ¾” wide—and a little longer than the boat. Strips for larger boats could be significantly thicker and wider, but they should be able to bend to all the boat’s designed curves without steaming. The most elegant way to nest them on the hull is to cut a cove and bead into the opposite edges of each plank, which is easy if you have a table-mounted router.

After the first half of the hull is completed, excess strip length is carefully cut away at the centerline. Staples hold the planks to the molds until all the planking is done and the glue sets.
The fun comes in bending, twisting, and nesting the strips into place around the molds, and the beamier the boat, the more interesting the problems. A wide beam will require some very odd shapes for fillers. This isn’t a terrible problem if the boat will be painted, but everyone begins a strip-planked boat with visions of a lovely varnished hull.
After the hull is glued up, you’ll remove the molds, spend several days cleaning up excess glue and fairing the surfaces, then sheathe it with fiberglass cloth set in epoxy.
Strip-planking isn’t limited to kayaks and canoes. A student at the Boat Building Academy in Lyme Regis, England, used fir strip-planking for an adaptation of Joel White’s famed Haven 12 1⁄2 daysailer , originally designed for carvel planking. The Northwest School recently completed a 62′ strip-planked daysailer designed by Bob Perry— though with a beam of just 9’10”, the boat, named SLIVER, resembled a gigantic canoe, or a cedar moon rocket.
Pros and Cons to Strip-Planking
- Relatively inexpensive woods (cedar, fir, sapele) can be used and will yield a beautiful bright-finished hull
- Labor intensive

Diagonal planks are shaped and stapled in place. Plastic prevents inadvertently gluing planks to the temporary building jig.
5. Cold-Molding
If this treatise were a series of car commercials for TV, this is the episode that might be f lagged “Professional Driver—Do Not Attempt.” It’s best suited, frankly, to professional shops and to producing multiple hulls from a single mold. Still, amateurs with the right mixture of patience, courage, and willingness to deal with large acreages of glue can successfully build in this way. Unlike driving a car sideways on a city street, cold-molding won’t kill anyone—but you must properly protect your skin and lungs from the toxic effects of epoxy.
When you build a cold-molded boat, in effect you’re fabricating a very large, exotically curvaceous sheet of plywood in the shape of a hull. First you create a form that consists either of a strip-planked inner hull or a mold with a great many stringers. Then you’ll bend diagonal strips of veneer, typically 1⁄16″ to 1⁄8″ thick, over this mold and laminate several thicknesses together with epoxy. It’s vital to apply even, consistent pressure to these skin layers to avoid air pockets between them. A professional shop will use a vacuum bag; home builders are likely to resort to staples—hundreds or thou-sands of them. After the epoxy cures and the staples are removed, the hull is faired and the exterior often sheathed in still more epoxy, this time with fiberglass cloth.

The second layer of planking is spiled for the opposite diagonal. For even pressure, such hulls are often vacuum-bagged in a single gluing operation.
Pros and Cons to Cold-Molding
- Strong, lightweight, watertight hull
- Adaptable to nearly any hull form
- Very labor-intensive and messy
- Critics complain that the hulls look “too perfect,” like production fiberglass boats

Stitch-and-glue is similar to glued lapstrake in that it relies on epoxy to secure joints; however, in this case planks are butted together at the seams and secured by epoxy fillets.
6. Stitch-and-Glue
This technique may have originated with the Mirror dinghy, concocted as a promotion by the London Daily Mirror in 1963. It was an extremely simple racing and recreational sailing dinghy that amateurs with little or no woodworking experience could build in around a hundred hours, and it was so successful that the Mirror now estimates that about 70,000 have been built around the world.
There is no simpler way to build a wooden hull. Cut five panels from plywood sheets—two sides, two bottom pieces, and a transom—drill pairs of holes a half inch inboard of the seams-to-be, and stitch the panels together with wire twists. The wires function as temporary clamps to hold the panels together. Then fill the gaps and fuse the joints with thickened epoxy, remove the stitches, and reinforce the seams with layers of fiberglass tape set in more epoxy. Most stitch-and-glue boats are then sheathed on the outside with fiberglass cloth set in epoxy, and the inside, too, is sealed with epoxy.
The medium is more versatile than the ubiquitous Mirror dinghies and kayak kits suggest. Sam Devlin, who designs and builds boats in Tumwater, Washington, has built stitch-and-glue motor cruisers up to 48′ and displacing 32,000 lbs. Since plywood thicker than 1⁄2″ is nearly impossible to bend into boat-like shapes, stitch-and-glue hulls longer than 25′ can be built up to the appropriate thickness by cold-molding additional plywood sheets onto the original hull form. This is possibly where stitch-and-glue construction’s easy-building appeal to the amateur begins to ebb, with the big boats best left to the pros.

Short lengths of copper wire make good “stitches” because if necessary they can be cut flush, and since the bits of wire left in the joint won’t rust, they’ll do no harm.
How easy, honestly, is stitch-and-glue? The basic technique is extremely simple; even if you’re a jigsaw goofus you can cut the panels safely wide of the line, then trim with a block plane and sanding block. Stitch-and-glue’s particular devil, however, is in the sheathing. There is a learning curve with fiberglassing a hull, and first-time builders may be doing a lot of tedious sanding to achieve a smooth and fair hull form. And stitch-and-glue boats more complicated than a Mirror dinghy will require the same kinds of appendages and furniture that any boat does.
One of the appealing qualities of a stitch-and-glue boat is its remarkable rigidity. All the interior components such as bulkheads, berth flats, and even cockpit seats become part of an eggcrate-like structure within a monocoque skin, so you don’t hear any groaning or creaking from pieces flexing and moving against each other. This also means good trailering durability. If you appreciate groaning and creaking as part of the intrinsic romance of wooden watercraft, you probably didn’t get past the word “plywood” in the second paragraph, anyway.
Pros and Cons to Stitch-and-Glue
- Relatively easy and rapid hull construction
- Strong, lightweight, abrasion-resistant and (nearly) rot-proof hull
- Some designs (certainly not all) look relatively clunky; hard chines are inevitable
- Since the entire hull and interior structures are essentially fused into one unit, some repairs and modifications are difficult
We launched this discussion some pages back with the admonition that “small boats are not small undertakings,” and the shower of phrases such as “labor intensive” and “exacting craftsmanship” that followed surely underscores the point. Do not be discouraged. Thousands of amateurs have successfully built their own wooden boats, some to extremely high standards and prodigiously ambitious plans. (A man on the Puget Sound island adjacent to the one where I live built a 43′ schooner as his first boat. However, it took him 33 years.)
If you’re in love with a particular design but not its intended method of construction, there is often room to maneuver. Designs of traditional carvel-planked boats can almost always be adapted for strip-plank or cold-molded construction with no external change in their hull shapes. Traditional lapstrake boats, which employ solid wood planks, can usually be executed in glued-lapstrake construction using marine plywood.
All Wooden Boat Construction Projects Start With a Plan
Whichever building method you decide on, you will discover one constant: You’ll begin with a vision of perfect beauty in your head, and if you’re an ordinary mortal, limits of time, money, and skill will inevitably force compromises along the way. Rather than plunge into a funk, the smart builder will set priorities: There are certain things that must be done right, those involving structural integrity or seaworthiness, while certain other details relating to aesthetics and the builder’s ego can be let go. Creating this rational hierarchy of values helps you keep momentum through the long process, and helps you feel good about yourself, even at the high tide of imperfection.
Here are some more techniques to help you build a wooden boat:
- Build a DIY Drop-Center Sawhorse to better support your boat hull
- Use External Frames for Strip-Building
- Assemble DIY Gantry Cranes to lift and roll a heavy hull
Share this article
Join The Conversation
We welcome your comments about this article. If you’d like to include a photo or a video with your comment, please email the file or link.
Comments (3)
Excellent summation. A pleasure to read as an amateur boat builder conversant with stitch-and-glue and glued-lapstrake construction.
Skin-on-frame might be worth a mention.
I just launched my Arch Davis Penobscot 17, following Arch’s variation on Glued Lapstrake design using permanent 3/4” stringers to guide the placement of each strake. This provides rigidity and strength with easy to work 1/4” plywood. Great fun in the shop, but 2X the budget and 4X the estimated time commitment is not far off.
Leave a Reply Cancel reply
Your email address will not be published. Required fields are marked *
Stay On Course
More From This Issue
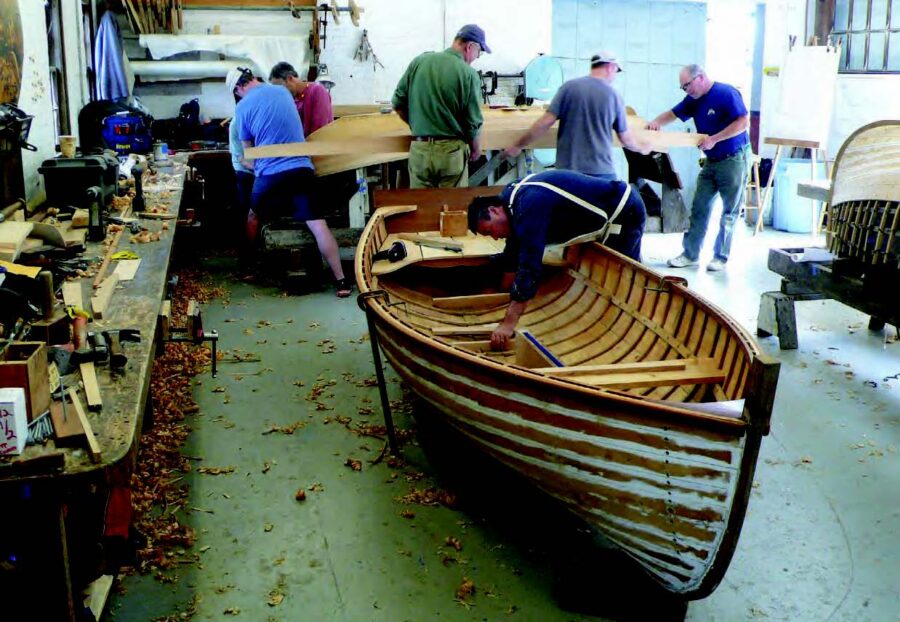
There are about six common methods of building wooden boats today, with variations on each. No particular method can be proclaimed the best; each comes with its own suite of…
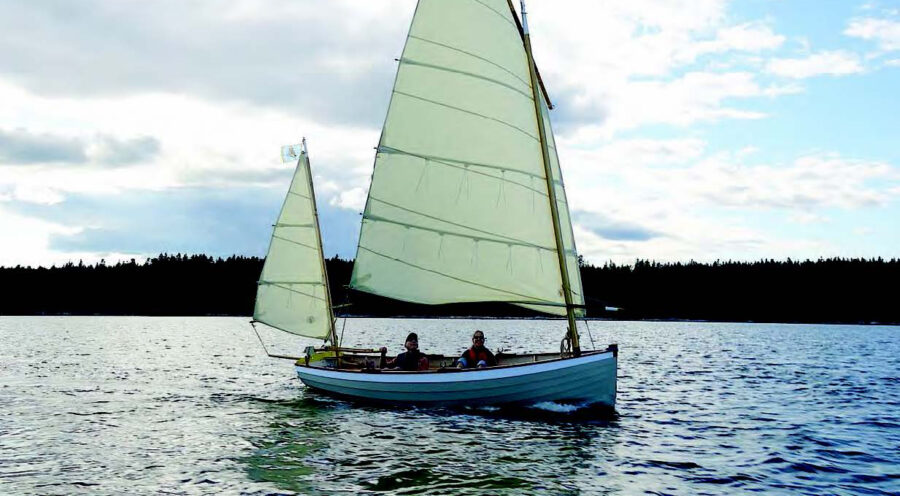
John Hartmann’s Ilur
AXWING, John Hartmann’s newly launched Ilur design from the drawing board of Fran-çois Vivier, caught my attention in Maine last summer when I spotted her at anchor off a Muscongus...
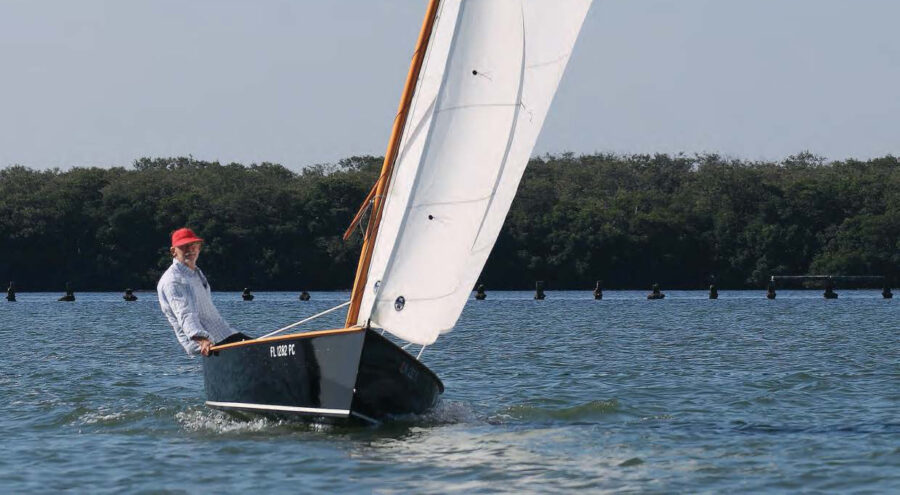
“Jones began sketching an evolution of the Windmill, a boat that would be less demanding and more practical for daysailing.”
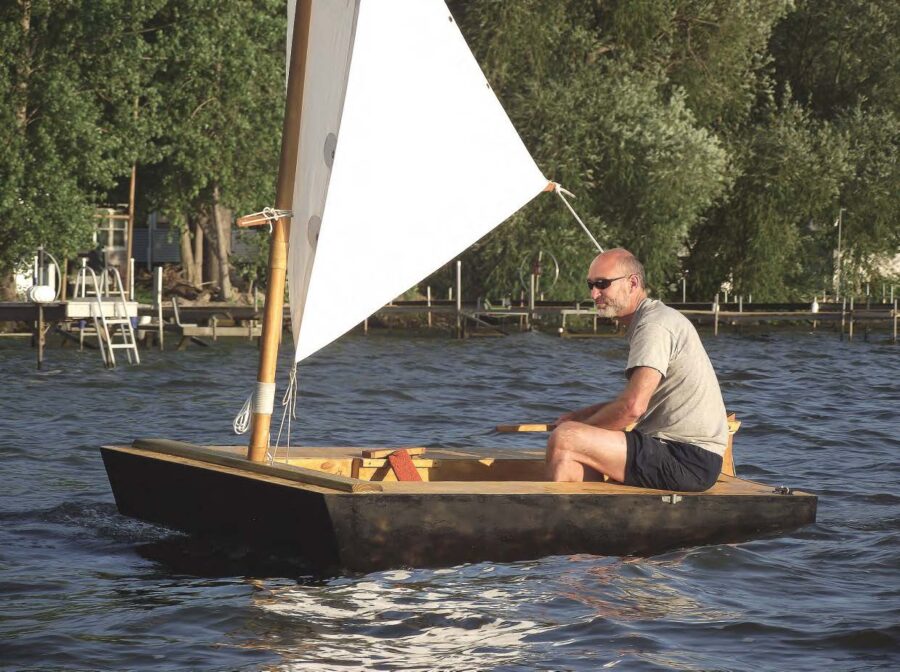
Puddle Duck Racer
“...anyone would look at it and think, ‘Yeah, I could probably build something like that.’”
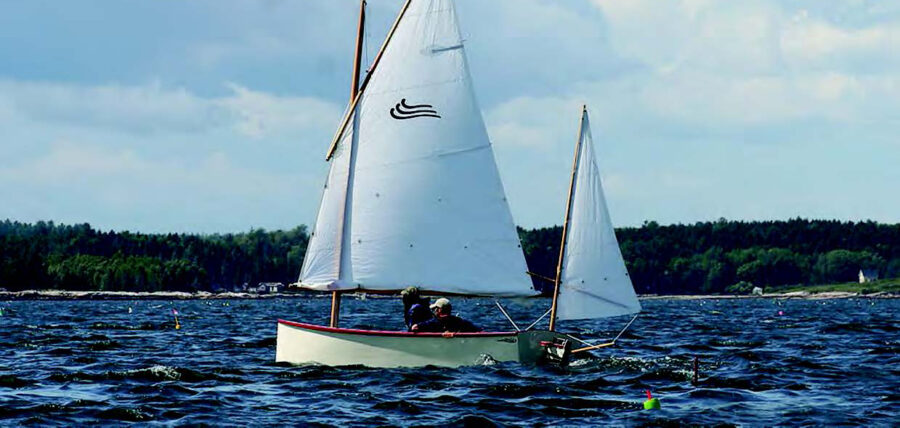
Goat Island Skiff
Paul and Cristophe are experienced sailors who were looking for an inexpensive, yet sophisticated, boat to satisfy their skill levels.
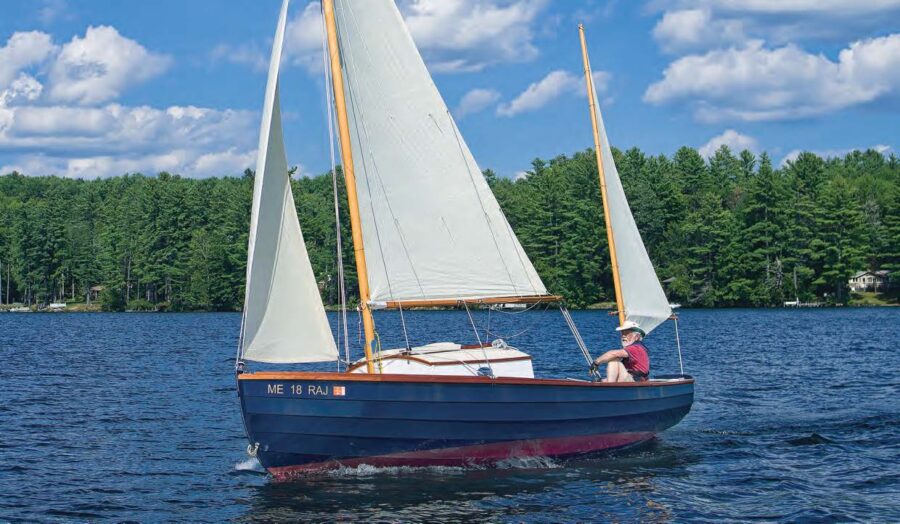
Small-boat cruisers have a long list of things they look for in a boat, and I can’t think of any criterion that this design fails to meet. And it meets…
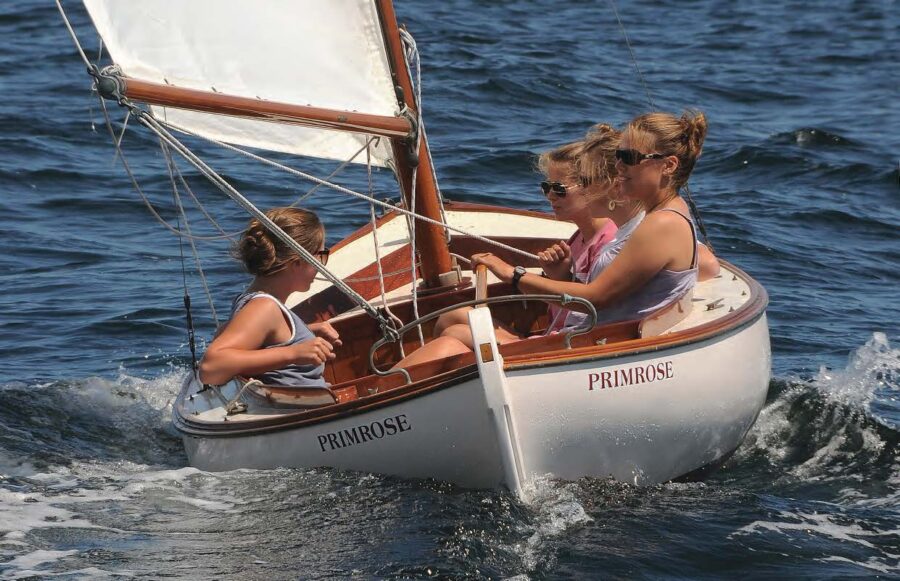
PRIMROSE stands as proof that Nielsen put as much of himself into his small boats as his large ones, and she is as timeless as any of them.
Boat Profile
Tough enough to drag across a rocky beach yet light enough to tow behind a bicycle.

The Morley Guide Canoe
In the early 1970s, Greg Morley, left, decided to leave a career in forestry and park management to make a living building cedar-strip canoes. More than 40 years later, his…
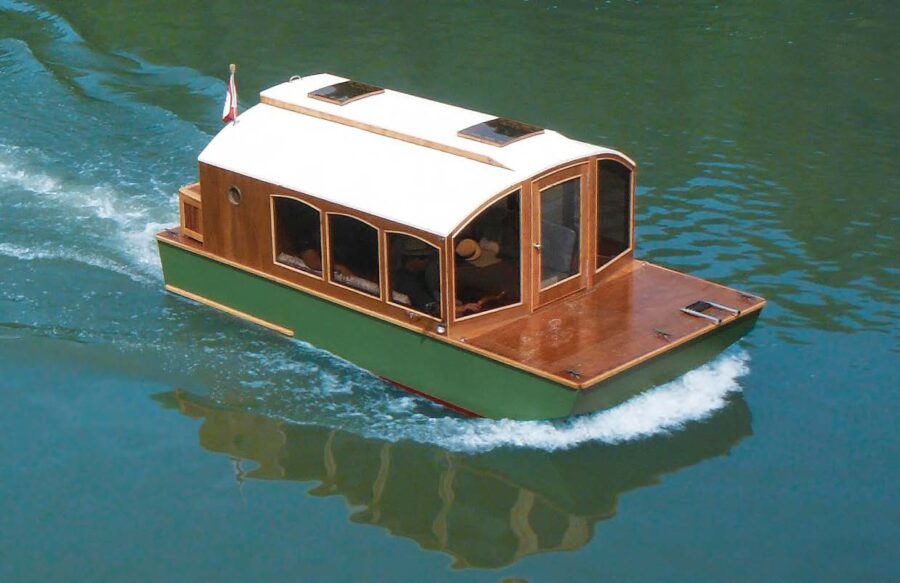
DIANNE’S ROSE
After Dianne Schreyer told her husband she’d spend more time on the water if they had a more stable boat, Roy built DIANNE’S ROSE. The couple are on the water…

A sweeping sheerline, together with ample “rocker,” or bottom curvature, give the McKenzie drift boats the ability to deftly run whitewater such as Marten’s Rapids on the namesake river in…
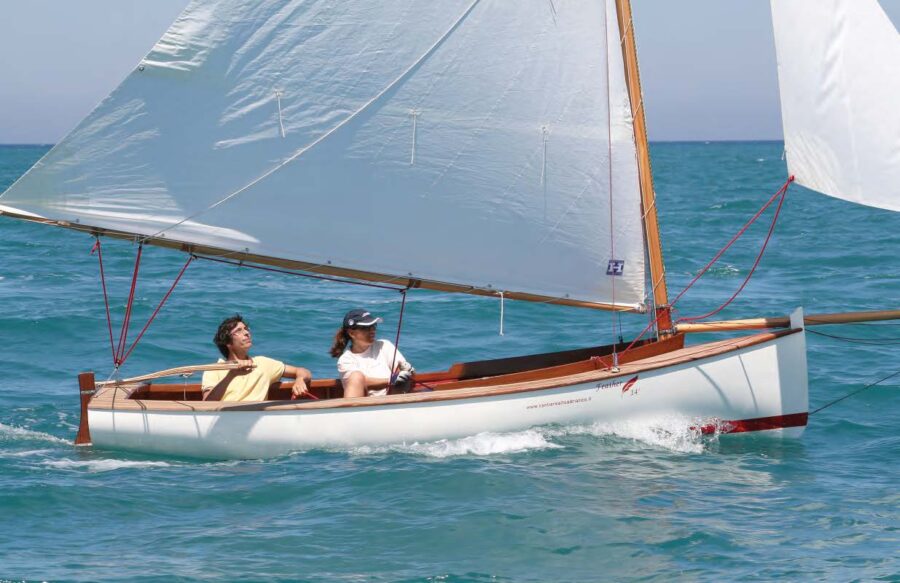
Drawing on a wide variety of influences, among them American racing sandbaggers and local traditional raceboats, Federico Lenardon developed a fast daysailer for the waters of Trieste, Italy.

BUNDUKI is a sport boat built to Australian John Georgalas’s Deep V 16′design. Initially, the design was to be a one-off for an American friend, but the drawings have since…

Bevin’s Skiff
Joe Youcha wants to build boats. A lot of boats. Not only does he want to build boats, but he wants you to build one as well. Back in the…
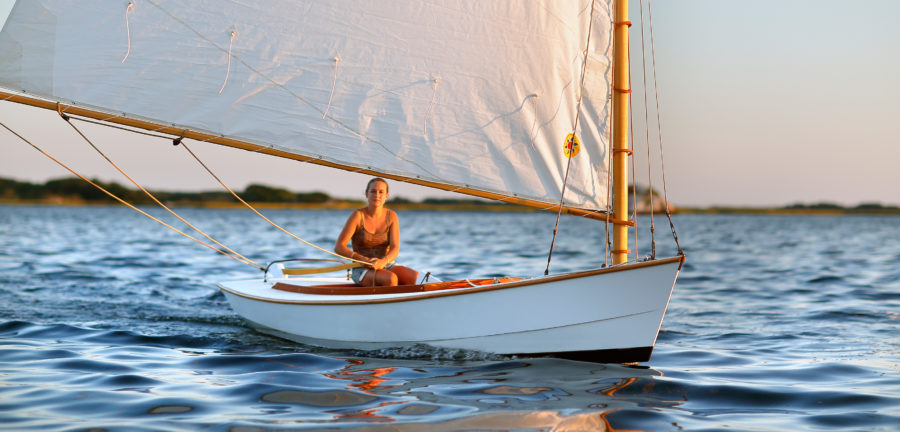
The Friendship Catboat
In boating circles, the word "friendship" brings to mind the classic Maine-built sloop from which pre-internal-combustion lobstermen tended their traps. For Richard Armstrong, however, the word conjures up a different…
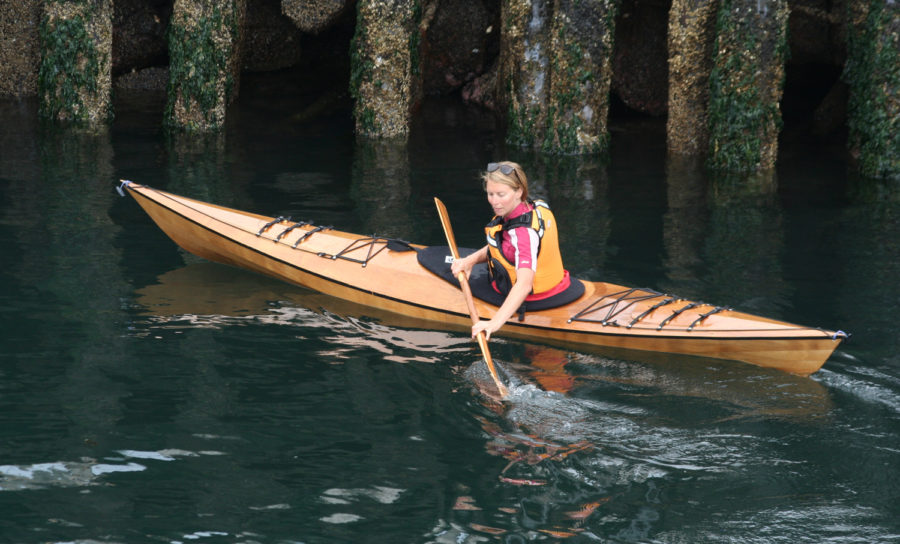
Pinguino 145 and 145 4PD
The Pinguino 145 is a stitch-and-glue plywood sea kayak that comes as a kit from Pygmy Boats in Port Townsend, Washington. An alternate version, the 145 4PD (it has a…
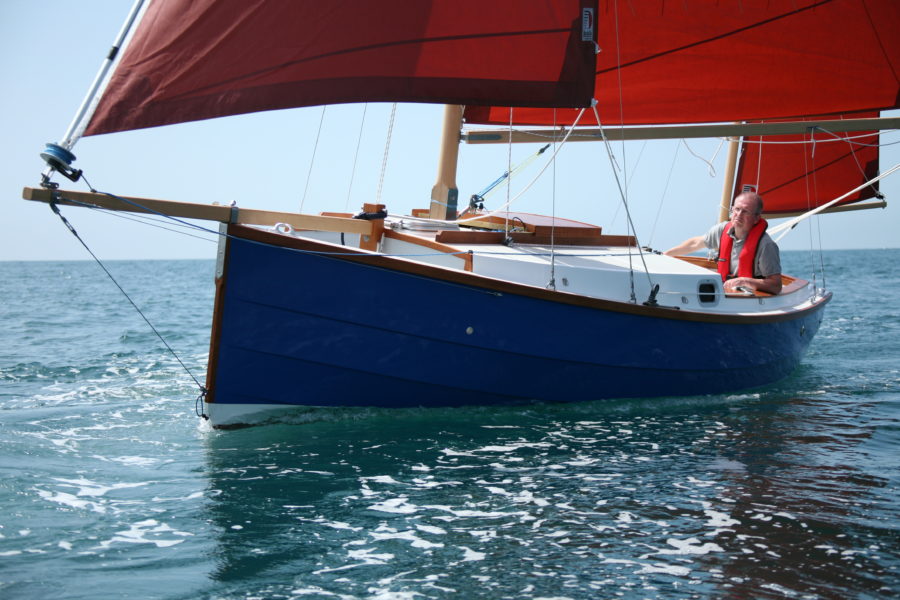
The Golant Ketch
The Golant Ketch is a 20′ hard-chined camp-cruiser designed by Roger Dongray. Dongray is perhaps best known for his Cornish Shrimper, which he designed in 1976 with the intention of…
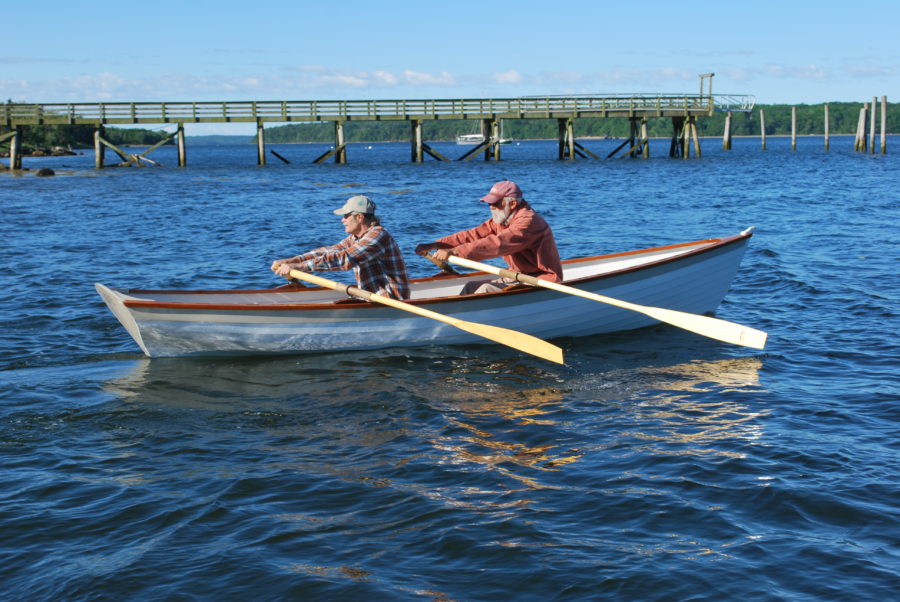
The Penobscot Wherry
The Penobscot Wherry from Cottrell Boatbuilding of Searsport, Maine, is based on the Lincolnville salmon wherry, a beamy high-volume boat used to remove salmon from weirs in the days when…

Outrigger Junior
Long before Europeans ventured to the new world, sailing dugout canoes fitted with outriggers sailed the waters in Southeast Asia and were used for migration throughout the Pacific region. The…

Sam Crocker’s Small Outboard Skiff
Here’s a boat type one doesn’t see too often these days. It’s a modest-sized outboard designed not as a center-console but instead with a small cabin that will accommodate the…
More Technique
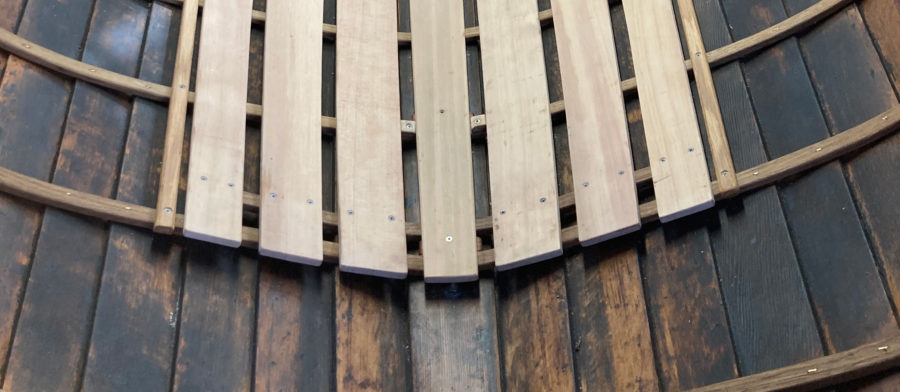
Removable Floorboards
While it may be common practice with plank-on-frame construction of this sort to fasten floorboards to the ribs, the floorboards are then a nuisance to remove, and repeated removal of…

A Quick Tick Stick
I quickly traded my joggle sticks in for tick sticks. I preferred having some irregularity on the edge to register the stick without having to eyeball markings along a stick…

DIY Bronze Blocks
When Kyle and I decided to build our own boat to take on a trip down the Mississippi River, we decided to make, rather than buy, as many of the…
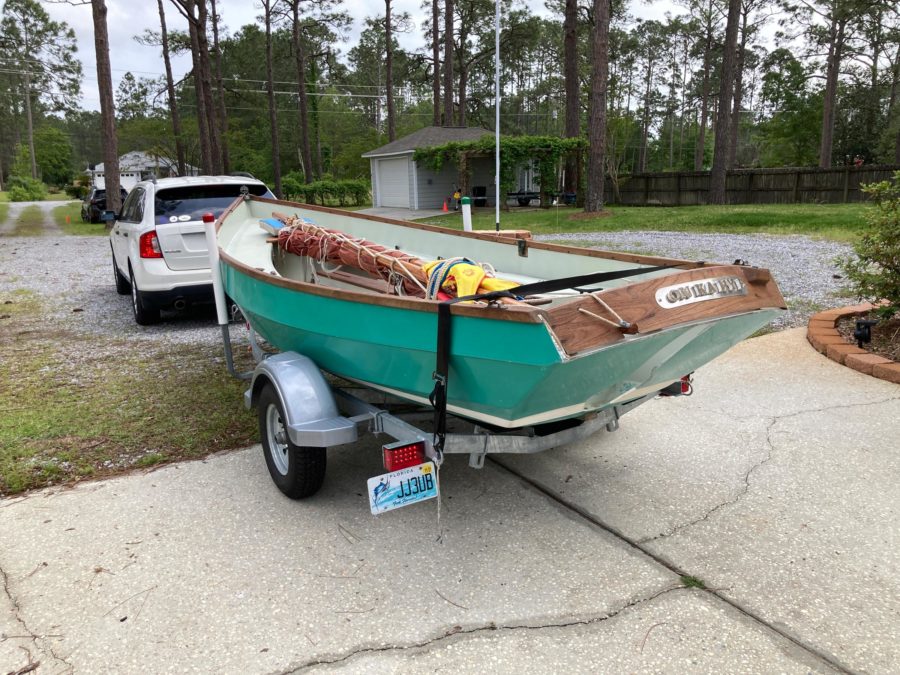
Boat Trailering Tips
To deal with breakdowns on our long-range trips, we carry a grease gun, rags, either a spare set of grease-packed bearings or a hub with bearings already installed, along with…
Subscribe Today!
Become a subscriber today and you’ll recieve a new issue every month plus unlimited access to our full archive of backlogged issues.
Already a subscriber? Sign In
Subscribe For Full Access
Flipbooks are available to paid subscribers only. Subscribe now or log in for access.
DIY Boat Building Plans
Wooden Boat Plans & Blueprints
Download over 500 Boat Plans. Click on the link below.
-->click here<--.
Table of Contents
Overview of Wooden Boat Plans & Blueprints
Wooden boats have a timeless charm and appeal that captivates many enthusiasts. These vessels, with their elegant lines and natural beauty, evoke a sense of nostalgia and adventure. At the heart of every successful wooden boat project lies a set of detailed plans and blueprints. These comprehensive guides are essential for the construction of a seaworthy and visually stunning craft. Wooden boat plans provide a roadmap for the entire building process, ensuring that the final product meets the desired specifications and maintains its structural integrity. Whether you’re a seasoned boat builder or a passionate hobbyist, understanding the importance of these plans is crucial for embarking on your nautical journey.
Key Takeaways
- Wooden boat plans and blueprints are essential for building a boat from scratch.
- Detailed boat plans are crucial for ensuring accuracy and avoiding mistakes.
- Choosing the right wooden boat design is important for achieving your desired outcome.
- High-quality wooden boat blueprints can be found through reputable sources.
- Interpreting and utilizing boat plans effectively is key to a successful build.

The Importance of Detailed Boat Plans
Boat plans serve as a comprehensive guide for the construction process, outlining every step and component in meticulous detail. These detailed schematics ensure that the final vessel is not only aesthetically pleasing but also structurally sound and seaworthy. By following the precise measurements, materials , and techniques outlined in the plans, builders can have confidence in the stability and performance of their wooden boat. Accurate plans are essential for maintaining the structural integrity of the vessel. Wooden boats , with their complex curves and intricate joinery, require precise engineering to withstand the stresses of the marine environment. The plans provide the necessary information to ensure that the boat’s frame, hull , and other critical components are designed and constructed to handle the demands of the open water. This attention to detail not only enhances the boat’s safety but also contributes to its longevity, allowing it to be enjoyed for generations to come.
Choosing the Right Wooden Boat Design
When embarking on a wooden boat project, the first step is to select the right design that aligns with your preferences, skill level, and intended use. Factors such as the boat’s size, purpose, and the builder’s experience all play a crucial role in this decision. For those new to wooden boat building , it’s essential to choose a design that matches their skill level and available resources. Smaller, simpler designs may be more suitable for beginners , as they often require fewer specialized tools and materials. As the builder’s confidence and expertise grow, they can explore more complex and ambitious designs that cater to their evolving needs and preferences. The diverse range of wooden boat designs available caters to a wide variety of enthusiasts. From classic sailboats and sleek motorboats to sturdy workboats and elegant canoes , the options are endless. Researching and comparing different designs can help prospective builders find the perfect match for their nautical dreams, whether they envision a family-friendly cruiser or a high-performance racing yacht .
Understanding the Components of Boat Plans
| Plan Name | Price | Difficulty Level | Number of Pages | Boat Type |
|---|---|---|---|---|
| Classic Wooden Boat Plans | 29.99 | Intermediate | 50 | Runabout |
| Wooden Plans | 39.99 | Advanced | 75 | Sailboat |
| Wooden Plans | 19.99 | Beginner | 25 | Canoe |
| Wooden Plans | 24.99 | Intermediate | 40 | Kayak |
Delving into the intricate world of boat plans requires a thorough understanding of the various components that make up these comprehensive documents. From the hull and deck to the rigging and hardware, each element is meticulously detailed to guide the builder through the construction process. The hull, the foundation of the boat, is typically the most complex and crucial component of the plans. The detailed drawings and specifications outline the shape, dimensions, and structural elements of the hull, ensuring that it is designed to withstand the forces of the water. The deck plans, on the other hand, provide the necessary information for constructing the upper portion of the boat, including the layout, hatches, and other features. Interpreting the technical drawings and specifications within the boat plans is essential for a successful build. These detailed schematics, often accompanied by explanatory notes and measurements, allow builders to visualize the final product and translate the plans into a physical reality. By familiarizing themselves with the various components and their interconnections, builders can develop a comprehensive understanding of the boat’s design and construction, ultimately leading to a more rewarding and successful project.
Sourcing High-Quality Wooden Boat Blueprints
Obtaining reliable and accurate boat plans is a crucial step in the wooden boat building process. Identifying reputable sources for these essential documents is key to ensuring a successful and satisfying project. There are numerous avenues for sourcing high-quality wooden boat blueprints, from specialized boat plan publishers to online marketplaces and even direct from boat designers. When evaluating potential sources, it’s important to consider factors such as the level of detail, the reputation of the provider, and the availability of support and guidance throughout the construction process. Carefully examining the quality and completeness of the boat plans is essential. Detailed drawings, clear specifications, and comprehensive instructions are hallmarks of a well-designed set of blueprints. Builders should also look for plans that provide additional resources, such as material lists, tool recommendations, and step-by-step construction guidance, to further enhance the building experience. By investing in high-quality wooden boat blueprints from trusted sources, builders can have confidence in the accuracy and reliability of the plans, ultimately leading to a successful and rewarding boat-building journey.
Interpreting and Utilizing Boat Plans Effectively
Mastering the art of interpreting and utilizing boat plans is a crucial step in the wooden boat building process. These comprehensive documents serve as the roadmap for the entire construction, and a thorough understanding of their contents is essential for a successful project. Developing a deep familiarity with the boat plans, from the technical drawings to the accompanying instructions, is the foundation for a smooth and efficient build. Builders must carefully study the plans, familiarizing themselves with the various components, their dimensions, and the specific construction techniques required. This level of understanding allows them to visualize the final product and anticipate potential challenges or modifications that may arise during the building process. Effectively translating the boat plans into the physical construction of the vessel is where the true magic happens. By meticulously following the plans, builders can ensure that each step of the process, from the initial framing to the final finishing touches, aligns with the designer’s vision. This attention to detail not only enhances the structural integrity of the boat but also contributes to its overall aesthetic appeal and performance on the water.
Customizing Wooden Boat Designs to Suit Your Needs
The world of wooden boat building offers a unique opportunity for enthusiasts to explore the possibilities of customization and adaptation. While pre-existing boat designs provide a solid foundation, the ability to modify and tailor these plans to suit individual preferences and requirements can truly make a project a one-of-a-kind creation. Exploring the potential for customization opens up a world of possibilities for wooden boat builders. Whether it’s adjusting the dimensions to accommodate a specific space or incorporating personalized features and details, the flexibility of boat plans allows for a high degree of customization. Builders can draw inspiration from various design elements, blending traditional aesthetics with modern innovations to create a vessel that truly reflects their unique vision. However, customizing boat plans requires a careful and thoughtful approach. Builders must carefully consider the structural implications of any modifications, ensuring that the integrity and seaworthiness of the vessel are not compromised. By working closely with the plan’s designer or consulting with experienced boat builders, enthusiasts can navigate the process of customization with confidence, ultimately crafting a wooden boat that is a true reflection of their personal style and needs.
Building Your Dream Wooden Boat from Scratch
The culmination of the wooden boat building journey is the actual construction of the vessel, where the detailed plans and blueprints come to life. This hands-on process, while challenging, can be immensely rewarding for those who are willing to invest the time, effort, and dedication required. Gathering the necessary tools, materials, and resources is the first step in the construction process. Builders must ensure that they have access to high-quality wood, specialized hardware, and the appropriate power tools and equipment to tackle each stage of the build. Additionally, having a well-equipped workspace, whether it’s a dedicated workshop or a backyard shed, can greatly facilitate the construction process. With the plans in hand and the necessary materials and tools at the ready, the step-by-step guidance provided in the boat plans becomes the foundation for the actual construction. From the initial framing and hull shaping to the intricate joinery and final finishing touches, each stage of the build requires meticulous attention to detail and a deep understanding of the plans. By following the instructions and techniques outlined in the blueprints, builders can navigate the construction process with confidence, gradually transforming their vision into a tangible, seaworthy wooden boat.
Maintaining and Preserving Your Wooden Boat
The journey of wooden boat building doesn’t end with the completion of the construction process. Proper maintenance and preservation techniques are essential for ensuring the longevity and continued enjoyment of your handcrafted vessel. Maintaining the structural integrity and aesthetic appeal of a wooden boat requires a dedicated approach. Regular inspections, preventive maintenance, and timely repairs are crucial for keeping the boat in top condition. Builders must familiarize themselves with the specific care and upkeep requirements outlined in the boat plans, as well as any additional guidance from experienced boat owners and restoration experts. Preserving the natural beauty and functionality of a wooden boat is a labor of love. From regular cleaning and varnishing to protecting the wood from the elements, the preservation process requires a meticulous and ongoing effort. By investing in the proper care and maintenance techniques, wooden boat owners can ensure that their beloved craft continues to turn heads and navigate the waters with grace and elegance for years to come. Ultimately, the journey of wooden boat building is a testament to the enduring appeal of these timeless vessels. From the initial selection of the boat plans to the final launch and beyond, each step is a rewarding and fulfilling experience that connects enthusiasts to the rich maritime heritage and the joy of crafting something truly unique. By embracing the art of wooden boat building, enthusiasts can create a lasting legacy, passing on their passion and their handcrafted vessels to future generations of nautical adventurers.

Conclusion – Wooden Boat Plans & Blueprints
In conclusion, wooden boat plans and blueprints are the indispensable tools that unlock the world of boat building for enthusiasts and novices alike. These meticulously crafted guides provide the roadmap to transform your dream vessel into a tangible reality. By following their precise measurements, materials, and instructions, you not only ensure the accuracy and completeness of your project but also save valuable time and resources.
The benefits of using wooden boat plans and blueprints extend beyond just a successful build. You have the freedom to create a boat that aligns with your unique preferences, whether you seek simplicity or complexity, small or large, rowboat or sailboat. The customization possibilities are as boundless as the open water.
These plans are not confined to a single purpose – they can serve as a fulfilling hobby, an educational tool, a potential business venture, or even a heartfelt gift to surprise your loved ones. Embrace them as a challenge to hone your skills and improve your capabilities as a boat builder.
The various types of wooden boat plans and blueprints cater to a wide array of preferences, from flat-bottomed boats for shallow waters to round-bottomed boats for stability in deeper seas, V-bottomed boats for agile efficiency, and multi-hull boats for added buoyancy and comfort. The options are as diverse as the waterways you intend to explore.
In your journey to create your wooden boat, you can find these plans and blueprints in books, magazines, websites, and even software programs. With the right plan in hand, you can venture into the world of boat building with confidence.
FAQs – Wooden Boat Plans & Blueprints
What are wooden boat plans and blueprints.
Wooden boat plans and blueprints are detailed instructions and diagrams that guide boat builders in constructing wooden boats . They include information on the materials needed, measurements, and step-by-step instructions for building the boat.
What types of wooden boats can be built using plans and blueprints?
There are various types of wooden boats that can be built using plans and blueprints, including canoes, kayaks , rowboats, sailboats, and powerboats. The plans and blueprints are usually specific to the type of boat being built.
Where can I find wooden boat plans and blueprints?
Wooden boat plans and blueprints can be found online, in books, and from boat building supply companies. Some plans and blueprints are free, while others require payment.
What materials are needed to build a wooden boat?
The materials needed to build a wooden boat depend on the type and size of the boat being built. Generally, wooden boats require marine-grade plywood , lumber, epoxy, fiberglass , and hardware such as screws, bolts, and nails.
Do I need to have experience in boat building to use wooden boat plans and blueprints?
While experience in boat building can be helpful, it is not always necessary to use wooden boat plans and blueprints. Many plans and blueprints are designed for beginners and include detailed instructions and diagrams to guide the builder through the process.
Can I modify wooden boat plans and blueprints?
Yes, wooden boat plans and blueprints can be modified to suit the builder’s needs or preferences. However, it is important to ensure that any modifications do not compromise the safety or structural integrity of the boat.

Written by DIY Boat Building Plans

How To Build a Utility Boat

How to Build a Dinghy
IMAGES
VIDEO
COMMENTS
Plan the boat layout and design. Create the center rib & transom. Create the boat frame. Add the seat rails & keel strip. Add the wood planks & seats. Add epoxy, sand & paint the boat.
Many modern wood-epoxy boats are based on traditional designs but take full advantage of modern design and construction techniques to minimize weight and maximize performance. Others are full-out modern superyachts measuring over 100 feet in length and a few are flat-out race boats.
If you are interested in building a wooden sailboat, it’s important to understand the basics of how a sailboat is constructed. In this section, we’ll cover the parts of a wooden sailboat and the different types of wooden sailboats.
How to Build a Wood Sailboat: I've been wanting to combine my two favorite hobbies - woodworking and sailing for a long time, so I thought I'd build a boat. It's got classic lines and looks so dazzling in the sunshine that people constantly stop me at the boat ramp to ask me ab….
There are about six common ways to build a wooden boat today, with variations on each. Which is best for you? Read on to find out.
Wooden boat plans and blueprints are detailed instructions and diagrams that guide boat builders in constructing wooden boats. They include information on the materials needed, measurements, and step-by-step instructions for building the boat. What types of wooden boats can be built using plans and blueprints?